Custom Events Overview

A feature we offer is being able to track users' actions and having this activity influence Product Fruits behavior. We call this functionality custom events.
Use cases
Custom events can be used to track user progress through your application based on what they click. This information can then be used to create Product Fruits content that follows a user's natural onboarding path, or can be used to direct users where you'd like them to go. You can observe areas that do not get enough attention with custom events, then create an onboarding flow to facilitate a user's journey through your application.
Create a custom event group
Events are organized by groups in Product Fruits administration. The groups are solely used to organize your custom events, and the individual events can be seen in the editor, as well as in our events tracking analytics.
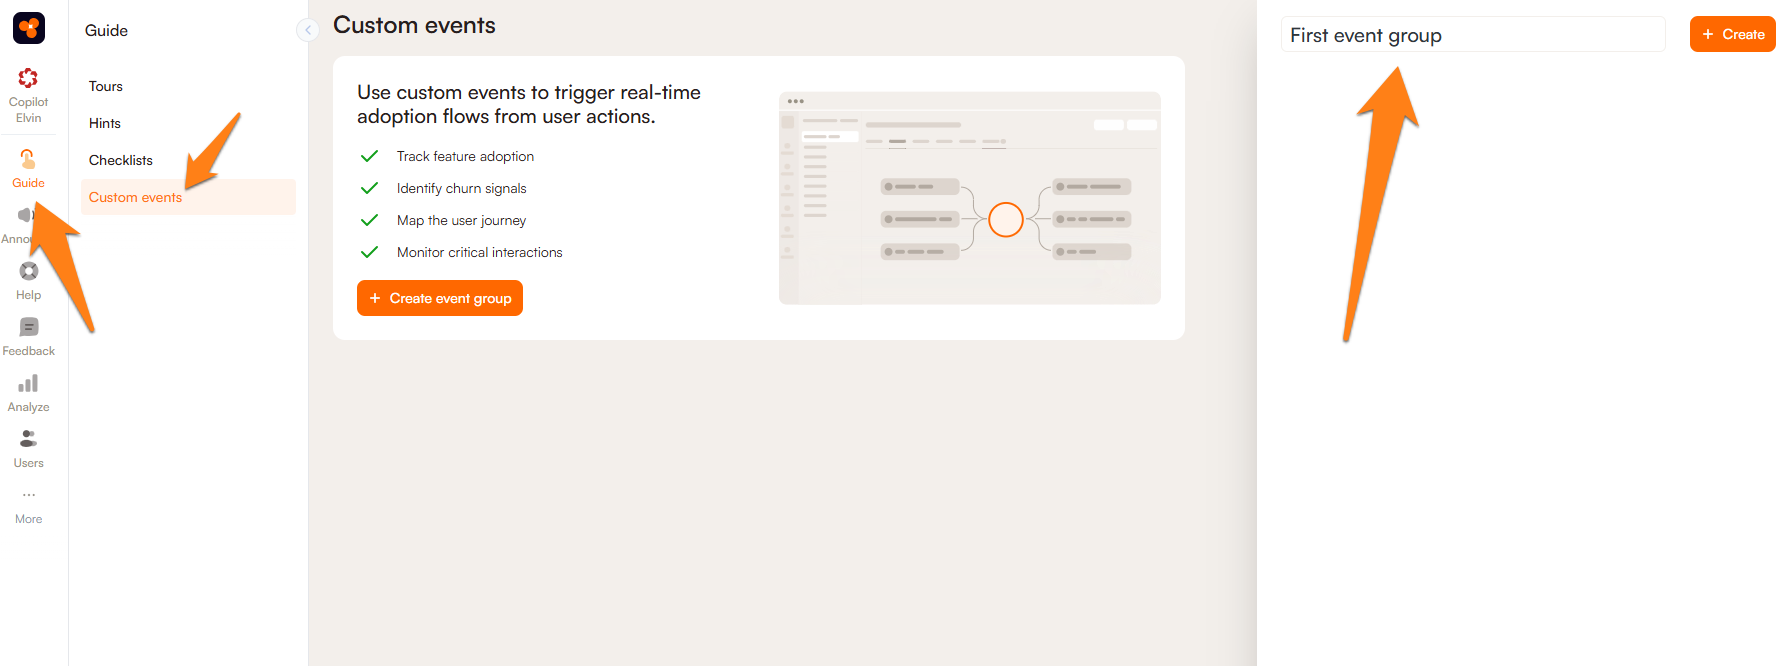
First, navigate to the Engage section of Product Fruits and select "Custom Events." Here, you can create your first custom events group by clicking + Create event group and adding a title.
Next, you will need to open the editor and decide which selectors to add custom events to. This is done the same way as with tours and hints, start by clicking + Add first event and determining a selector. After creating the first event, we recommend changing the event name to something more relevant, for your organization:
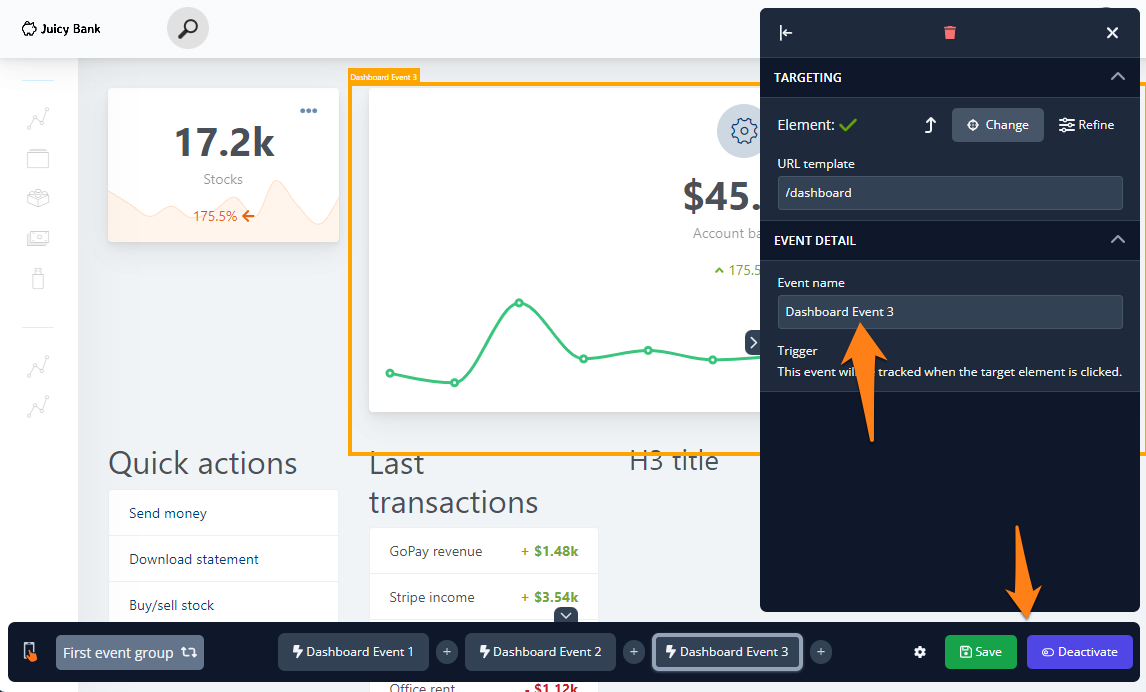
Finish by saving and activating this event, and you're ready to go!
Additional settings
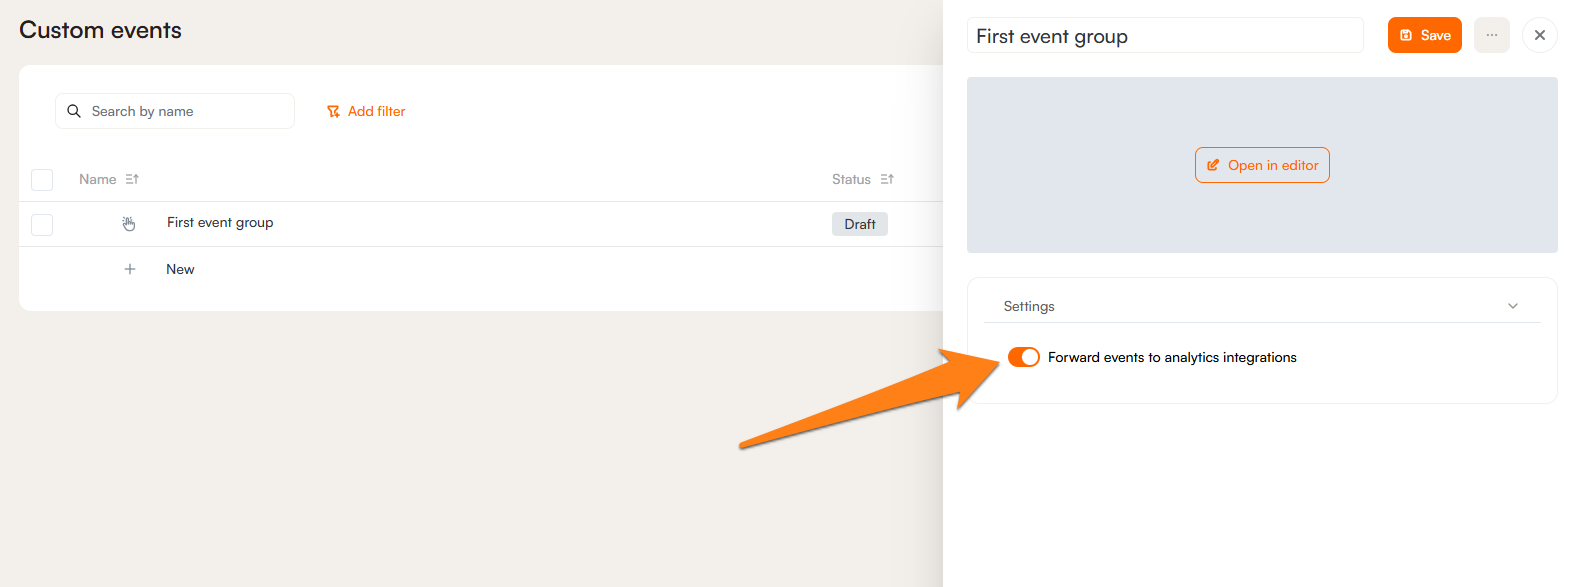
If you have analytics integrations set up, you can have these custom events analytics forwarded to those integrations by enabling this toggle in the event group settings.
Events tracking
Once events are created and activated, you can monitor their activity in the Product Fruits analytics section (Analyze icon).
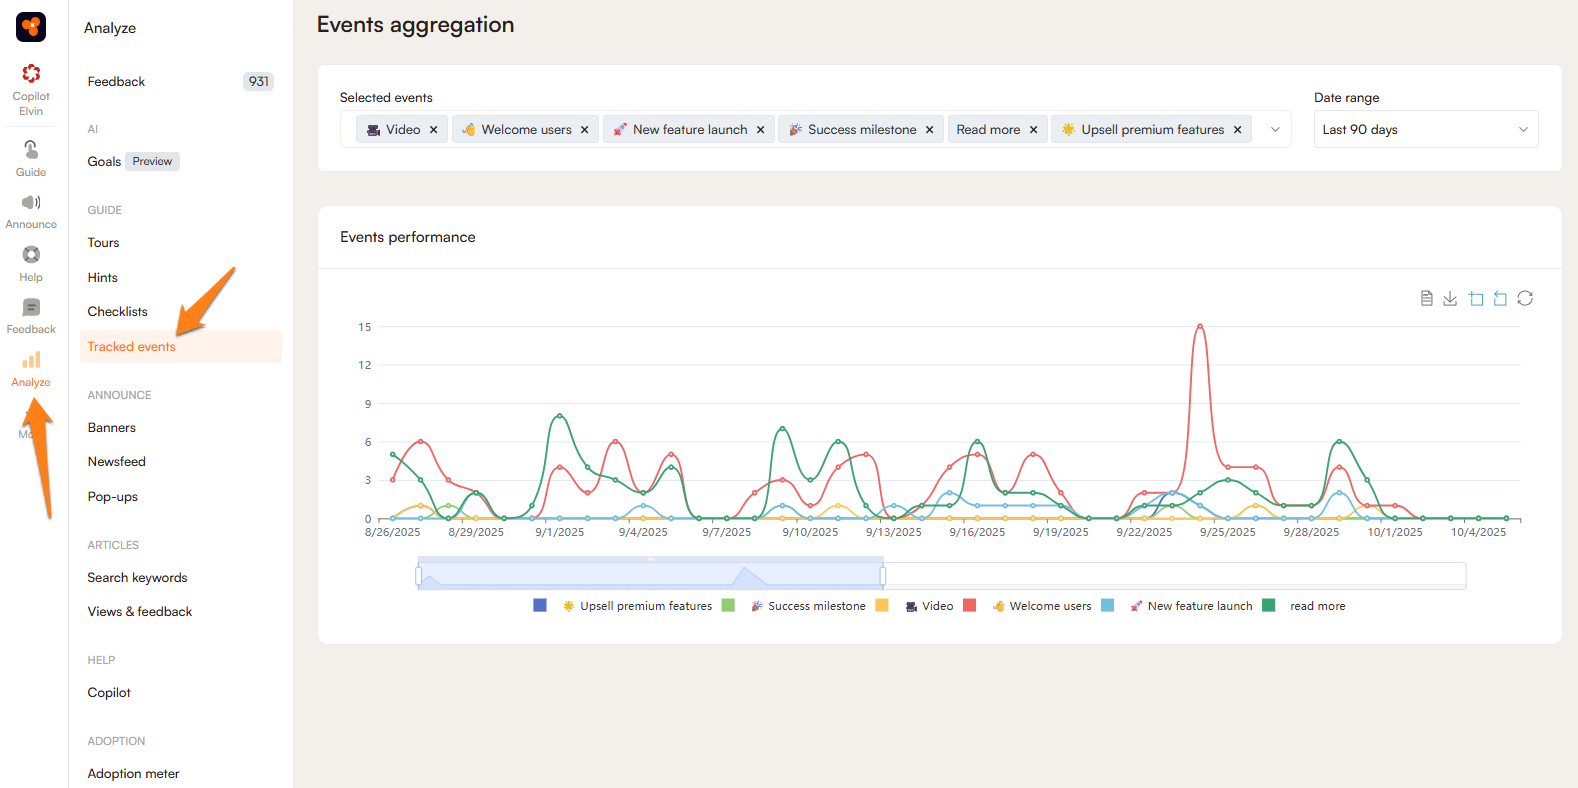
Events do not need to be attached to a tour or hint group to be tracked, nor does an event need to be created inside of an event group.
You can also send these events via JavaScript API.
Using custom events with content
Do you notice that some events are not being triggered? Maybe your users haven't found this part of your application yet, and you'd like facilitate their exploration. This can be done using custom events to launch an onboarding flow.
In this example we recognize that the user has made significant progress in your application by viewing several tours, but may have missed an important feature, where these events take place:
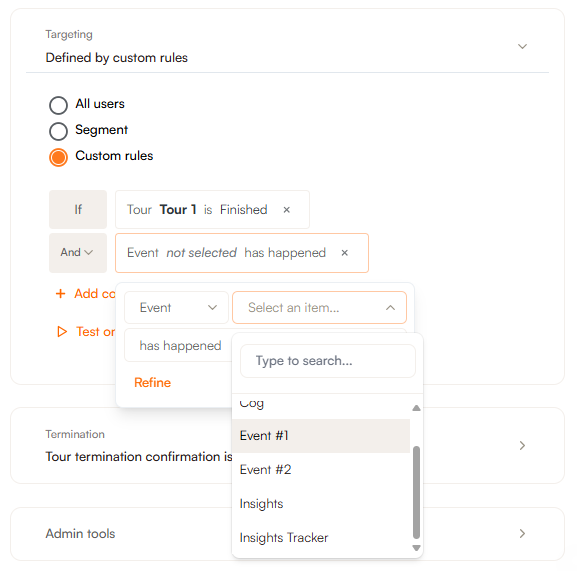
By adding the rule that this event hasn't happened yet, you can trigger a tour to nudge the user to explore features that they have been missing until now.