SSO with Okta
Customer configuration with Okta
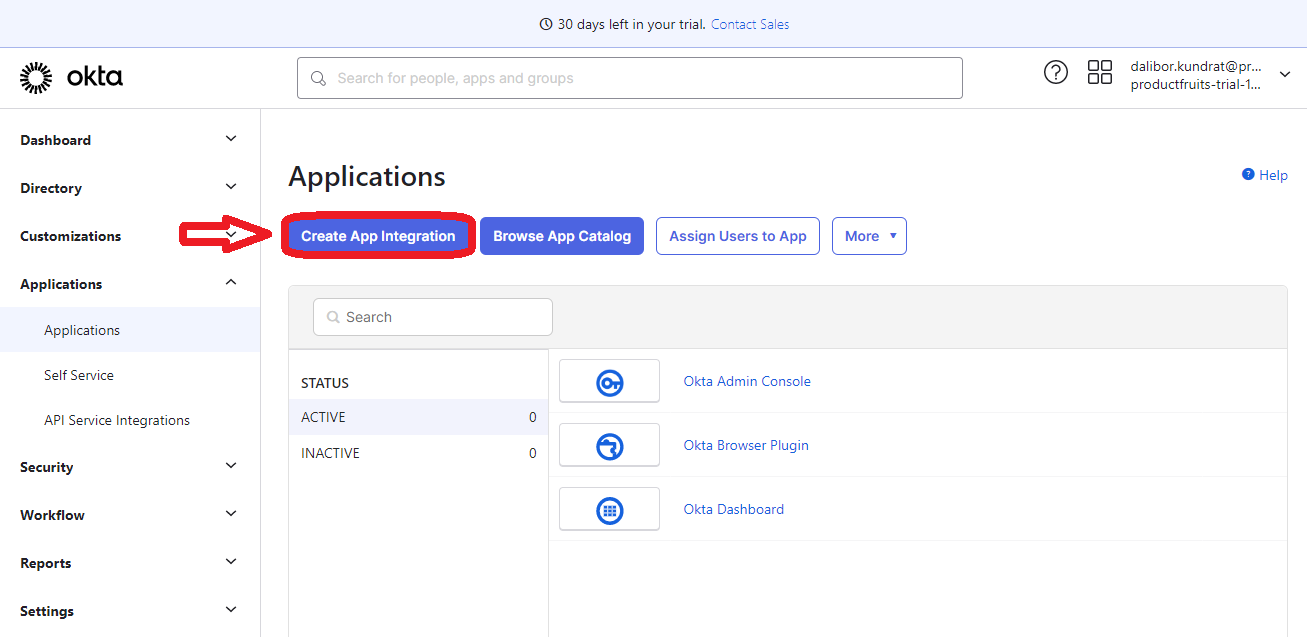
1. In the Admin Console, go to Applications > Applications.
2. Click Create App Integration.
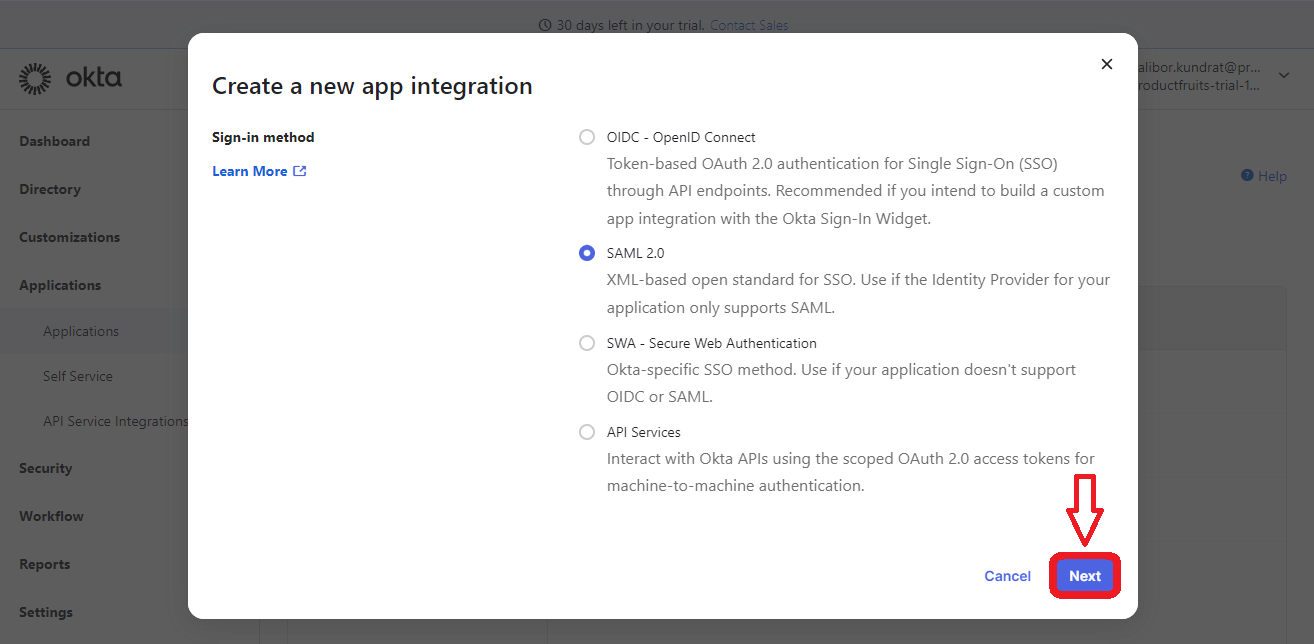
3. Select SAML 2.0 as the Sign-in method.
4. Click Next.
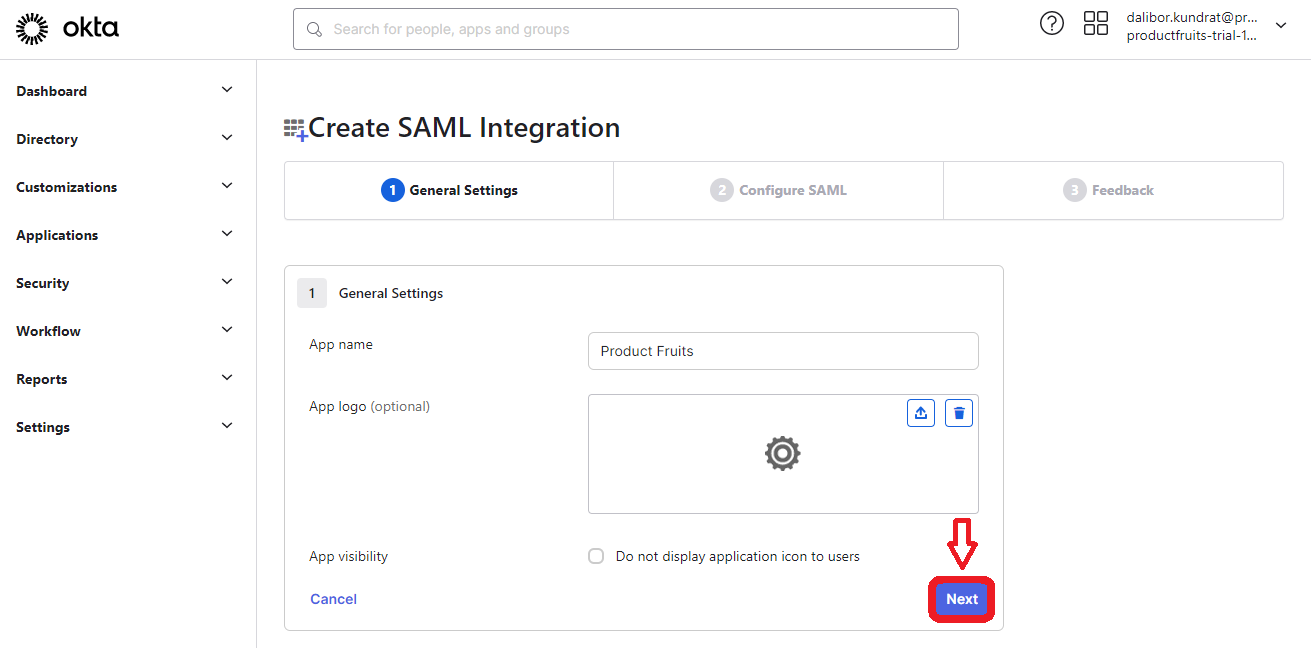
5. Provide general information for the integration and then click Next.
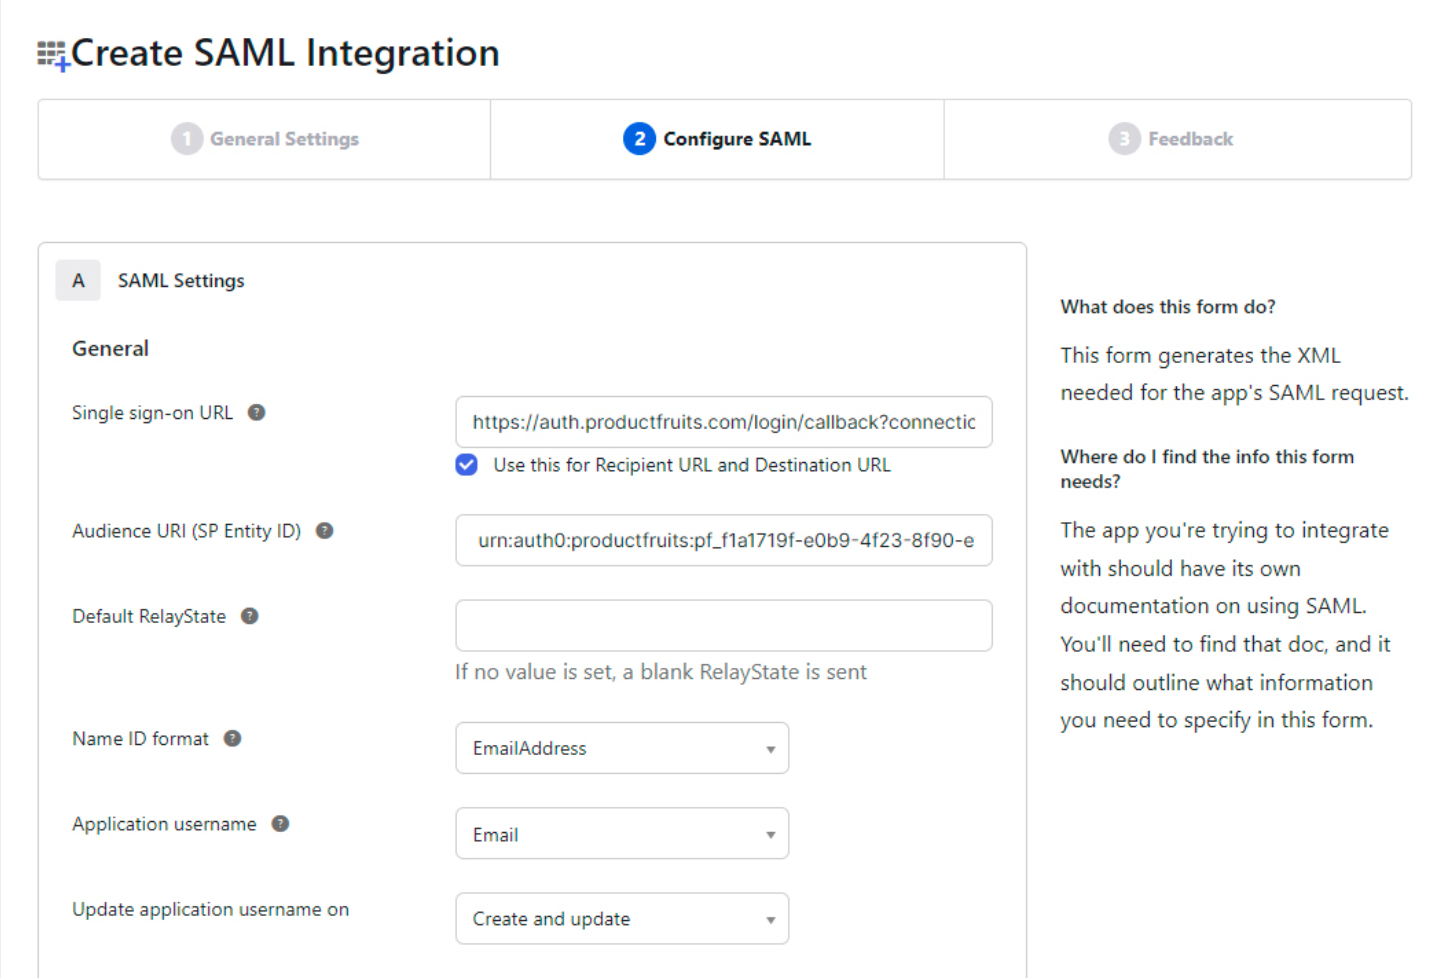
6. Set up the necessary SAML settings for your integration:
Login endpoint:
https://auth.productfruits.com/login/callback?connection=COMPANY_SSO_IDENTIFIER
Audience (Entity Id):urn:auth0:productfruits:COMPANY_SSO_IDENTIFIER
(You can find Product Fruits COMPANY_SSO_IDENTIFIER under the user management SSO tab. Here is a direct link)
7. Click Next and set up the attribute statement option adding the name email and setting the value as user.email. It's also recommended to see Application username to the Email option.

8. Select I'm an Okta customer adding an internal app.
9. Select This is an internal app that we have created OR if your app requires more SAML configuration instructions to work with Okta, select It's required to contact the vendor to enable SAML. Fill in the provided fields to help the Okta support team understand your SAML configuration.
10. Click Finish.
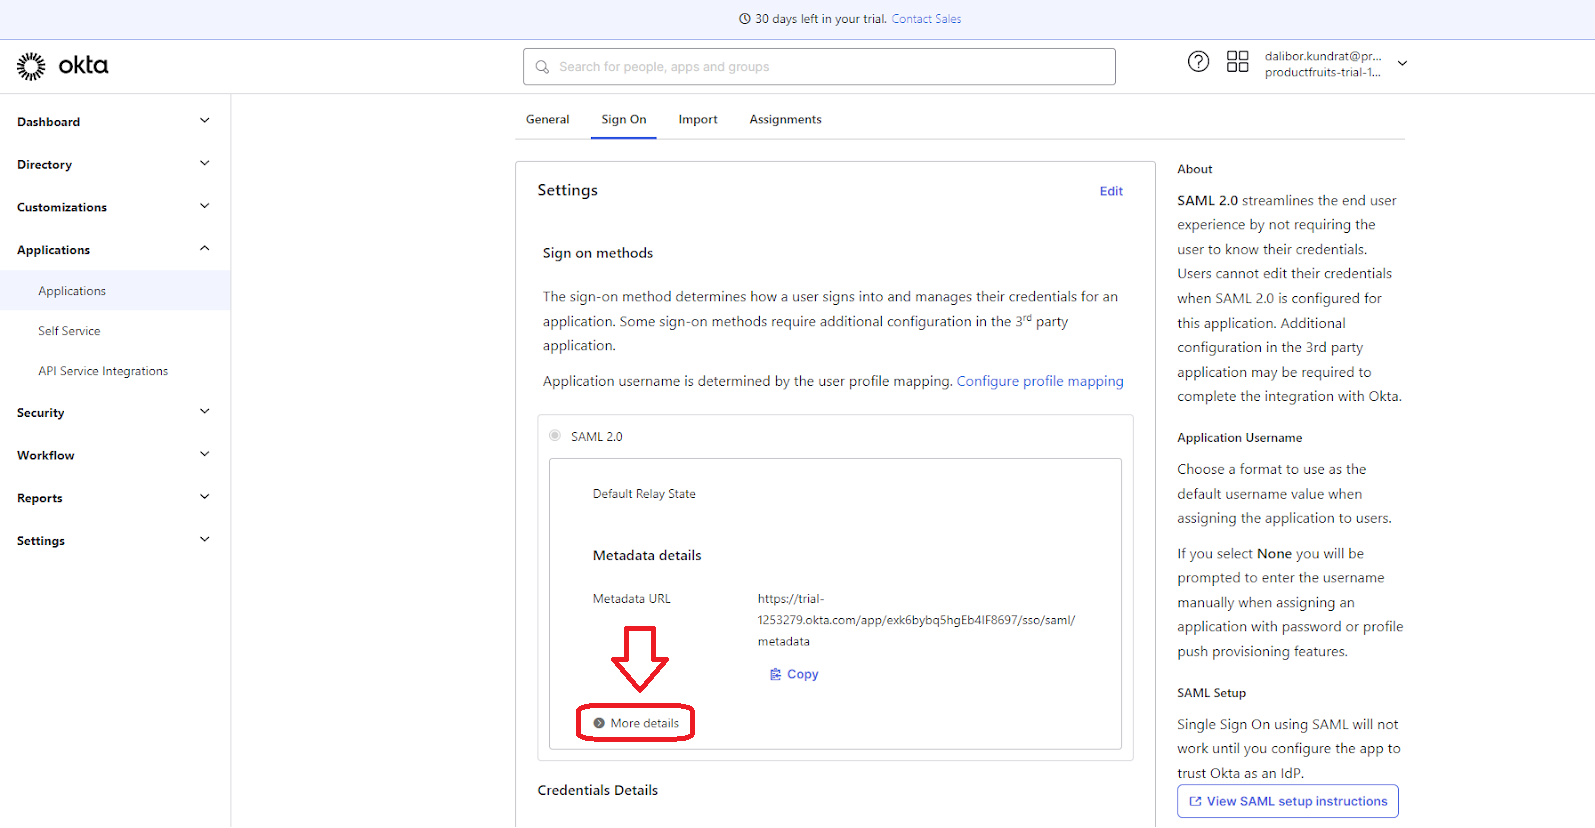
12. Under the Sign On Settings, click “More details”
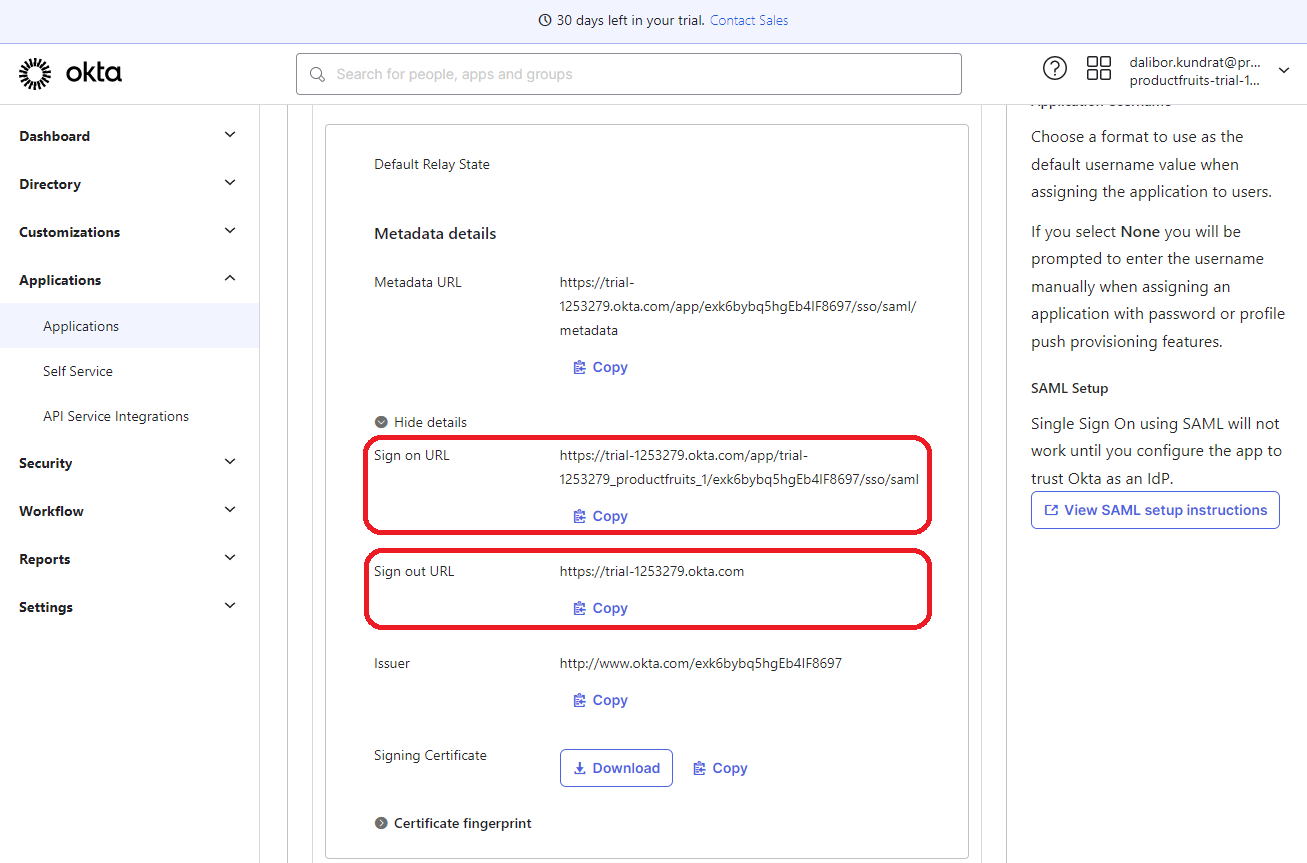
13. Copy the "Sign on" and "Sign out" URLs, as well as the Signing certificate (You will need to provide these values to Product Fruits Team)
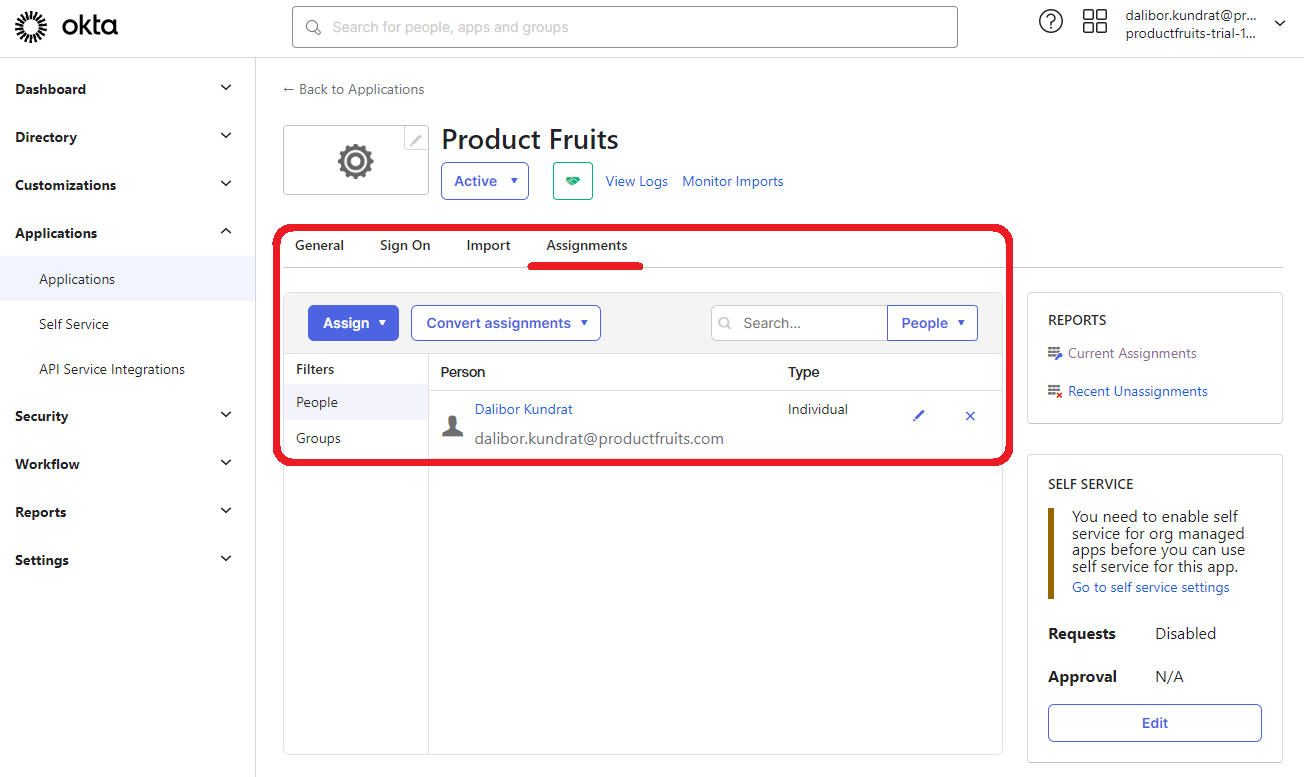
14. Add users to SSO under the Assignments tab.
Note:
Once we set up SSO for a particular domain the Product Fruits login will automatically redirect all requests to the identity provider side. Make sure you have already set up everything on the Okta side and that all values are valid.
