How to localize your content
Set up supported languages
First, go to the Workspace settings (Click on the More icon on the bottom left menu and then Settings) and find the Supported languages section. Add all the languages you want supported in Product Fruits. This should match the languages supported by your application (unless for any reason you're wanting to support fewer languages in Product Fruits than in your application).

Once you've saved the settings, every Product Fruits tool should display a dropdown with these languages. When you switch the language in the dropdown, you can edit and localize the content for that language.
How do we detect the language of the user?
Product Fruits is unable to automatically detect the user's language; you will need to pass this information to us. In the Product Fruits code snippet, there is a language parameter, which is where you will need to pass us the current language of the user. This way, we will know which localized version to display. You can read more on this in the installation guide. Please ensure that the language code that you set matches the content that your onboarding content is written in, otherwise you will encounter blank content. Please note that in applications where the user has the ability to change the language, window.productFruits.services.destroy() should be called to destroy the initialized instance of Product Fruits before it's reinitialized in the new language.
Tours and hints
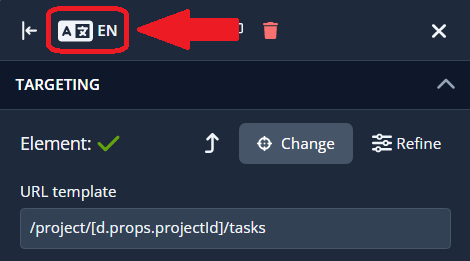
You can translate any cards to different languages by switching the language dropdown in the editor. Currently, we don't support fallbacks to a default language.
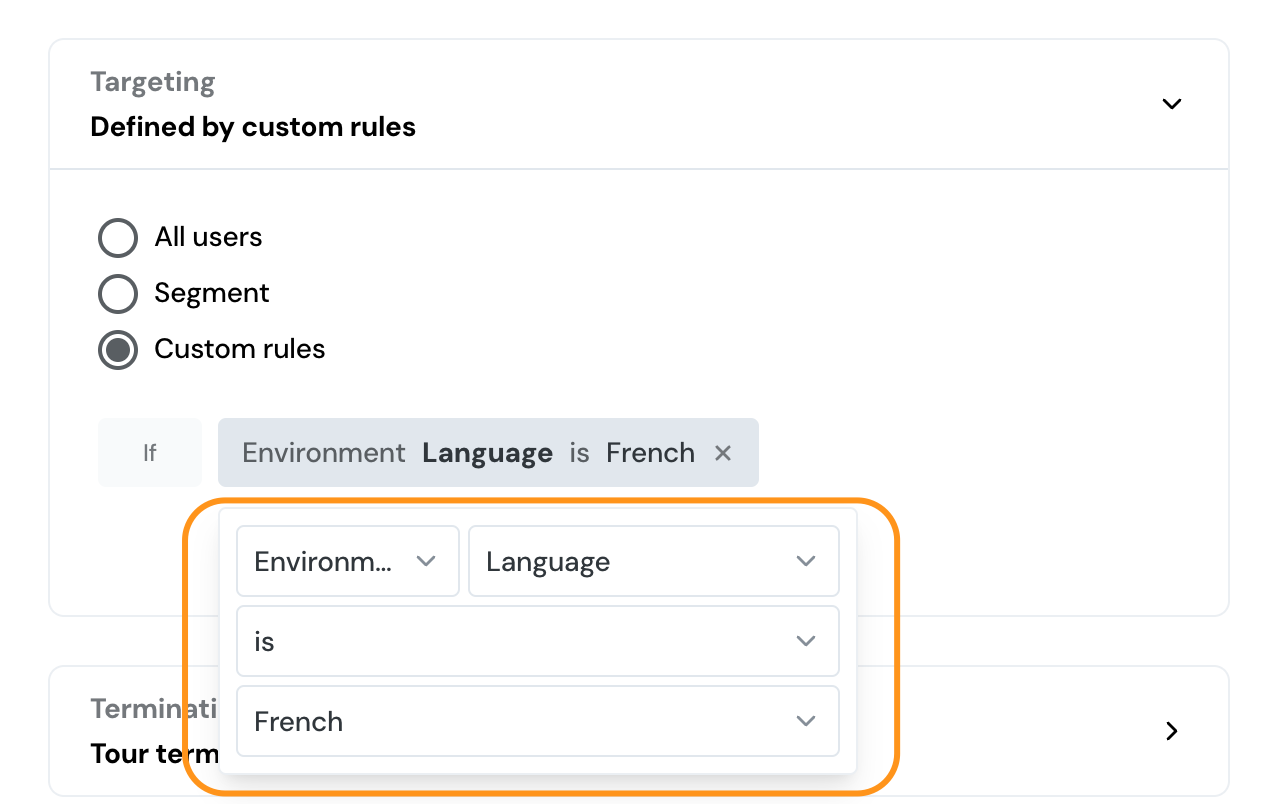
You may want to display different tours/hints for different languages or restrict the tours/hints to certain languages. You can use the Targeting settings in the tour/hints detail for this. Select Custom Rules -> If Environment -> Language , and select the desired language.
Default button text
It's also possible to set the default text of buttons for different languages. You can do this by clicking the gear ⚙️ icon in the editor next to Preview (at the bottom of the screen), and navigating to Default texts. Select your language from the dropdown menu and input your translations.

Note: Changing the language on a new tour card or hint will now account for these settings, but existing tour and hint cards will be unaffected. See here for a good way to edit preexisting content in bulk.
Right-to-left (RTL) support
We support RTL natively in our tools. By default, we will inherit RTL settings from your application. If your application sets dir="rtl" attribute on the <html> or <body> element, we will read this and display all Product Fruits content in RTL alignment.
We also support RTL in our knowledge base. If you edit your article in an RTL language, the editor will automatically switch to the RTL layout.
XLSX Import/Export
To translate many tour and hint cards at once, you can use the XLSX import/export feature. This is not enabled by default, so you will need to message or email us to activate this feature for you.
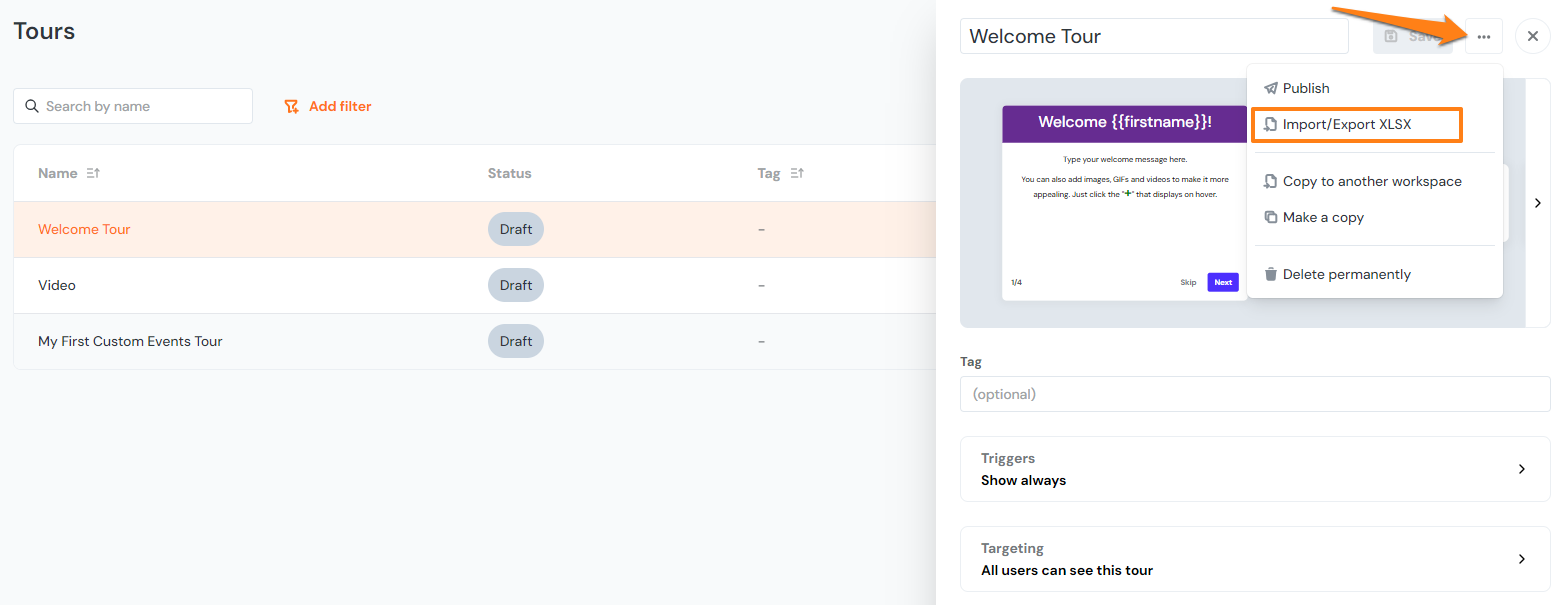
Once it's enabled, you must add a language to your supported languages (if you haven't already, see the top of this article), then you can go to the administration page for a particular tour or hint group. Click the three dots in the top right corner of the page and select 'Import/Export XLSX'. As shown in the image below, you'll want to make sure that no one else on your team is making changes to the Product Fruits content you are exporting at the time of export.

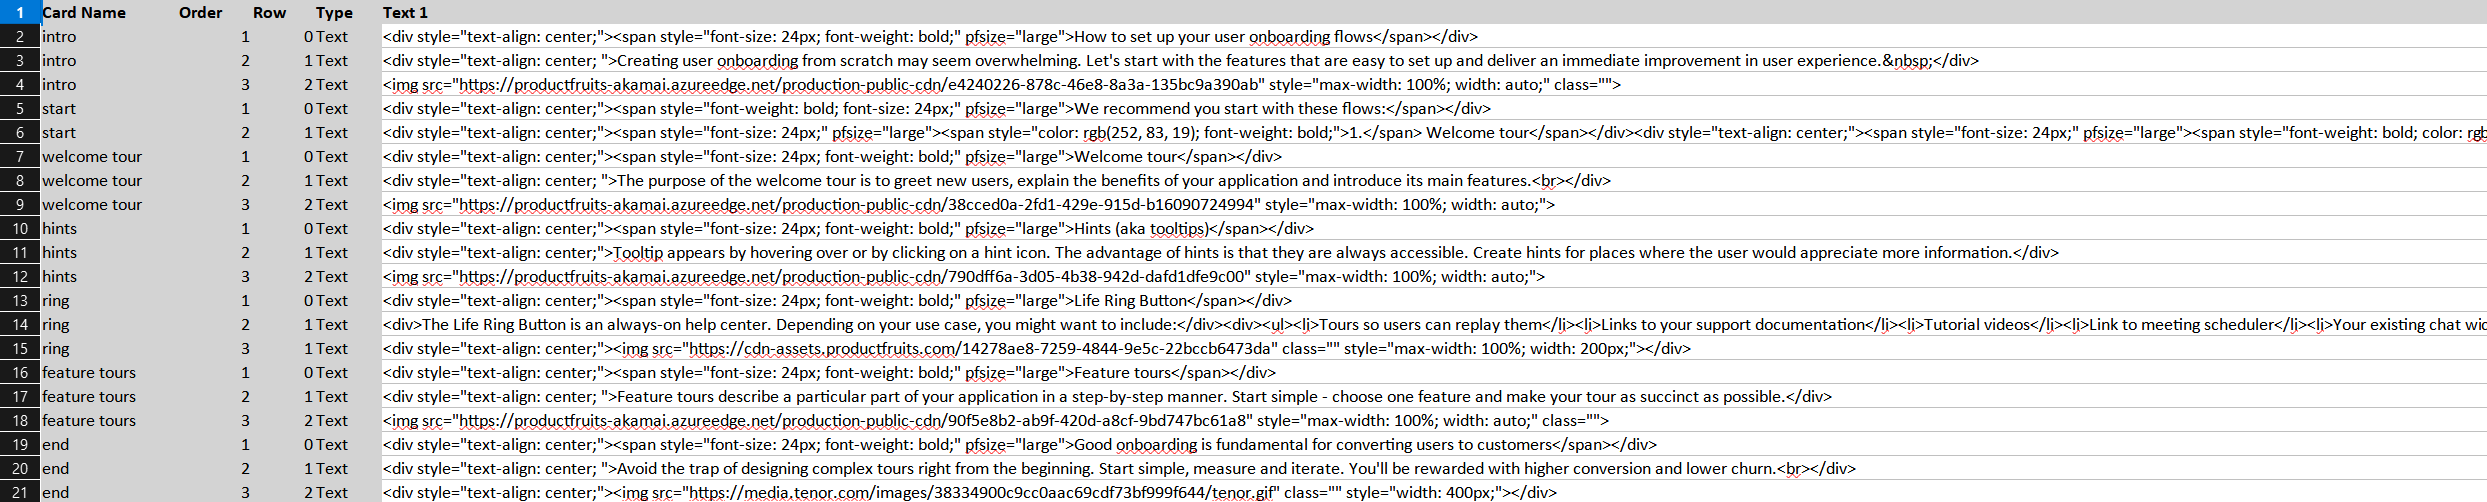
This will open a menu to select which language to export the content in. Once you've opened the file in your preferred spreadsheet tool, it should look something like this: