Feedback Widget Overview
The feedback widget is a powerful tool that can be utilized to directly receive opinions and insights from your users who have first-hand experience using your application. Collecting feedback can be used to best know how to improve your product or services by enhancing your understanding of the needs of your users, boost your onboarding experience, and improve product decisions.
With the feedback widget, your users can send screenshots and videos directly from your application and explain them in detail at the same time.
There are three settings sections for the Feedback widget: In the General section, you can choose the fields to display on your widget, configure your launcher button, choose how you'd like the feedback to be sent to you, and filter which URLs you'd like the widget to display on. In Localization, you can edit all the text fields on the widget and pop-up window, and in Appearance, you can choose display colours of the widget and pop-up.
General
The general settings for the Feedback widget define how you'd like it to function. By default the feedback is forwarded to your feedback inbox, found along the left side of the interface.
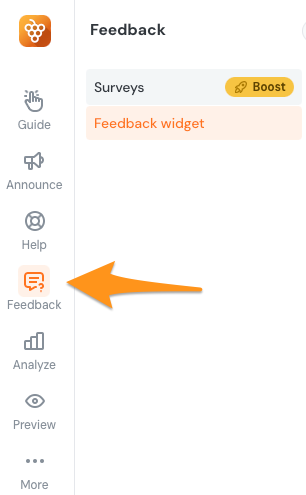
Launching
The feedback widget can be launched by its own button, by API, and from the Lifering button - your single access point for all things support:
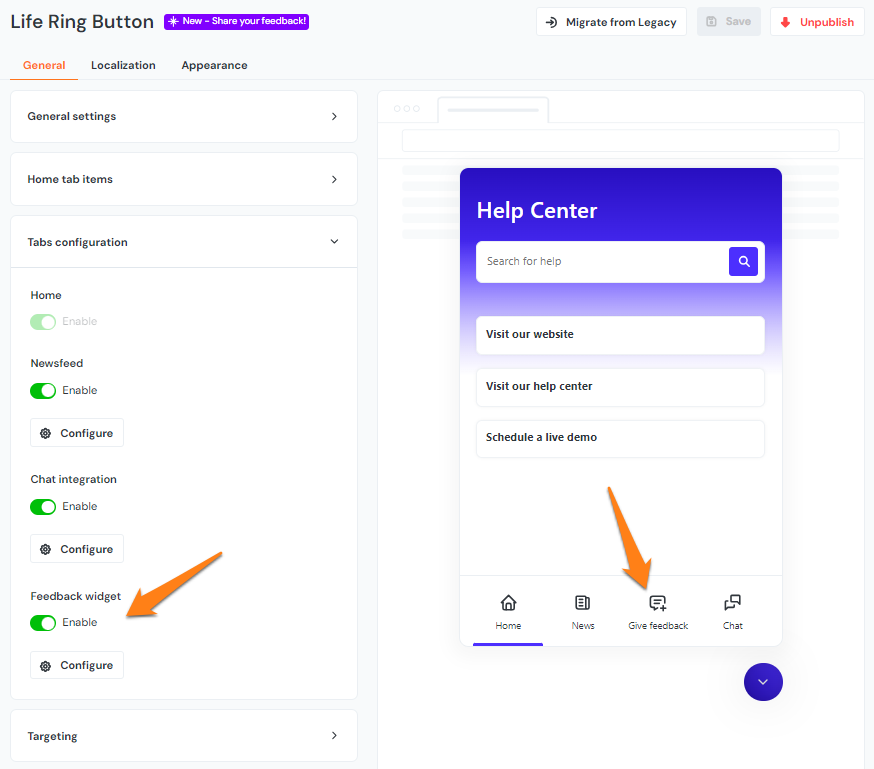
Features
In the Features section, you can choose which items are enabled on your Feedback widget pop-up:
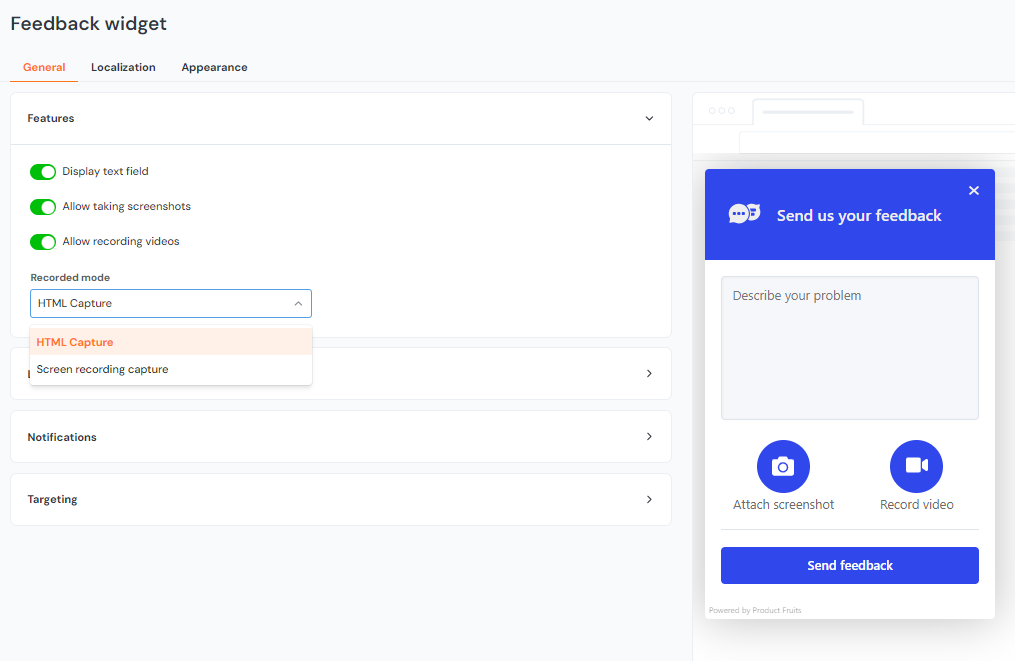
You can disable or enable the text field, and choose if you'd like the users to be able to attach screenshots and videos. This is also where you will choose how you'd like the video recorded, with either HTML Capture or Screen recording capture.
Click here for more information on the different types.
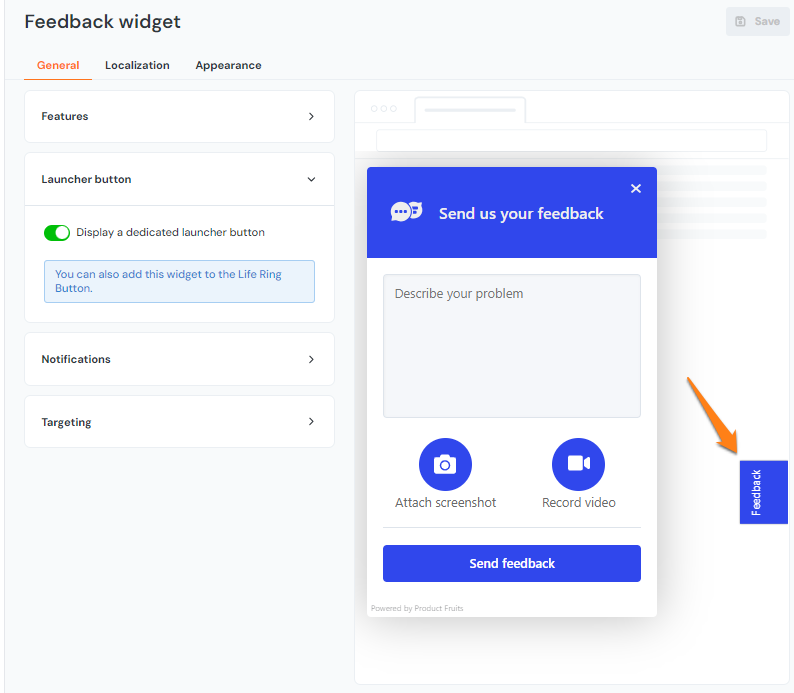
Launcher button
In the Launcher button section, you can toggle whether you'd like the button to display or not:
Notifications
In Notifications, you can choose how you will receive the feedback your users submit. Connect your Slack here, or enable e-mail or webhook. You can also enable screenshot and video links to be viewed anonymously:
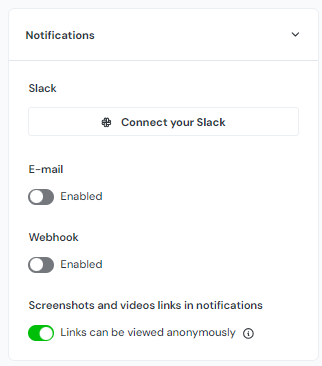
- If the anonymous option is enabled, users who aren't logged into Product Fruits can access video and screenshot links.
- If the anonymous option is disabled, users will be required to log into Product Fruits to access them.
When you enable e-mail, you are given the option to specify the e-mail address it is sent to, as well as what you'd like the subject line to read:
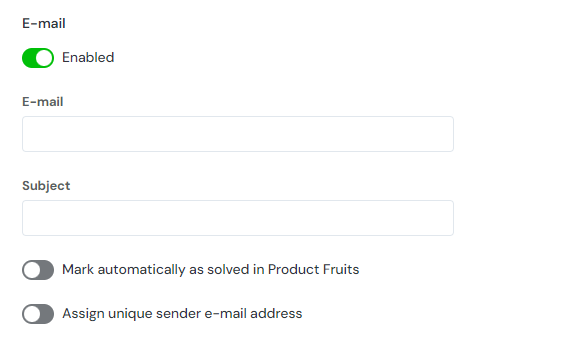
Currently is is only possible to specify one email address where incoming feedback will be sent.
Within this menu you can also choose to mark the feedback as solved automatically in the Product Fruits feedback inbox and assign a unique sender e-mail address.
The 'Assign unique sender e-mail address' toggle works by including the users' email address (if you're passing it to us) in the 'reply to' header in the email that is sent to the address that you specify. This way, your email client can take the email found in the 'reply to' header and automatically fill in the destination email address. Unfortunately, not all email platforms (including CRMs like Hubspot and Salesfroce) support taking the information from the 'reply to' header, so you'll need to test if it works in your set up.
When you enable webhook:
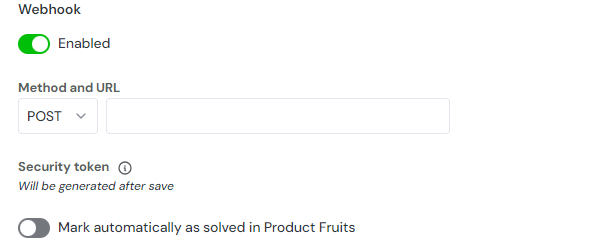
This is where the webhook security token will be displayed, in addition to the toggle if you'd like the feedback to be marked as solved automatically in the Product Fruits feedback inbox.
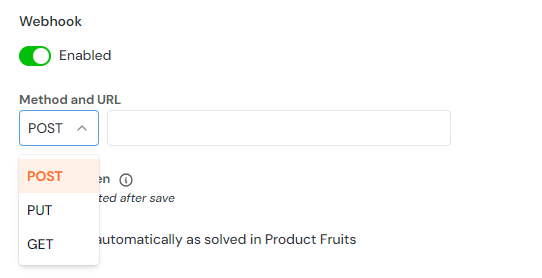
With the dropdown here, you can choose the webhook method and also the URL destination of the webhook.
More information on the webhook payload can be found here.
Categories
The Categories field helps organize feedback by letting users choose a category for their submission, making it easier for you to analyze and use the data. It can be added and configured under Feedback > Feedback Widget > General, where you can manage the drop-down options by adding, editing, or removing entries. It can also be set as mandatory, requiring users to select a category before submitting feedback.
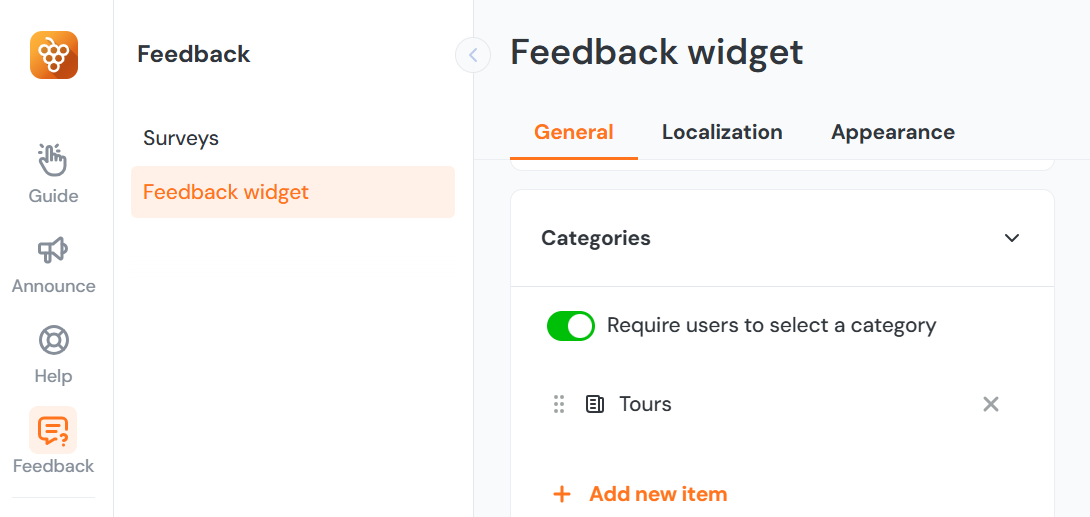
The field, named “Categories” by default, can be renamed using the Localization tab; placeholder text for the drop-down menu can also be customized in the same section, providing additional guidance to end-users.
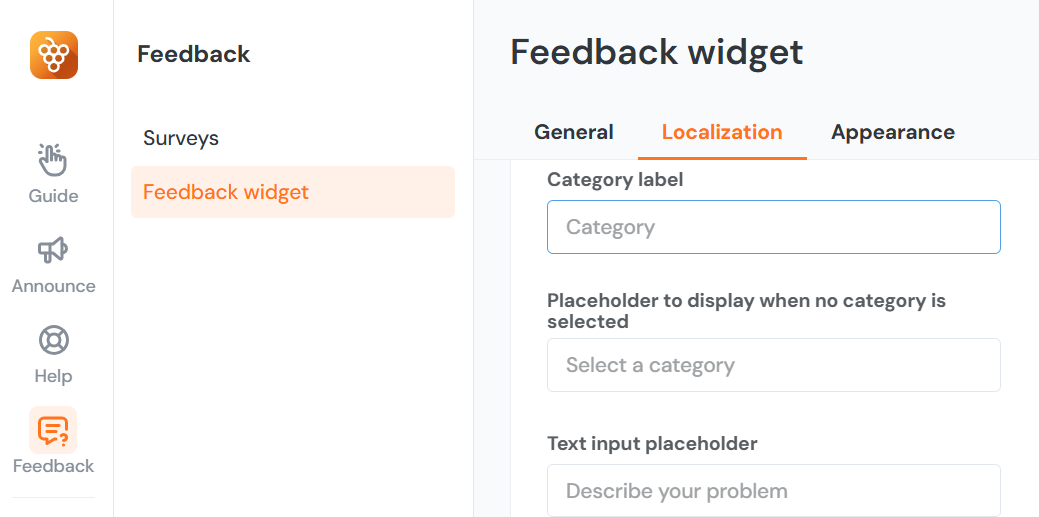
The drop-down field is only visible to end-users if at least one option is configured. When interacting with the feedback widget, users select an appropriate category from the menu before submission.
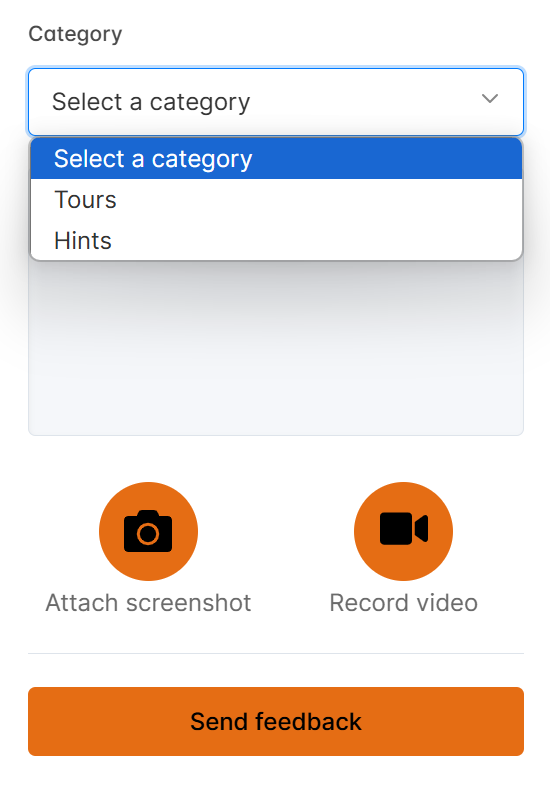
Collected data includes the selected category as part of the feedback submission. In the Analyze > Feedback section, a new Category column displays this data, making it easy to review and interpret. This data is also included in export files for analysis.
Targeting
Targeting in the Feedback widget is used to filter which URLs it will display on. Leave this field blank to display the feedback widget on all pages that your Product Fruits workspace is installed on.
You can also specify a URL or URLs which you'd like to hide the Feedback widget on:
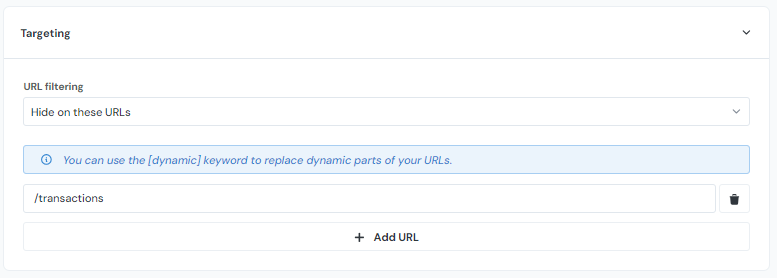
Note: You can only choose one URL Filtering option. Either 'show' on a set of URLs or 'hide' on a set of URLs.
Localization
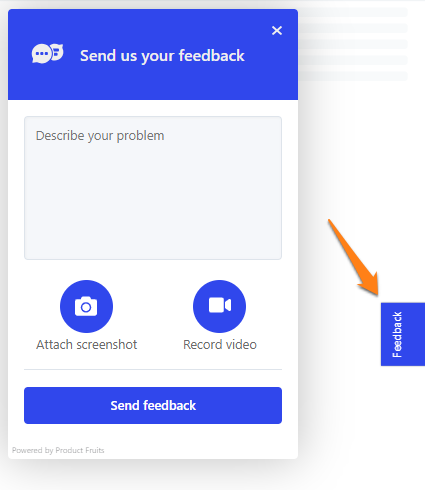
You can make the Feedback widget unique to your application! In Localization you can edit all the default texts for the Feedback widget and set different texts for different languages.
Launcher text
Customize the launcher button text here:
Pop-up texts
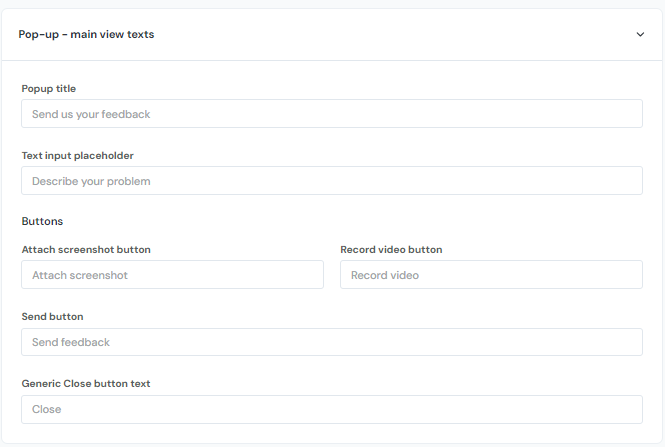
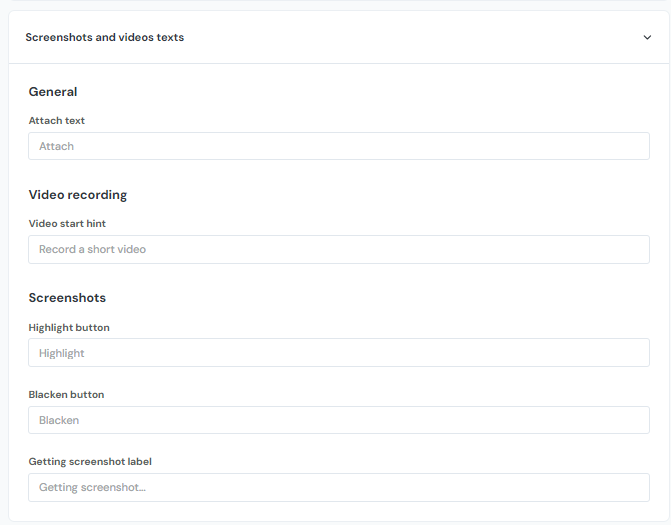
You can customize all the texts on the feedback widget in these sections:
Appearance
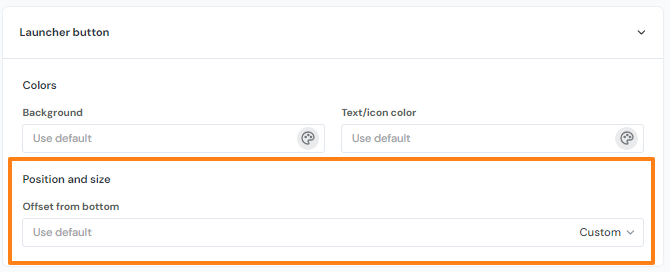
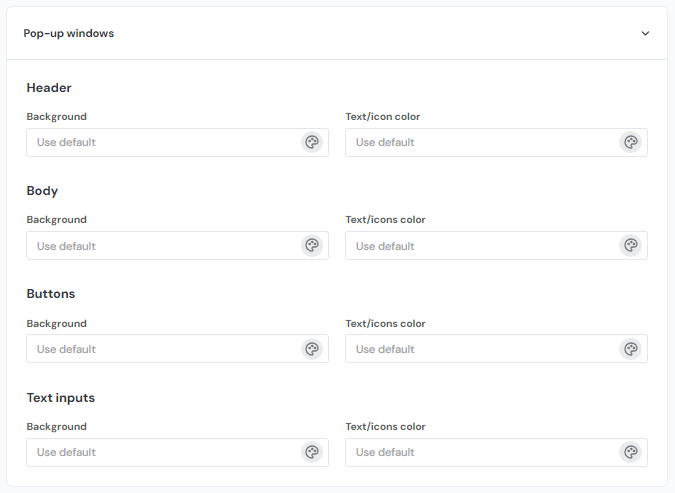
Want to make the colours of the Feedback widget match your application? In Appearance, you can change both the Launcher button colours and the pop-up colours.
Launcher button & Pop-up windows
In addition to customizing colours, you can also customize the launcher button's offset from the bottom of the screen here:
