SSO with JumpCloud
What we need before beginning
- IDP URL (Step 10 in customer configuration below)
- A Certificate (Step 9 in customer configuration below)
- An email Domain(s)
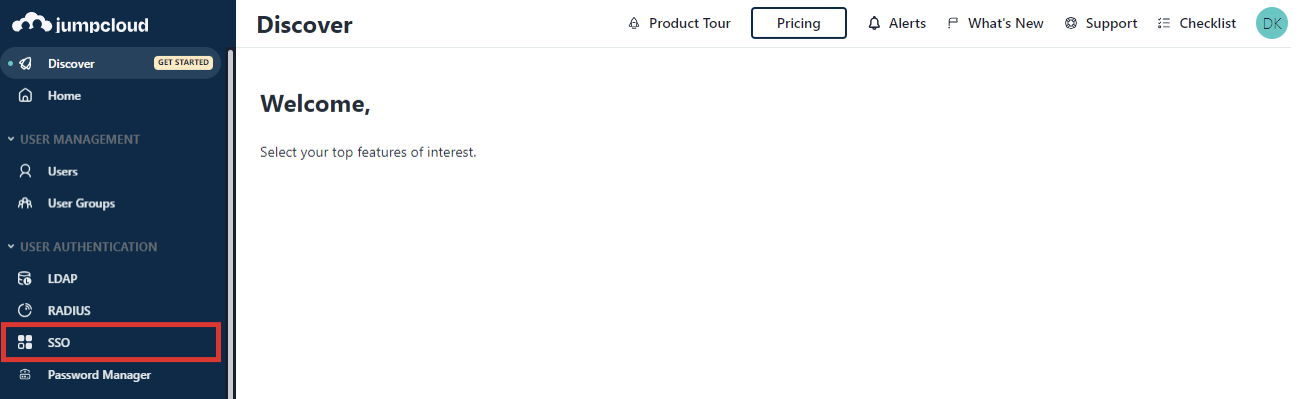
Customer configuration with JumpCloud
- Access the JumpCloud Administrator Console at https://console.jumpcloud.com (you need to be an admin to setup SSO)
- Go to USER AUTHENTICATION > SSO.
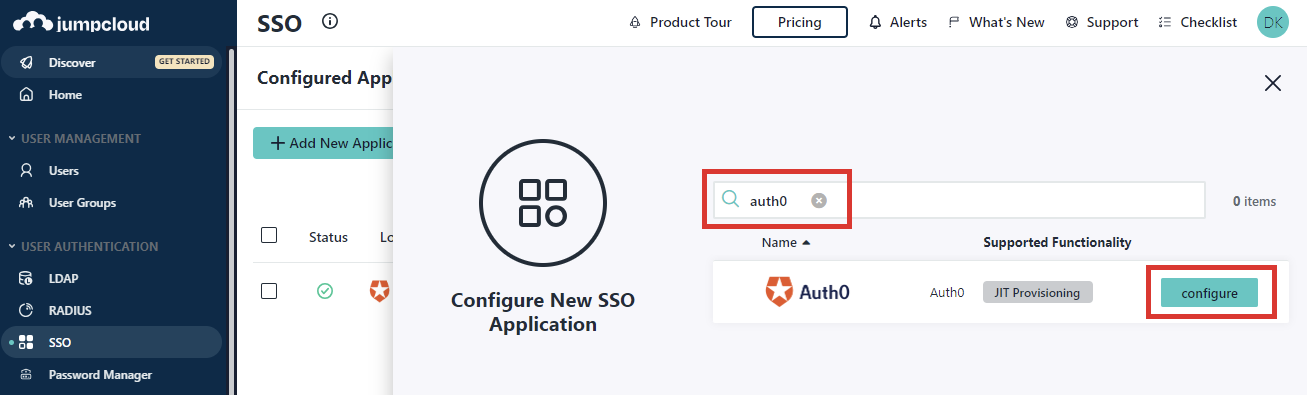
- Click ( + Add New Application ) to configure a new application.
- Search for Auth0, then click configure.
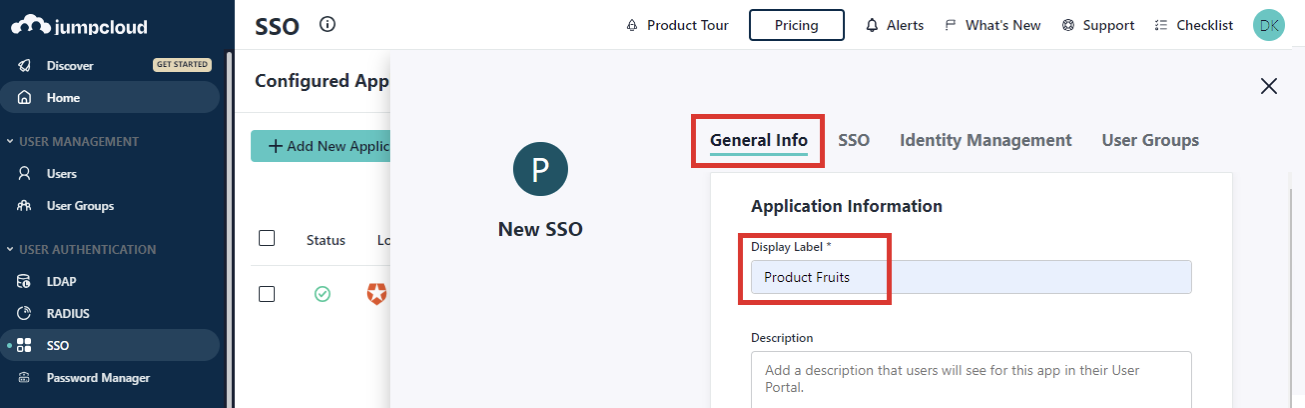
- Enter a Display Label in the General Info tab. Optionally, you can enter a description and adjust the logo shown for the application.
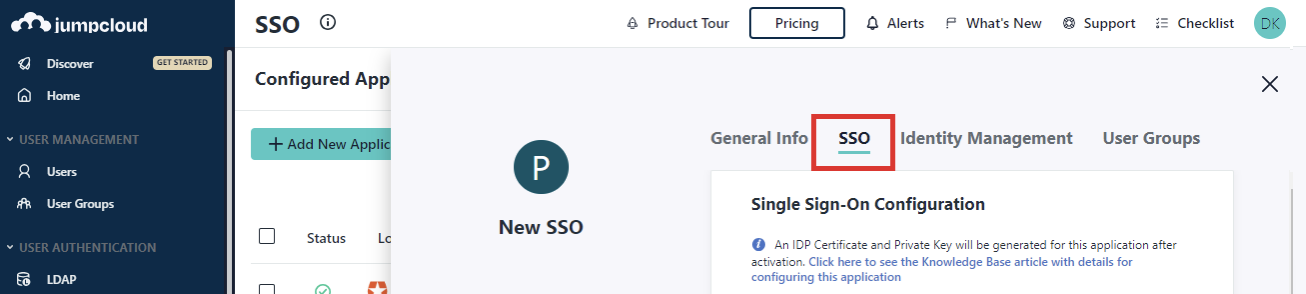
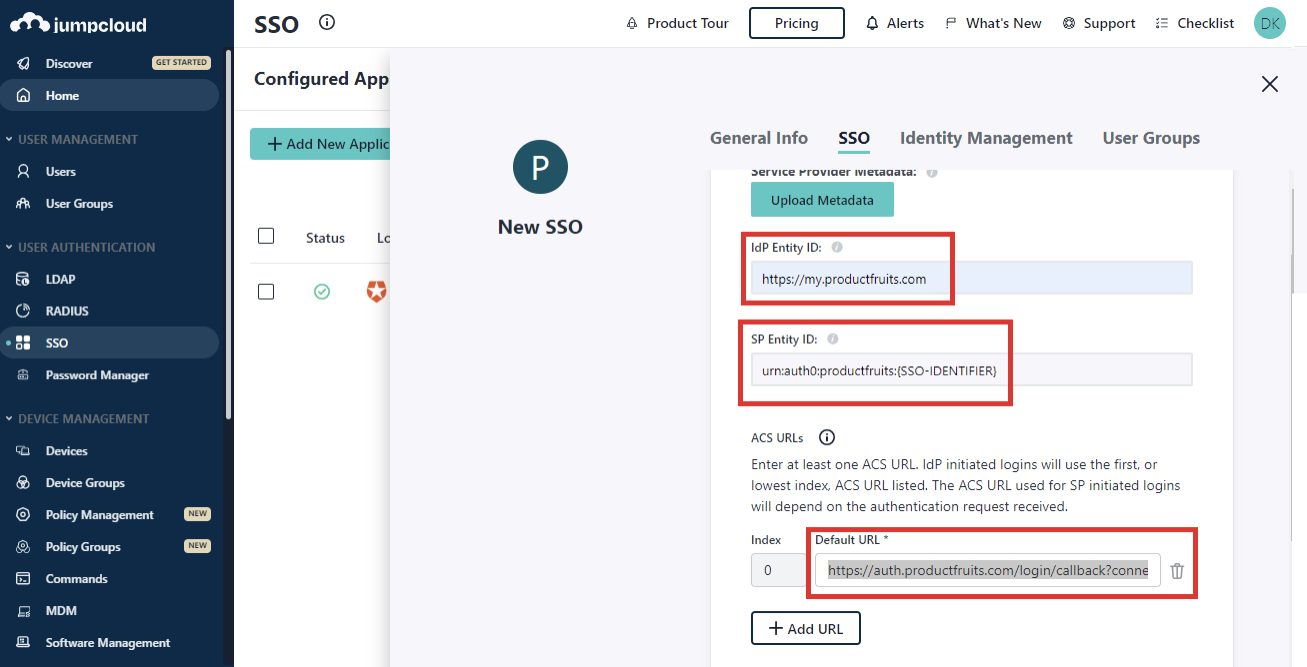
- Select the SSO tab
- Set these parameters to the following values:
IdP Entity ID: https://my.productfruits.com
SP Entity ID: urn:auth0:productfruits:{SSO-IDENTIFIER}
ACS URLs (Default URL):https://auth.productfruits.com/login/callback?connection={SSO-IDENTIFIER}
(You can find Product Fruits COMPANY_SSO_IDENTIFIER under the user management SSO tab)
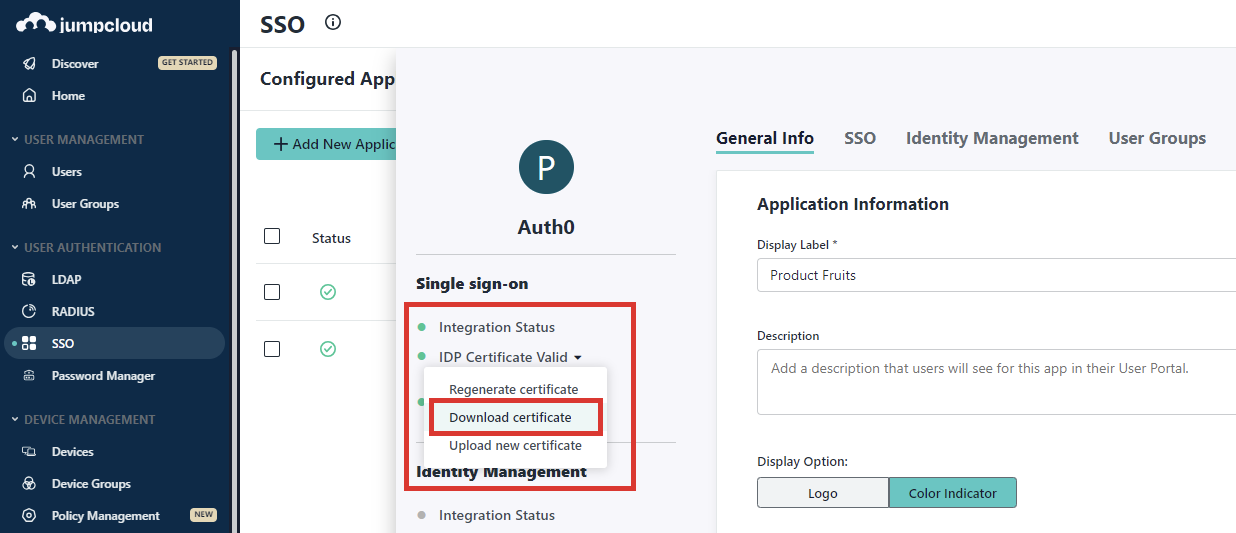
- Click on Activate (Confirm setup)
- Download the certificate (please provide this to Product Fruits support)
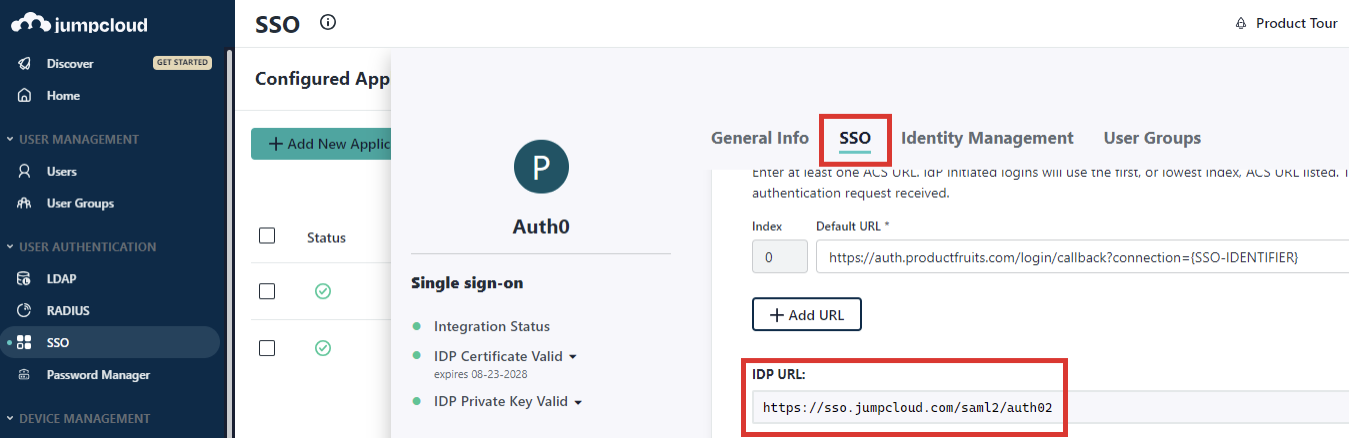
- Under SSO tab copy tho IDP URL (please provide this to Product Fruits support)
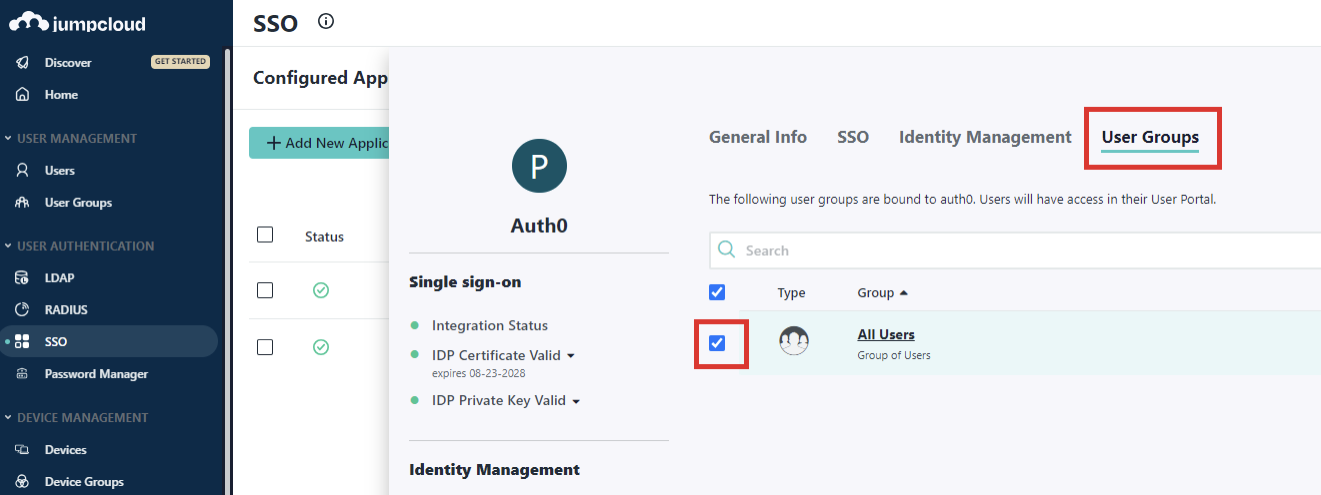
- After setup you need to add a user to the specific group and enable this group for the newly created Product Fruits application. Save your changes!
- Keep attributes mapping as it is. By default, it is email to email.