HubSpot Integration
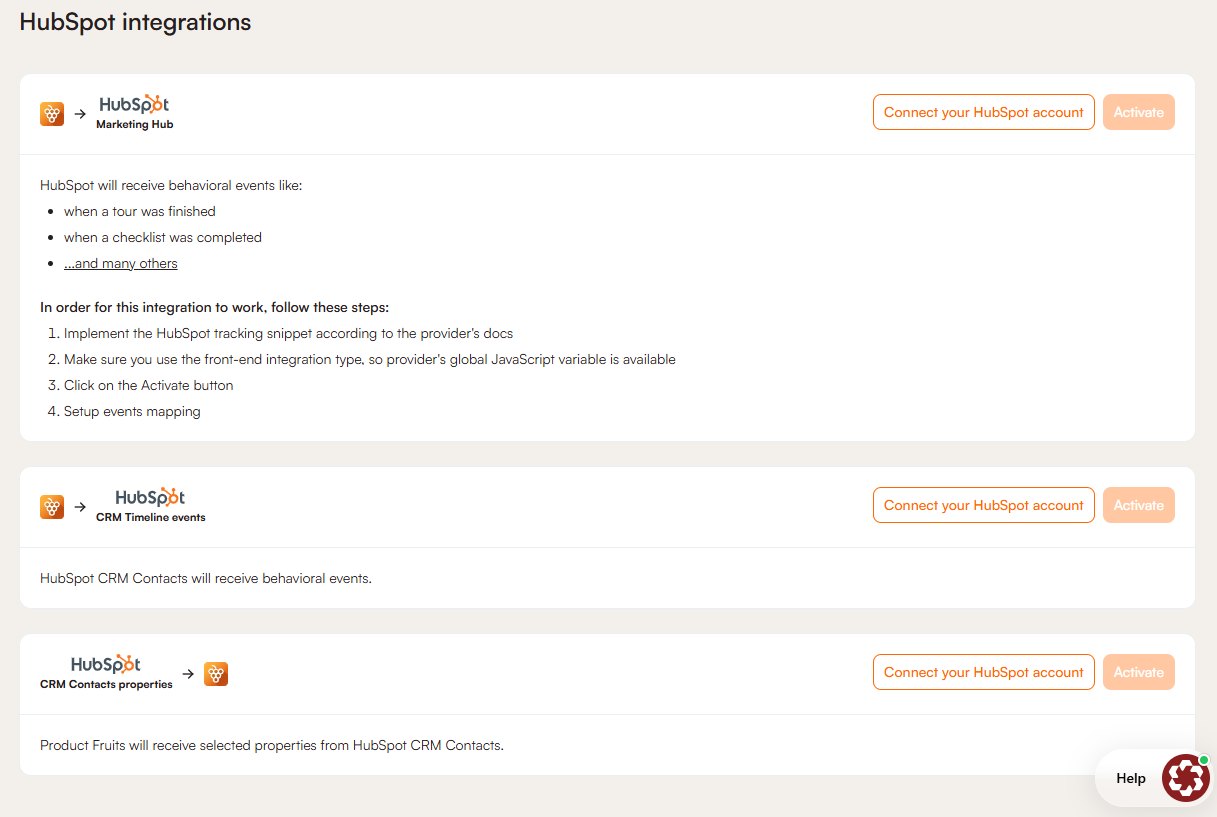
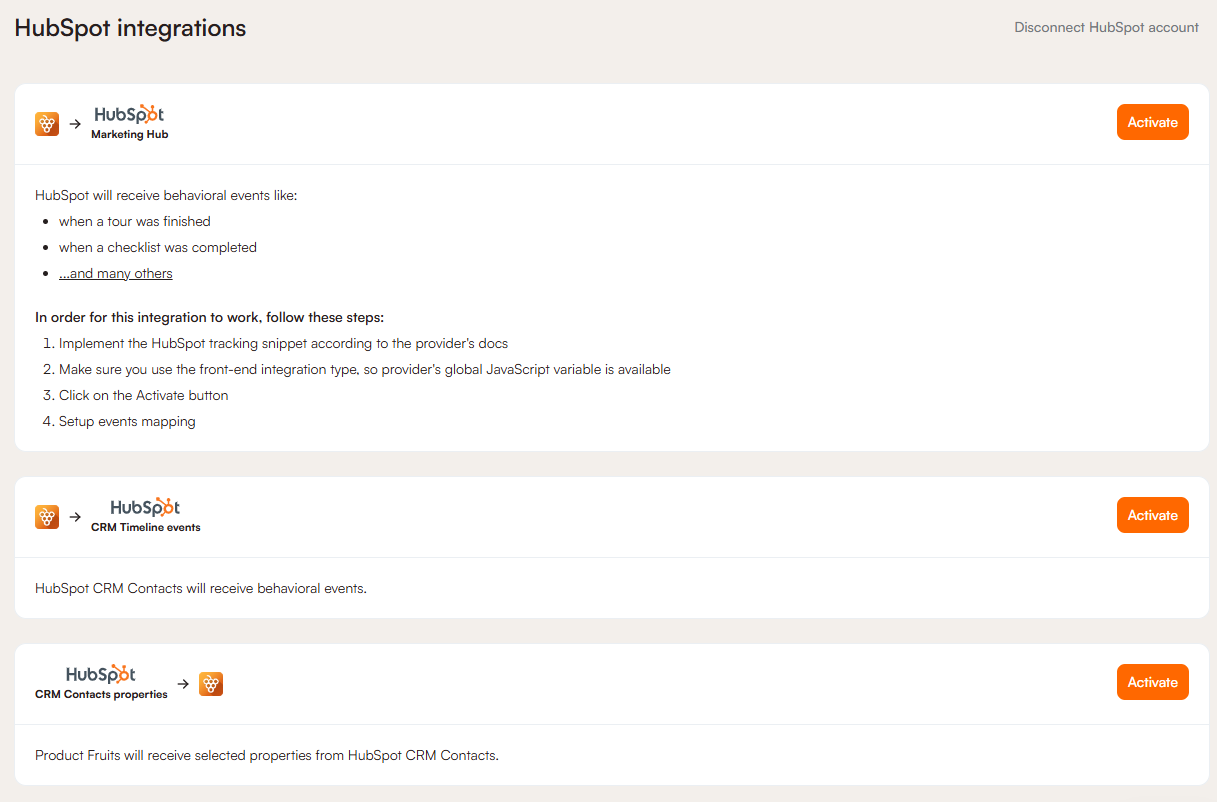
Product Fruits offers three integration options with HubSpot. Two of these integrations send data to HubSpot, while one receives data from HubSpot.
If you don't have an associated HubSpot contact, one will be automatically created during the integration process.
Setting Up HubSpot
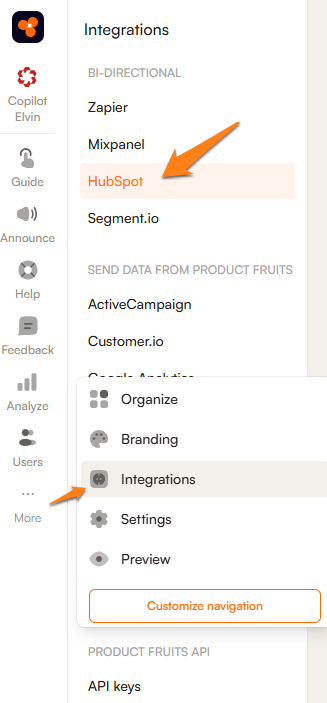
To set up the HubSpot integration, start by clicking on the More icon in the sidebar and navigate to Integrations. Under the Bi-directional integrations section, you'll find HubSpot.
When you click Connect your HubSpot account, the system will redirect you to HubSpot's authorization page. Here, select your HubSpot account, accept the terms of service, and click Connect app.
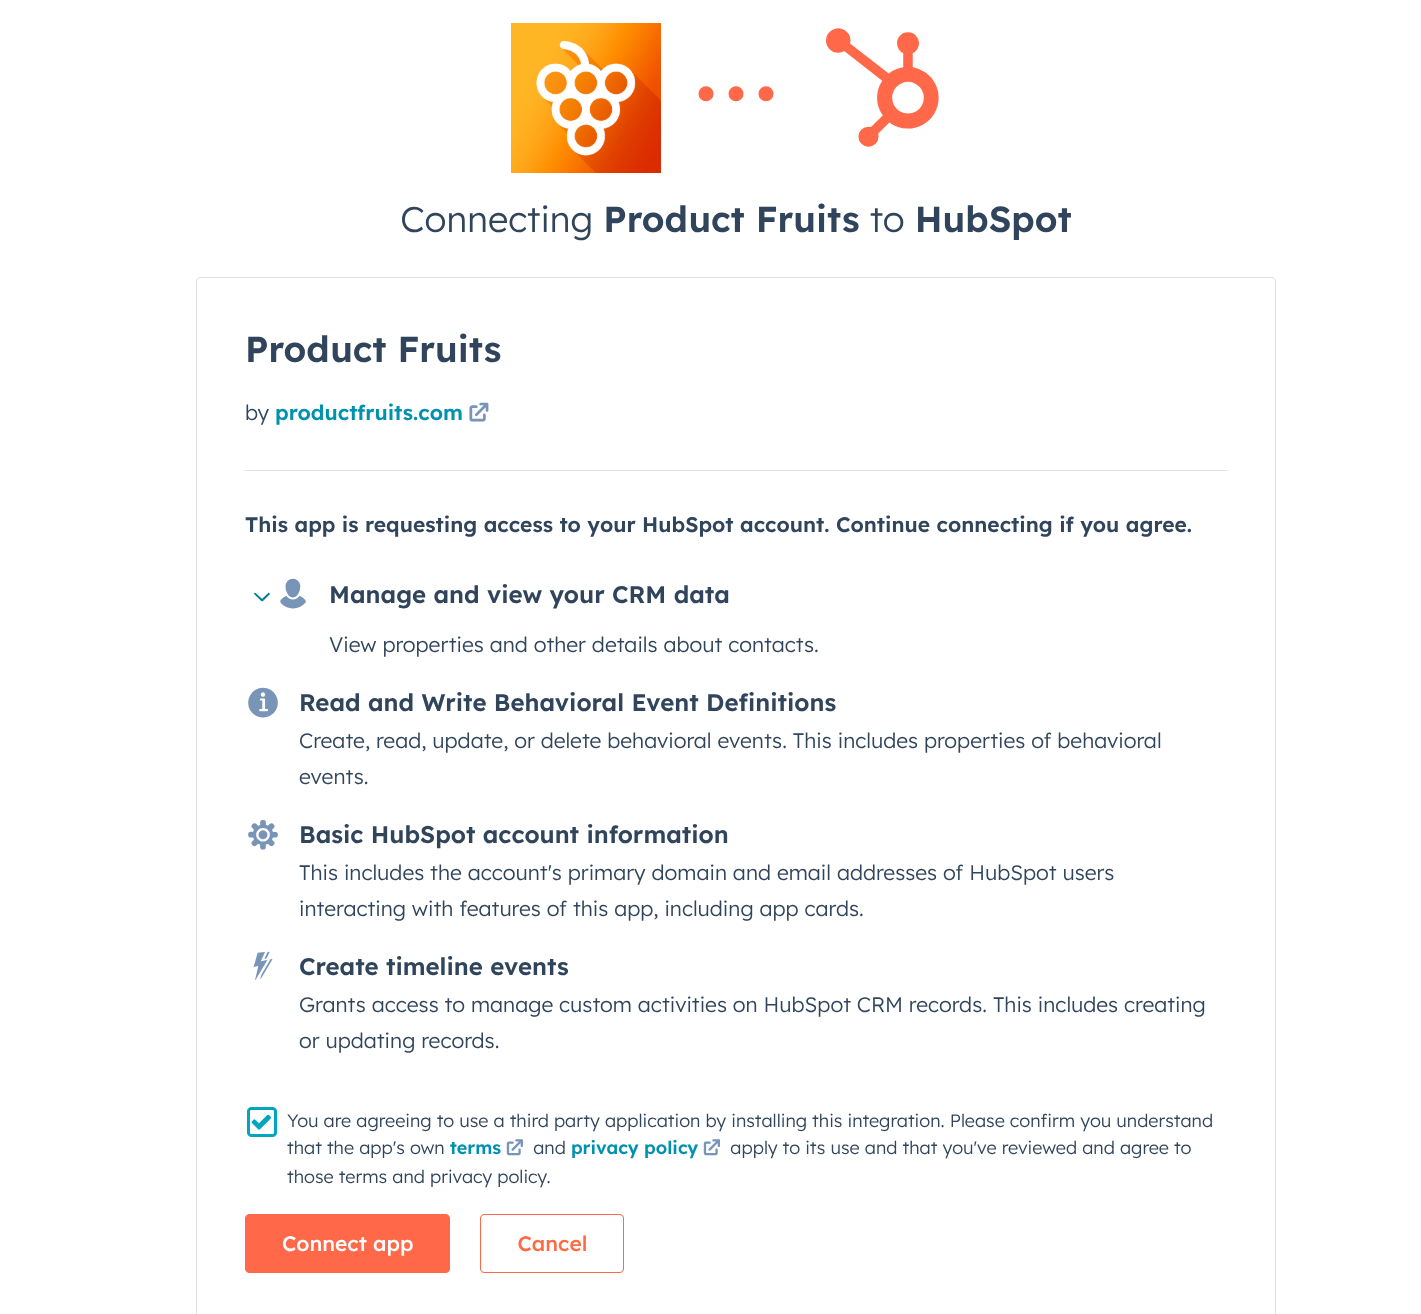
After completing this authorization step, you'll be automatically redirected back to the Product Fruits interface, where you should finalize the connection by clicking the Activate button.
Note that integration doesn’t support multiple email addresses for a single HubSpot contact. Only the default email address will receive the custom fields to their custom property. Additional email addresses associated with the same contact will not receive the synchronized data.
Sales (CRM) Integration
To start, you must pass the email attribute for the user to Product Fruits via our JavaScript snippet to be able to use this integration. Without the email field, there is no way to map Product Fruits' activities to contacts in HubSpot.
This integration uses the HubSpot Contacts timeline feature. We send selected events to HubSpot Contacts. If you use their CRM, we can also send information to the Contacts' timeline. You also have the option to sync HubSpot Contact information to your Tracked Users section in Product Fruits.
Events Available with HubSpot Integration
The Customer Relationship Management (CRM) integrations provide fewer data options compared to Enterprise-level HubSpot accounts.
When using the CRM integration, the following events are sent to HubSpot:
- Tour started - Triggered when a user begins a tour or when a tour starts automatically
- Tour finished - Triggered when a user completes a tour
- Tour skipped - Triggered when a user skips a tour (includes information about which step the tour was skipped on)
- Checklist completed - Triggered when a user finishes all items in a checklist
- Checklist dismissed - Triggered when a user dismisses a checklist before completion (includes information about how many steps were completed)
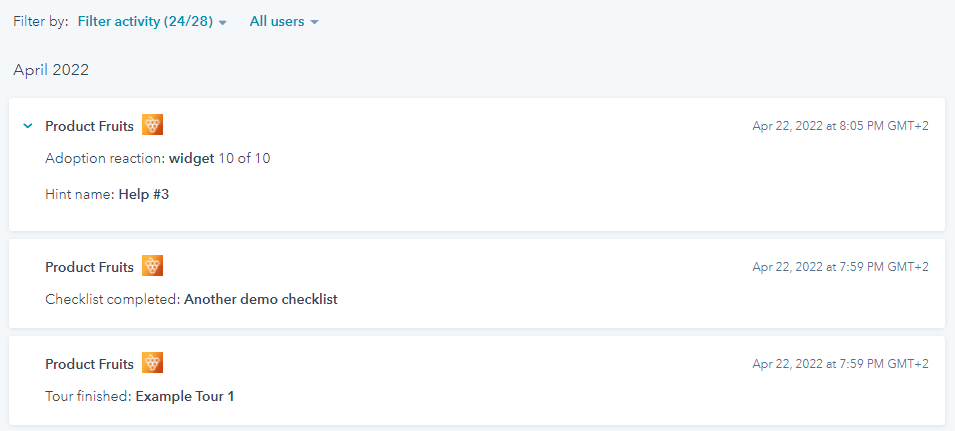
- Adoption reaction - Triggered when a user submits feedback through the Adoption meter feature (includes the tag, rating on a scale of 10, and information about which tour/hint prompted the reaction)

'username' and 'email' fields when setting up HubSpot integrations. Using different values may result in data inconsistencies under certain conditions.
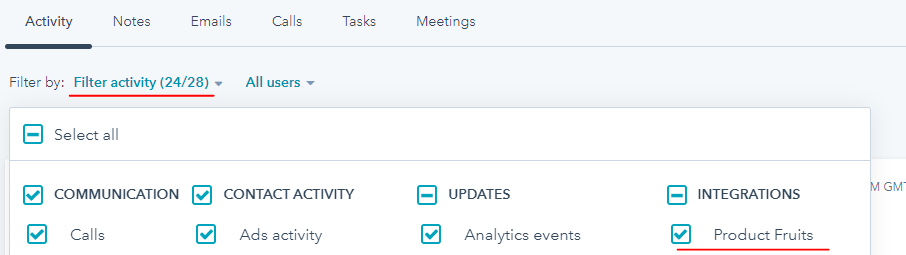
To see events in HubSpot, open a contact detail and select Product Fruits in the dropdown filter.
An example of an existing timeline:
HubSpot to Product Fruits Integration
Syncing information from your HubSpot contacts to your Product Fruits users enables content segmentation based on HubSpot contact data. The email field serves as the key identifier used to match HubSpot contacts with Product Fruits users from your application.
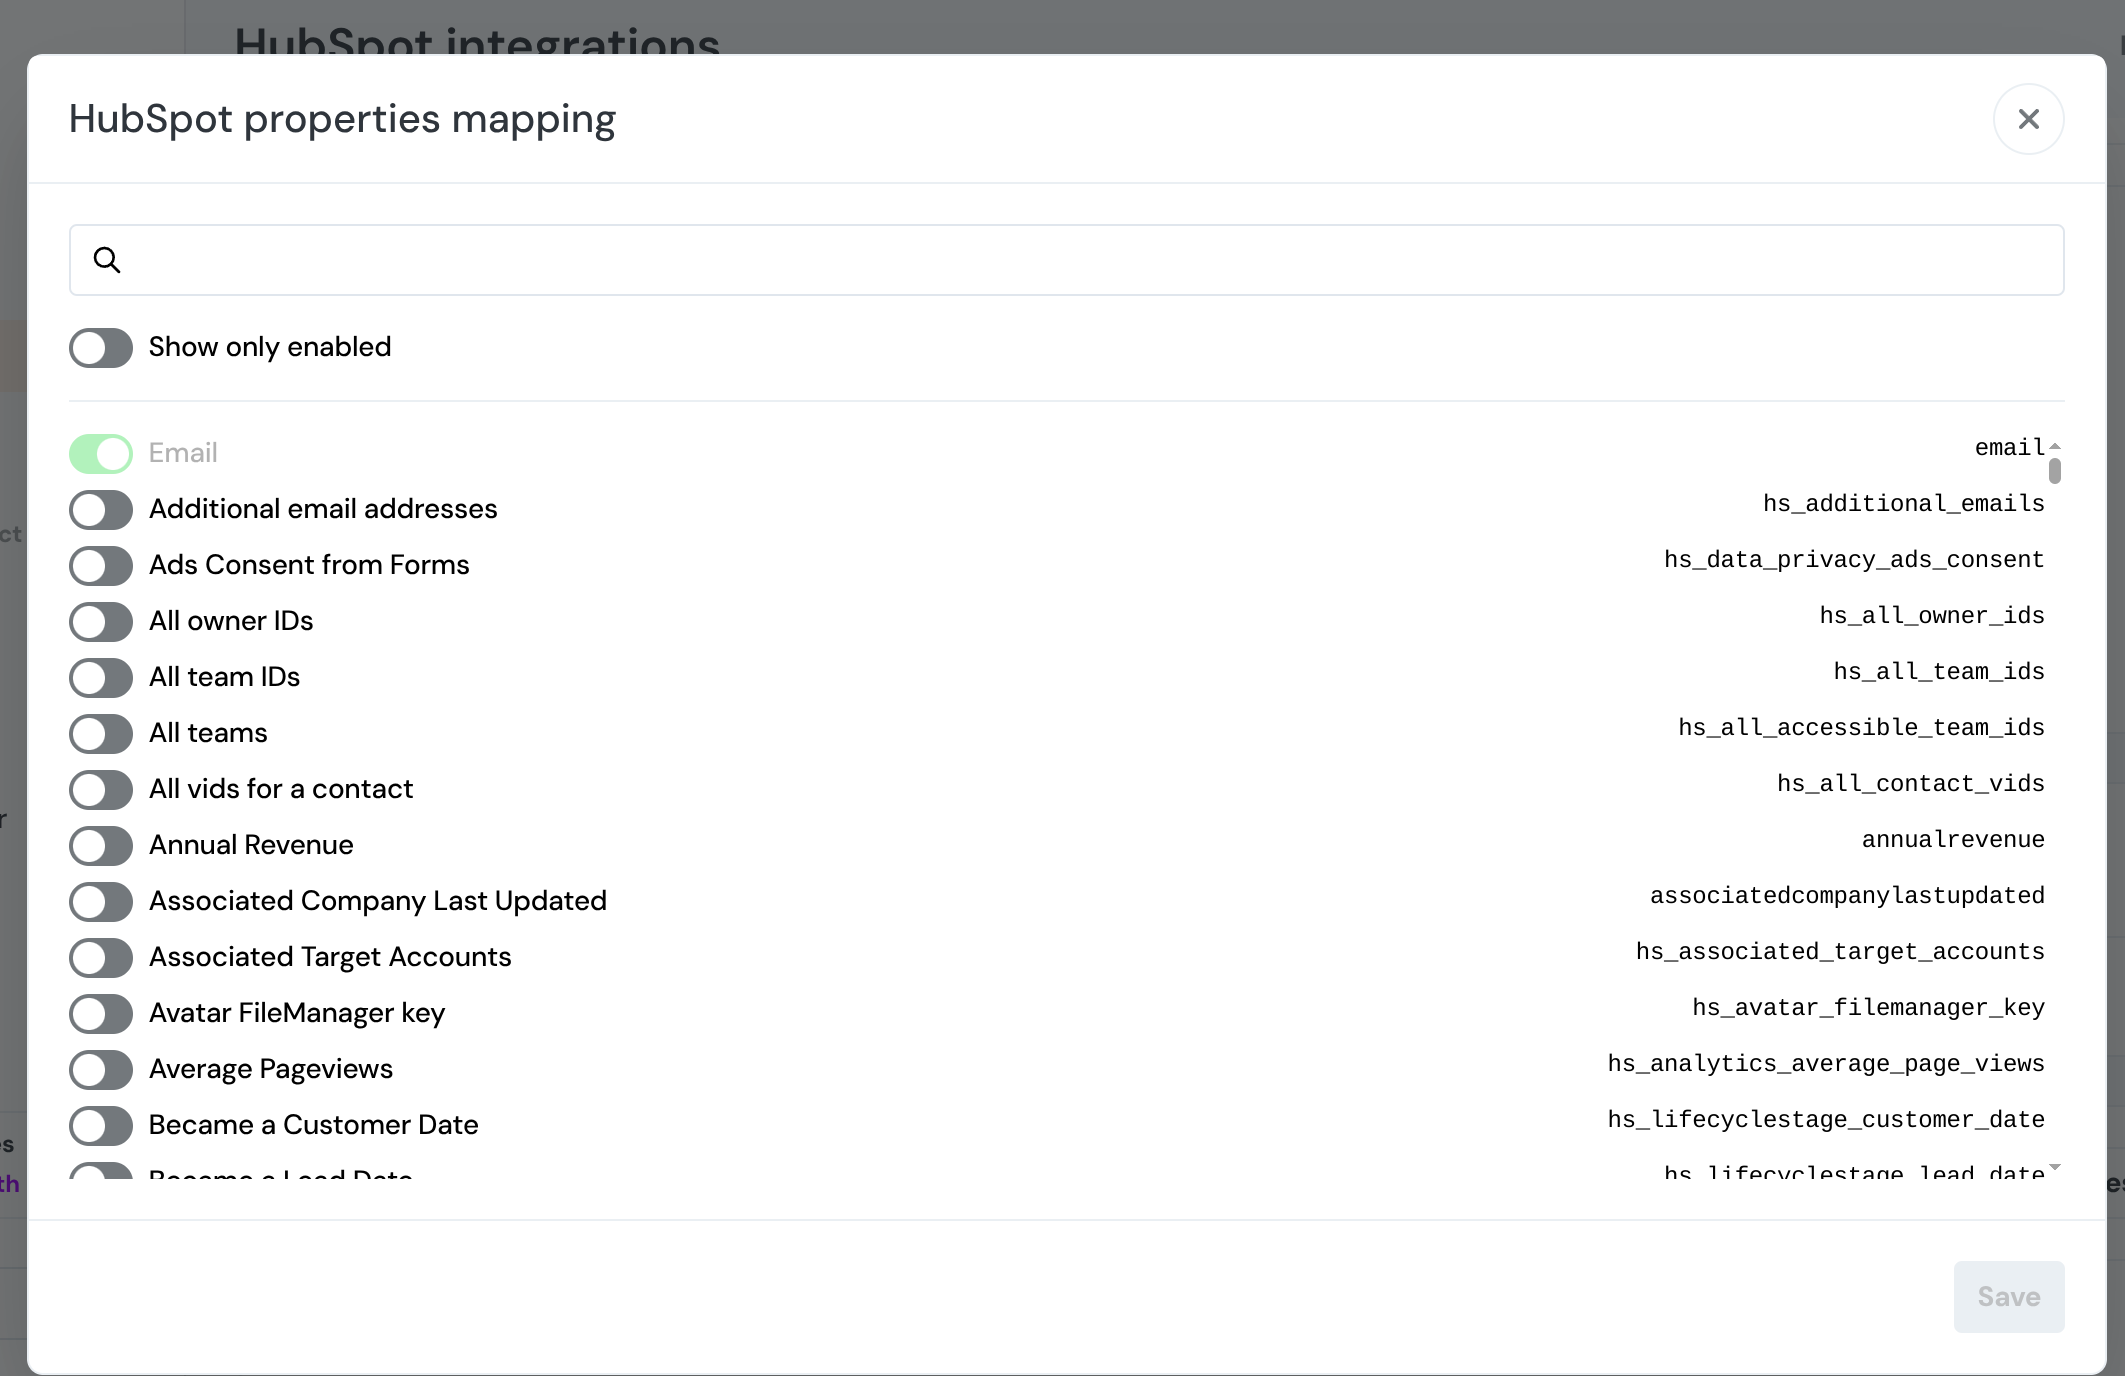
When you activate the HubSpot contact sync feature, the system will display a comprehensive list of available HubSpot CRM contact properties. You can toggle on the specific properties you want Product Fruits to receive from your HubSpot contacts.
This integration allows Product Fruits to access selected contact data from HubSpot, which you can then use as criteria for targeting and segmenting your in-app content.
Marketing Enterprise Integration
The Enterprise-level integration allows for a greater number of events to be sent. An exhaustive list of data fields that can be passed to HubSpot is available here.
There are two ways to map events between Product Fruits and HubSpot:
Creating Events in Product Fruits
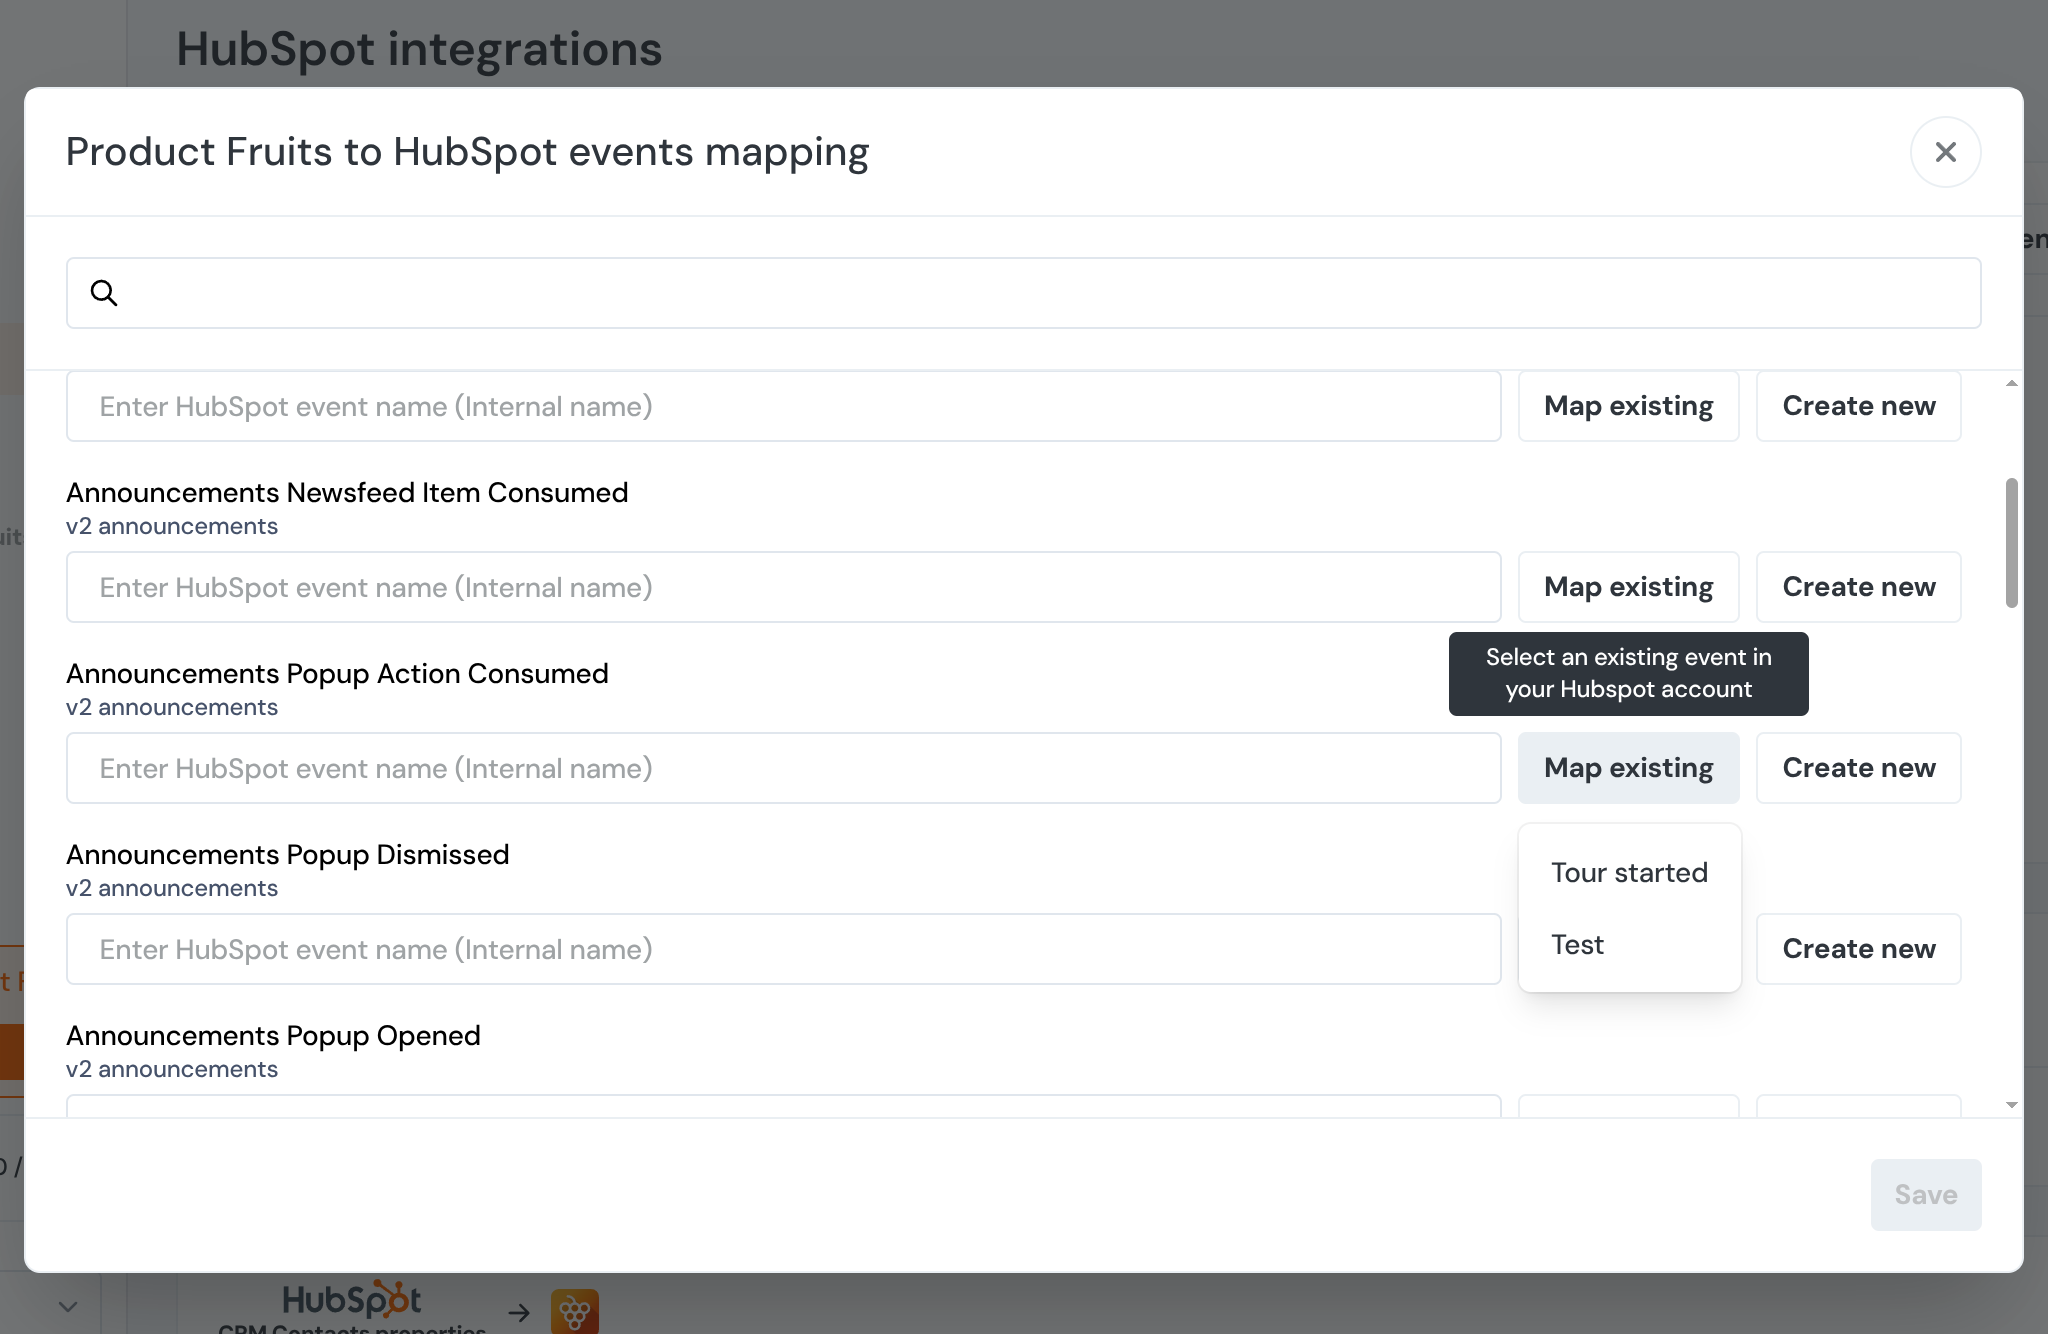
After activating the HubSpot integration, you'll need to map specific events between the two platforms. To do this, locate and click on the Event mapping button positioned next to the Deactivate one.
From the dropdown menu that appears, select the type of event you want to track (eg. Tour started). Once you've selected your desired event, click the Create new button. The system will automatically generate a unique event ID for this mapping.
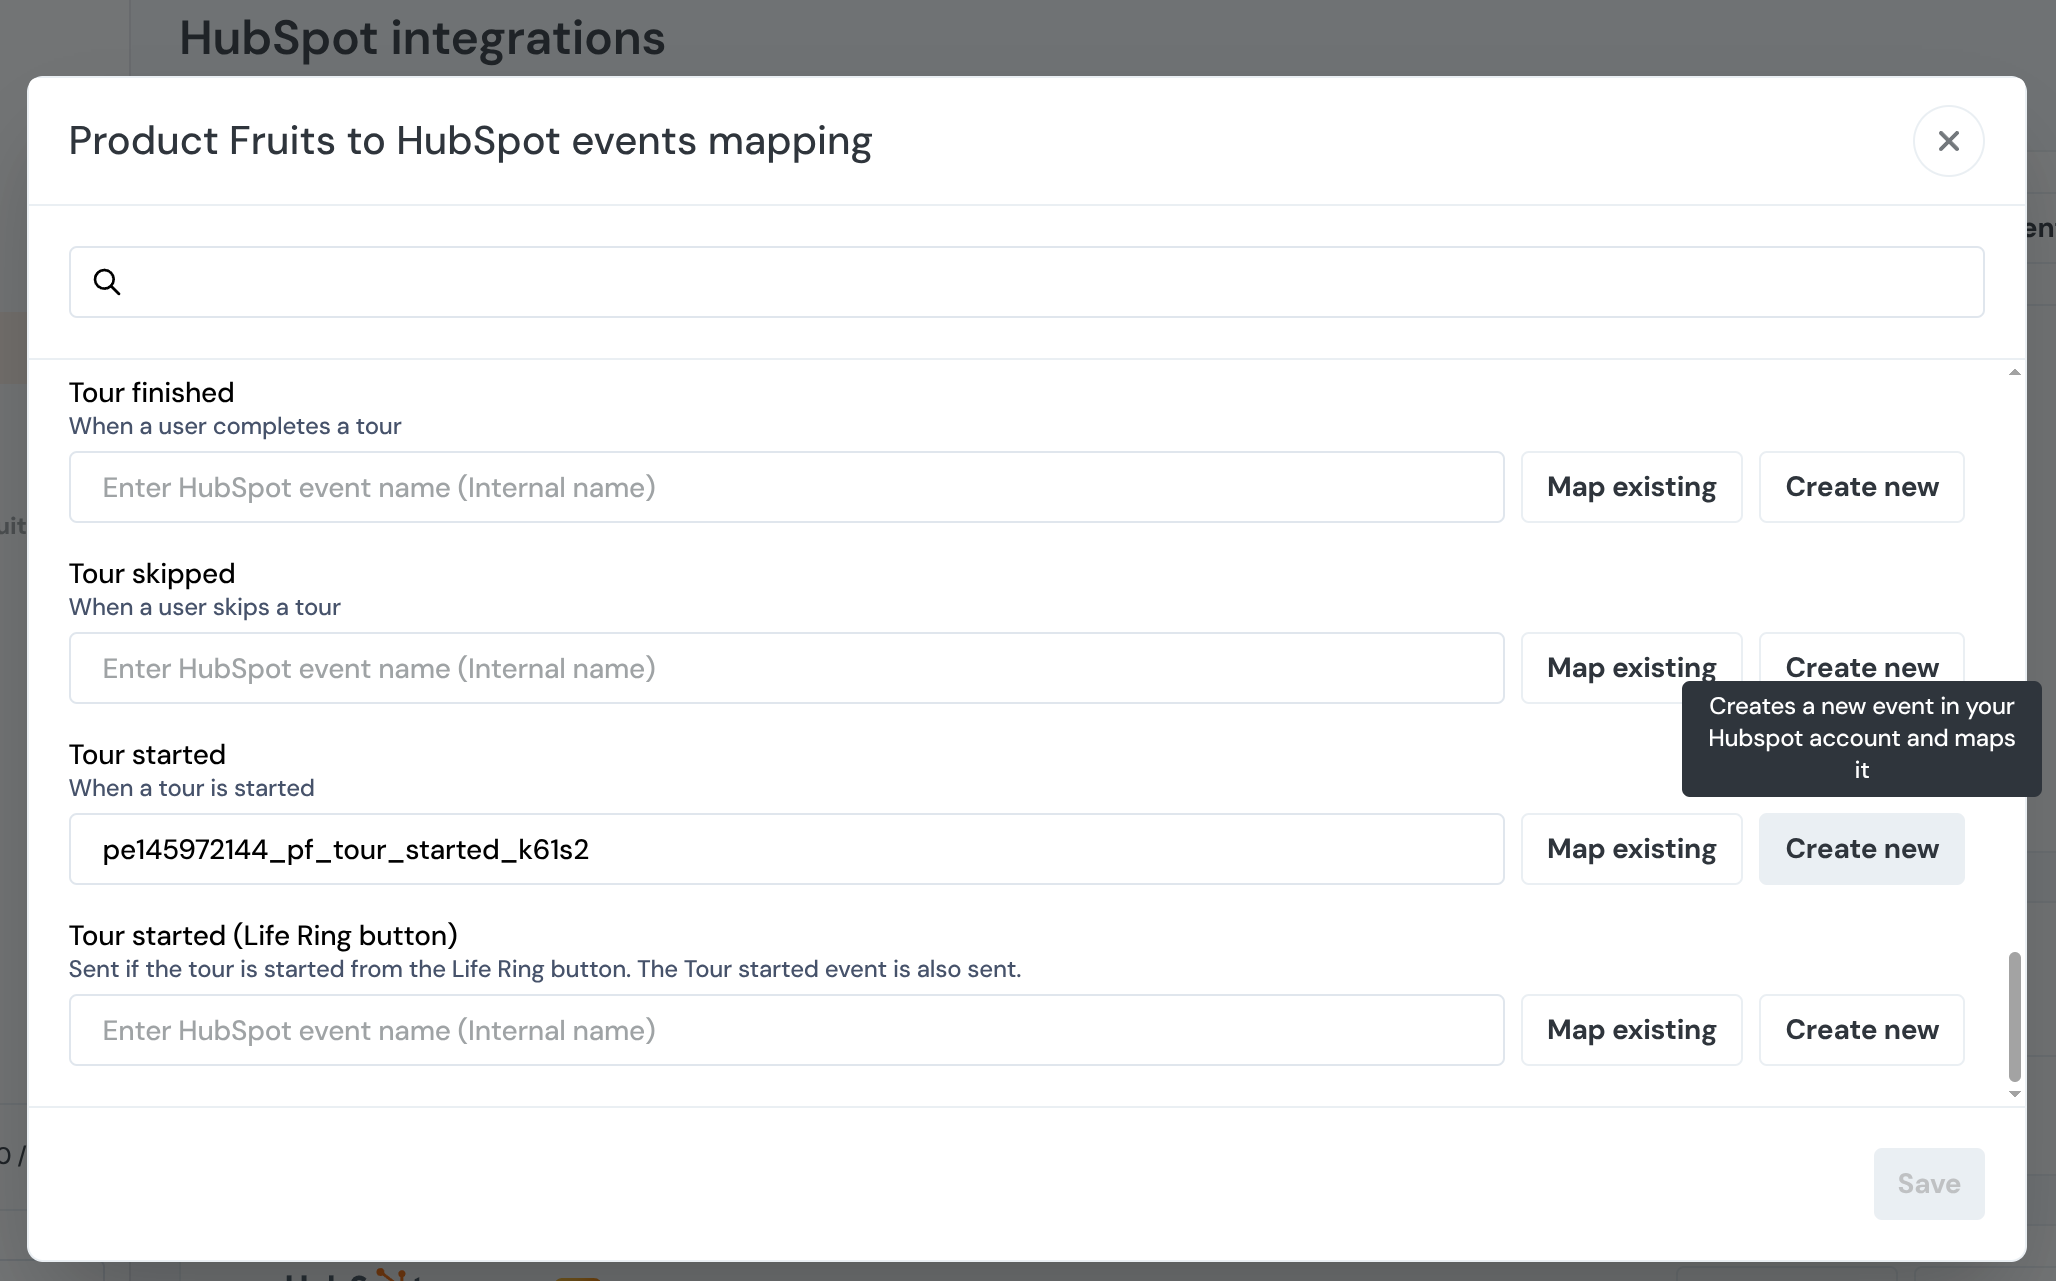
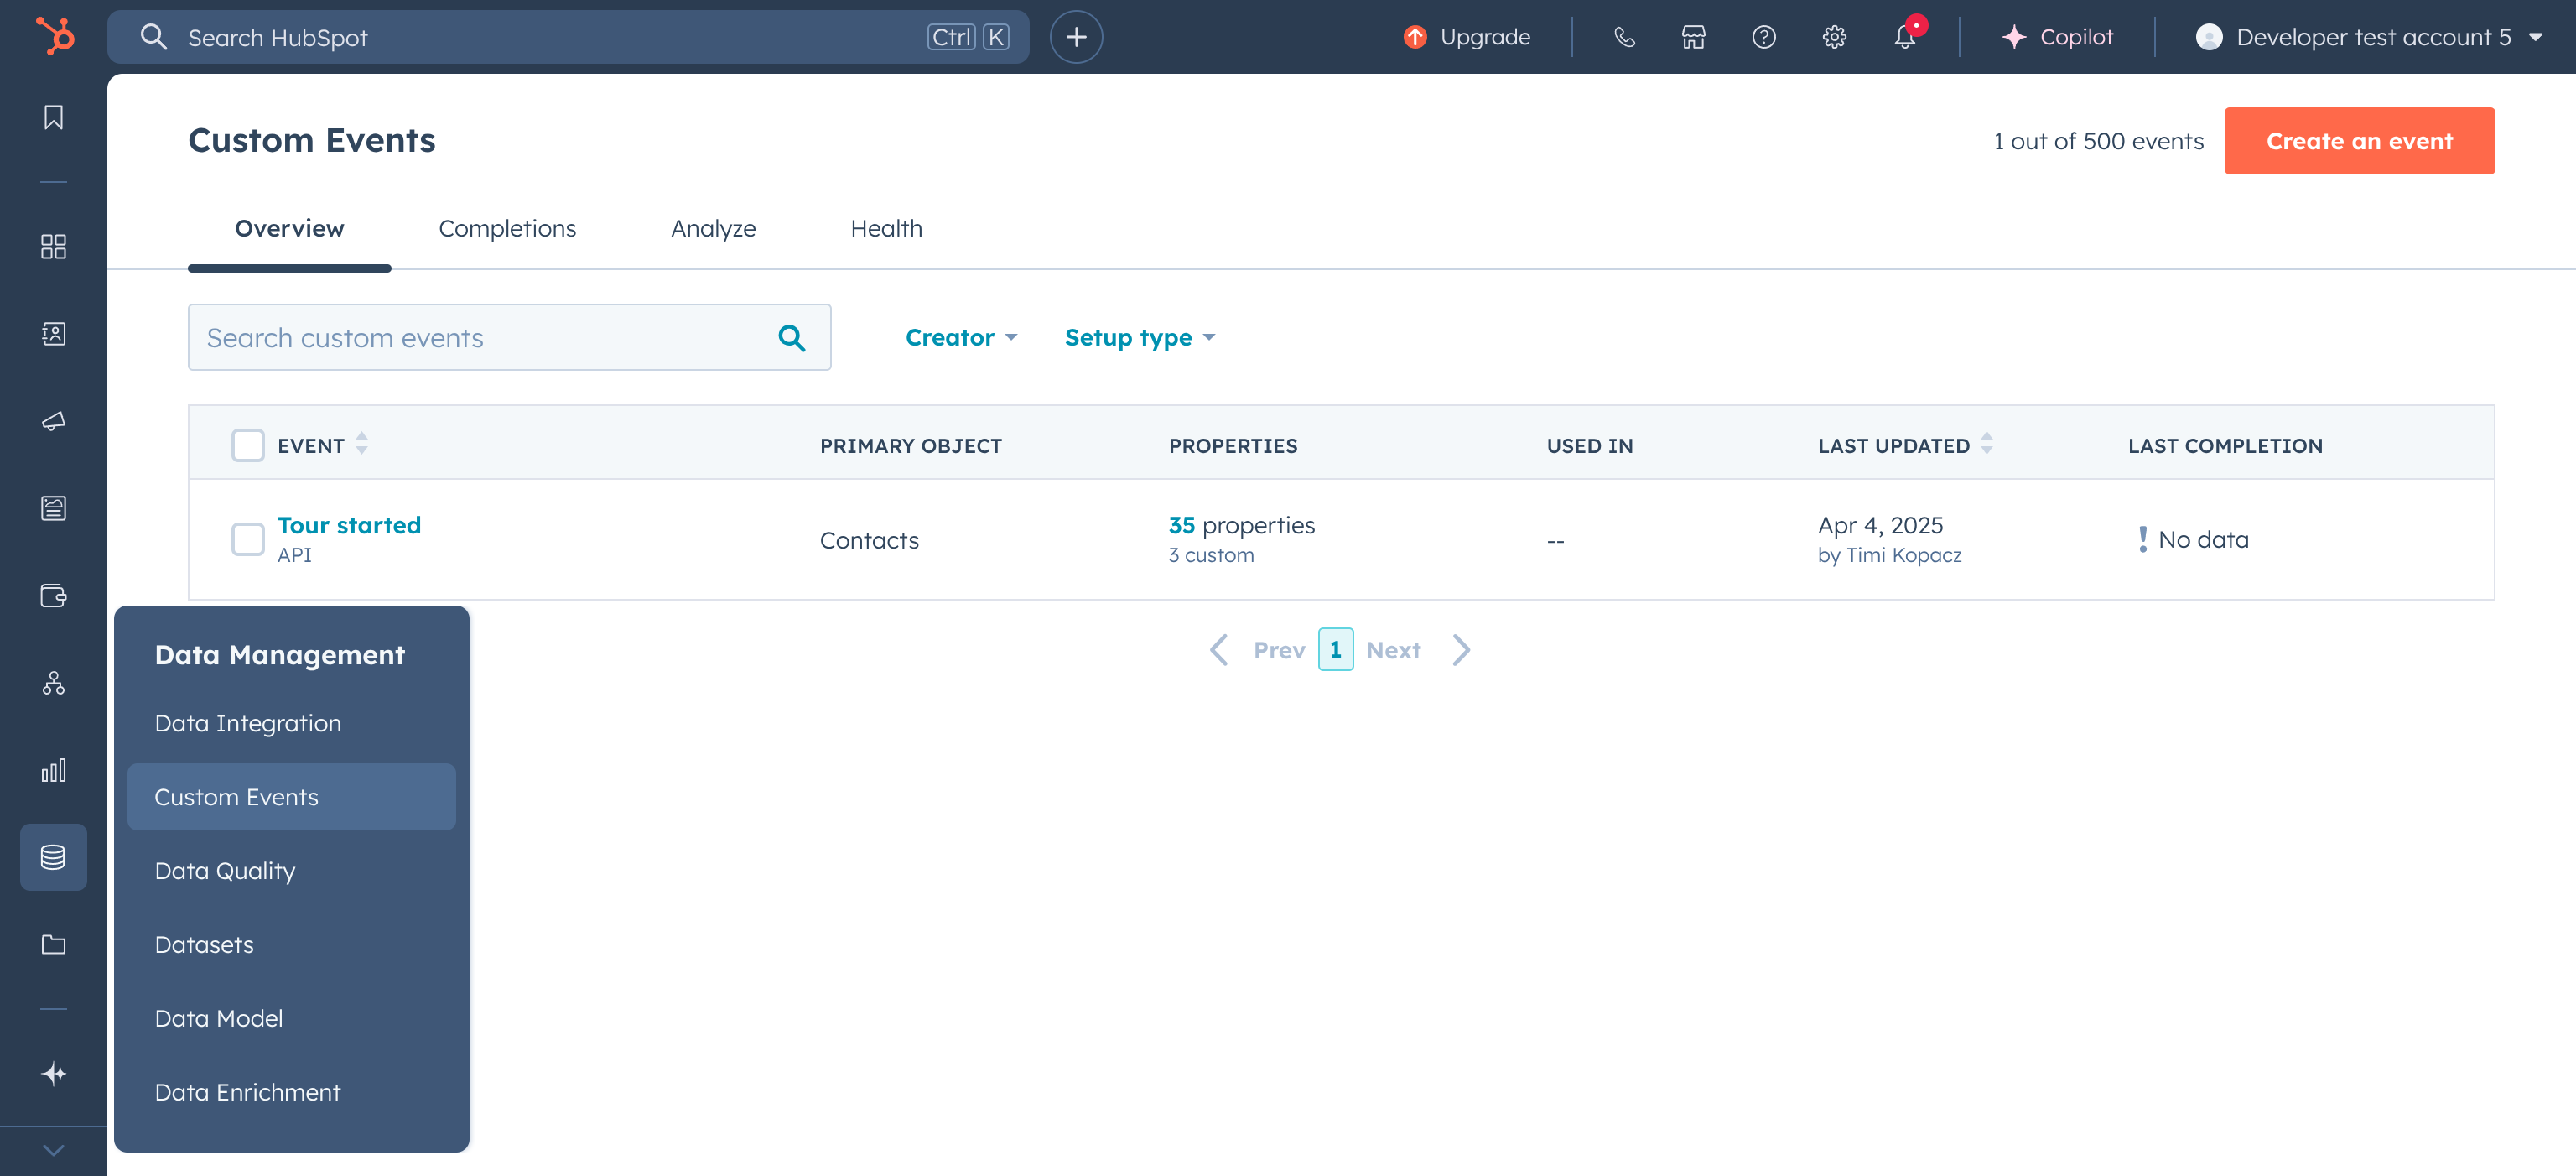
To verify that the event has been properly created and mapped, you can navigate to the Custom events section within your HubSpot account. There, you should see your newly created event listed and ready to receive data from Product Fruits whenever the specified action occurs in your application.
Creating Events in HubSpot
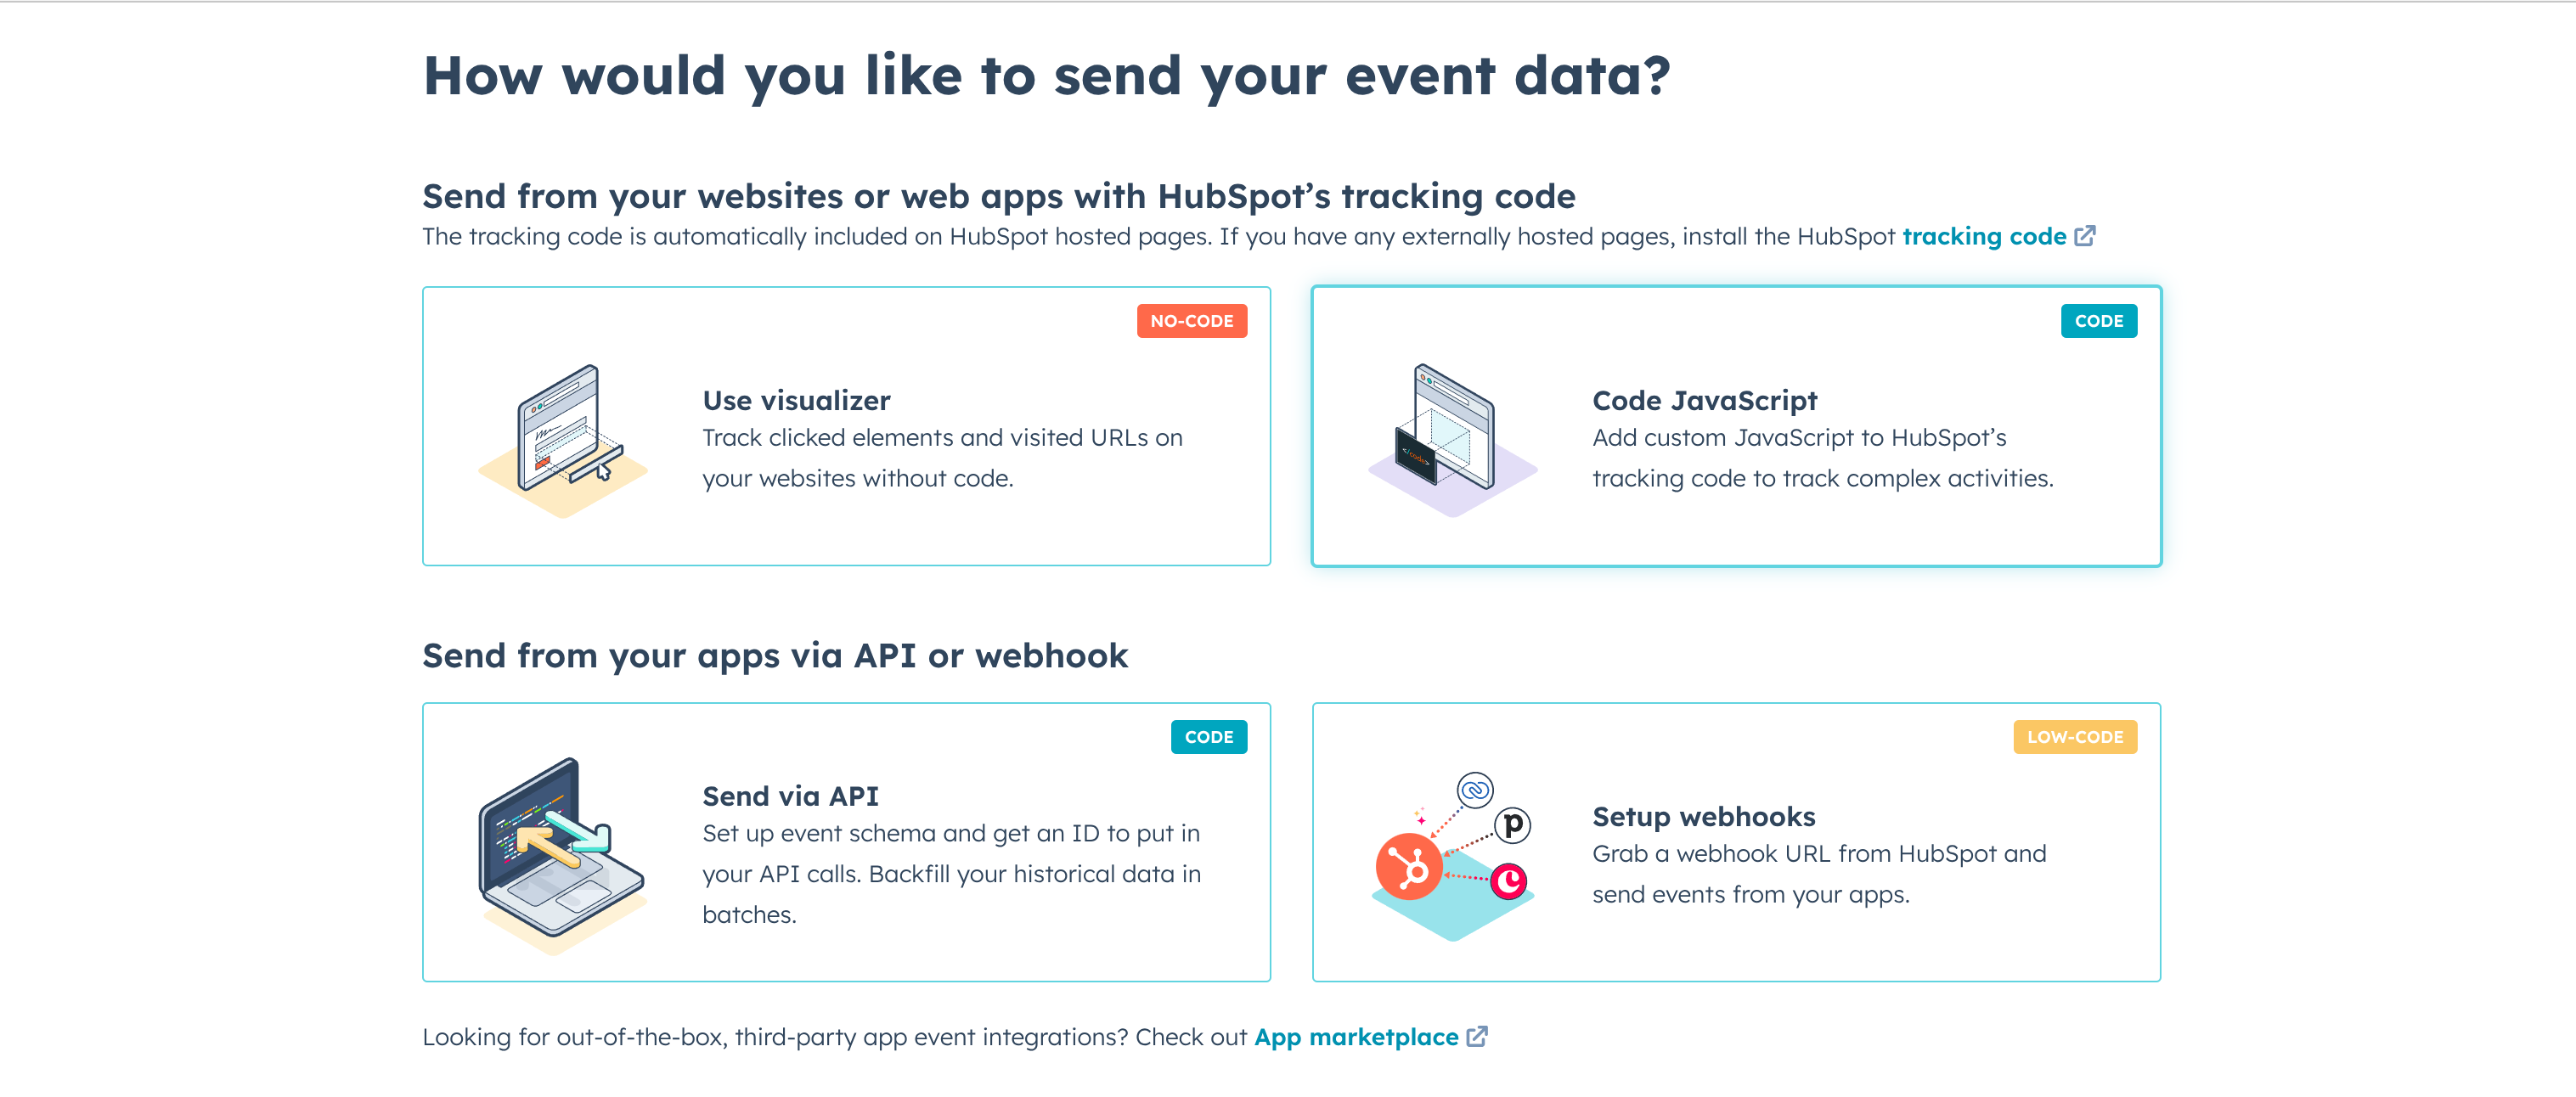
Start by navigating to the Custom Events section in your HubSpot account. Click on Create an event. During the creation process, HubSpot will ask how you plan to send event data. Select the "Code JavaScript" option from the available choices. Give your event a descriptive name that clearly indicates what action it will track.
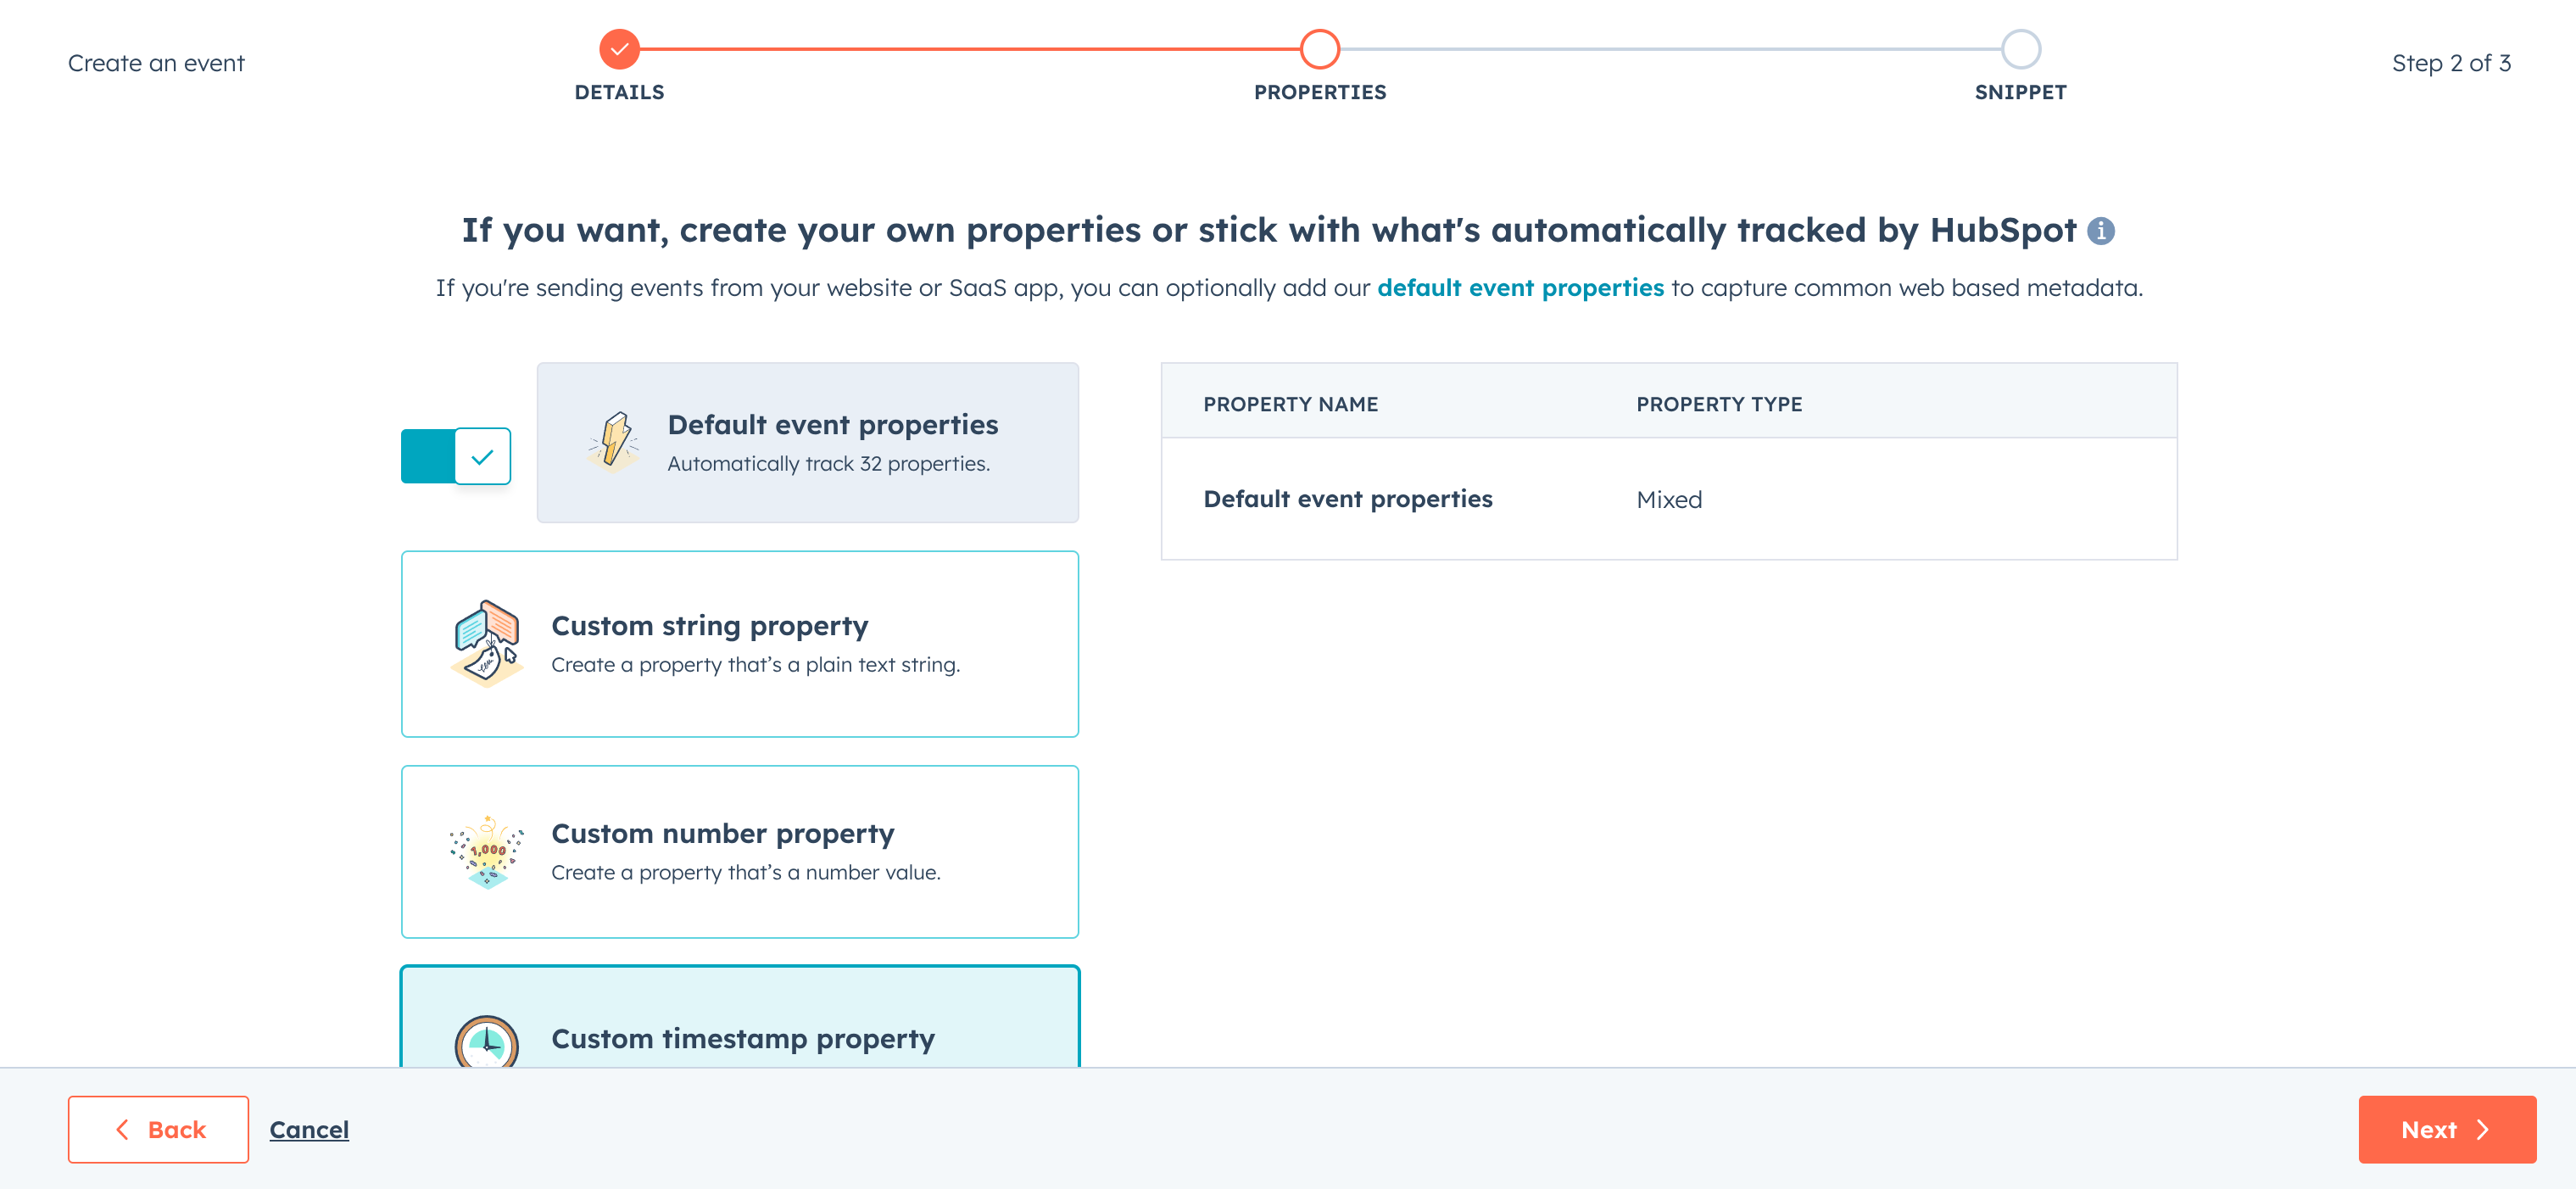
At this point, you have two options for properties: you can create your own custom properties to track specific data points, or you can use the standard properties that HubSpot automatically tracks. Make your selection based on your specific needs, then save your event.
After saving, go back to the Custom Events section in HubSpot and find the event you just created. Click on it to view its details. Look for and copy the Internal name (event ID) - this is the unique identifier you'll need.
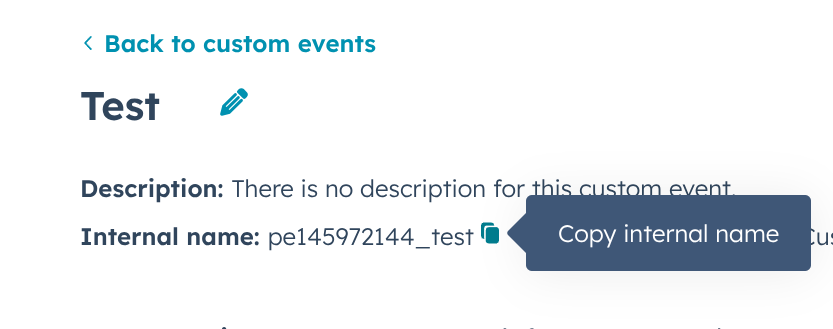
Now return to Product Fruits, go to the HubSpot integration settings, and paste this event ID into the appropriate text field. This connects the HubSpot event to Product Fruits.
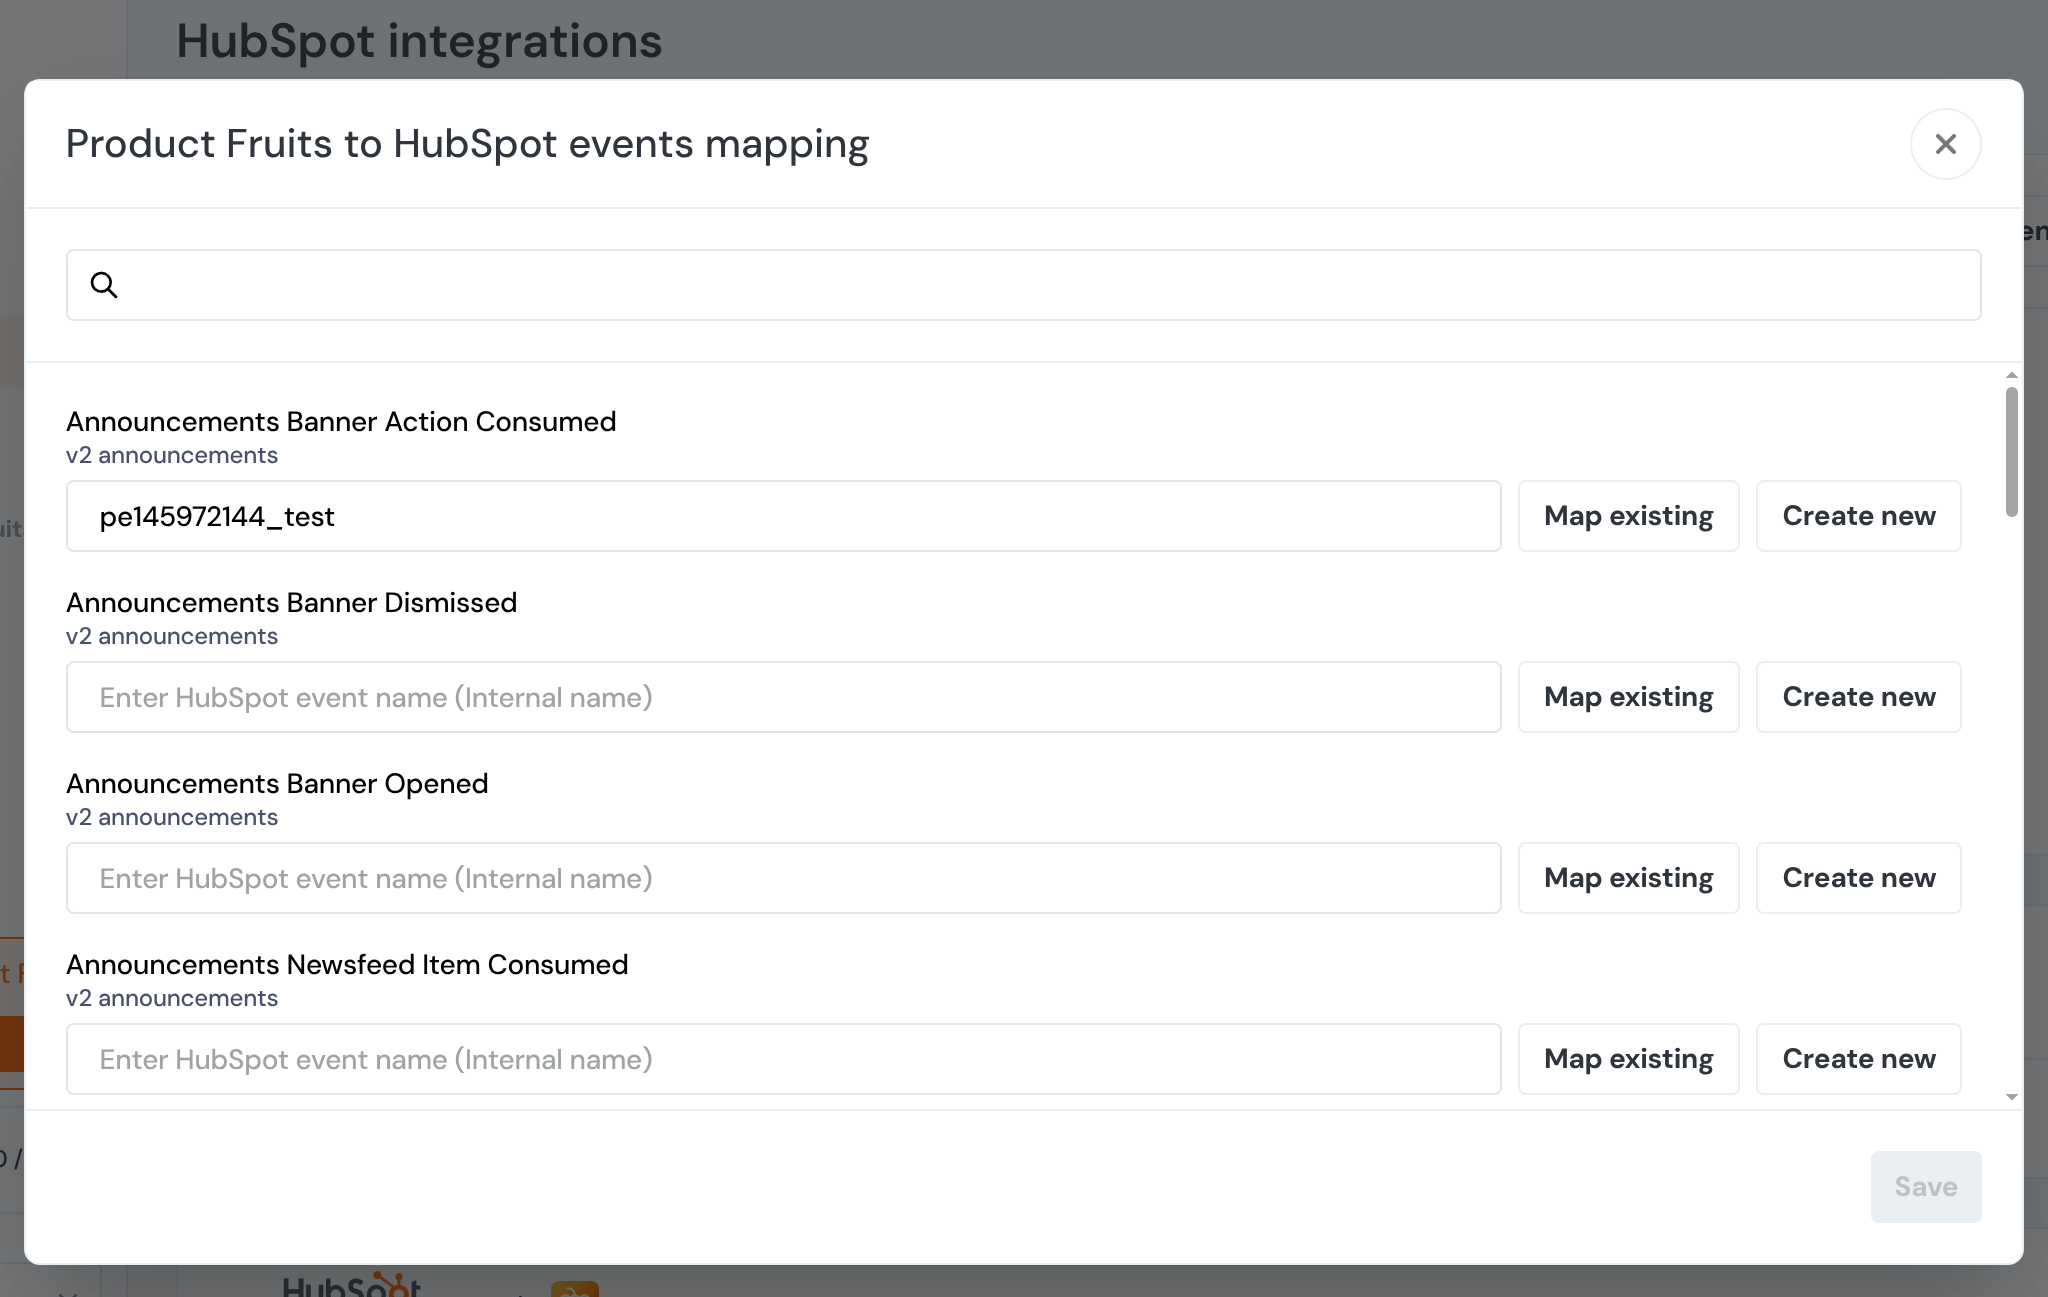
You can also select existing events from the dropdown list in Product Fruits, which will display all available events from your HubSpot account.