Banners Overview
Introduction
Banners are versatile UI elements that deliver important updates and highlight new features without disrupting the user experience. Whether positioned at the top or bottom of your app, they’re perfect for announcing product launches, sharing maintenance notifications, or promoting sales. Our redesigned banners allow you to adjust colors, sizing, and placement, add images or videos, and even incorporate gradients, badges, and flexible border styles for a truly polished look.
With built-in AI content generation, crafting impactful text is as simple as providing a few characters, and real-time previews ensure your message looks great on both desktop and mobile. You can easily fine-tune button styles, drag and drop elements for custom layouts, and integrate banners alongside popups or a Newsfeed to create seamless, in-product communication. From sleek, minimalistic designs to visually rich displays, our banners empower you to deliver announcements quickly, effectively, and beautifully.
How to Create a Banner
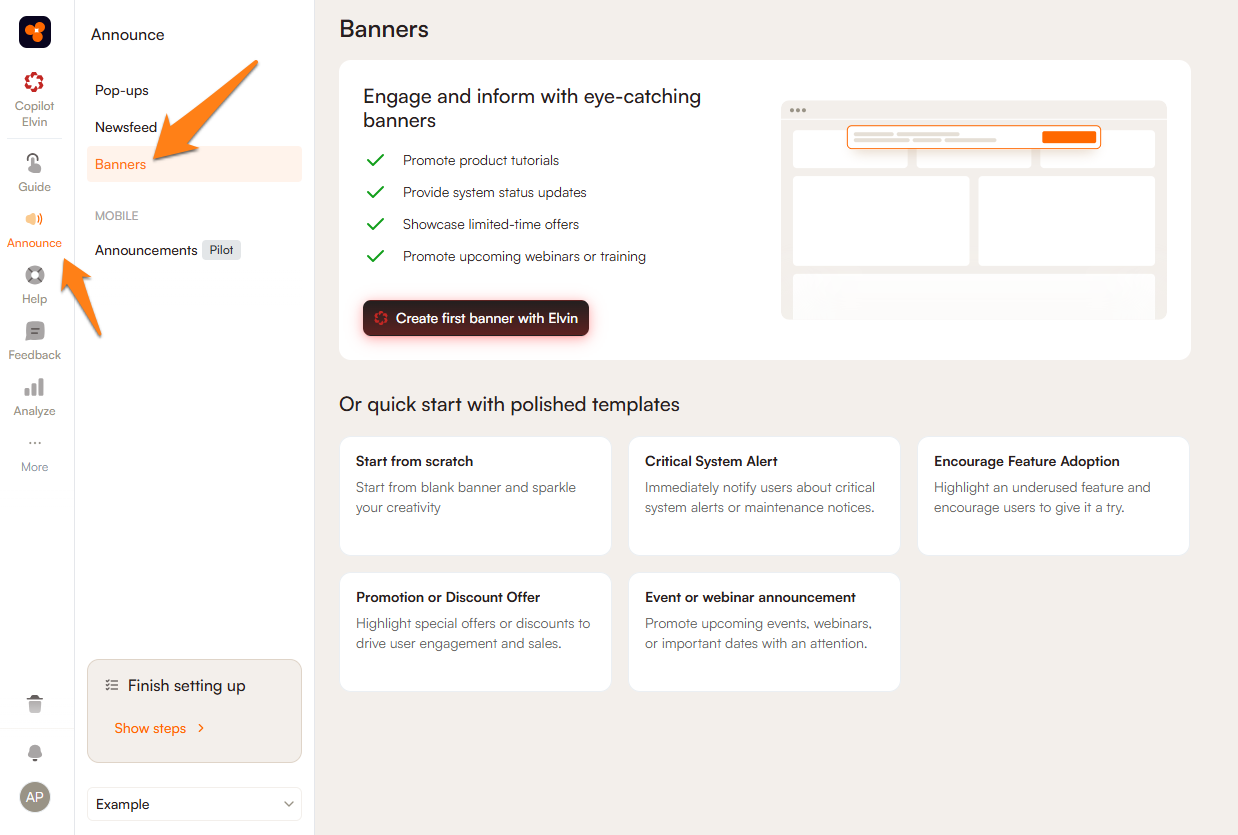
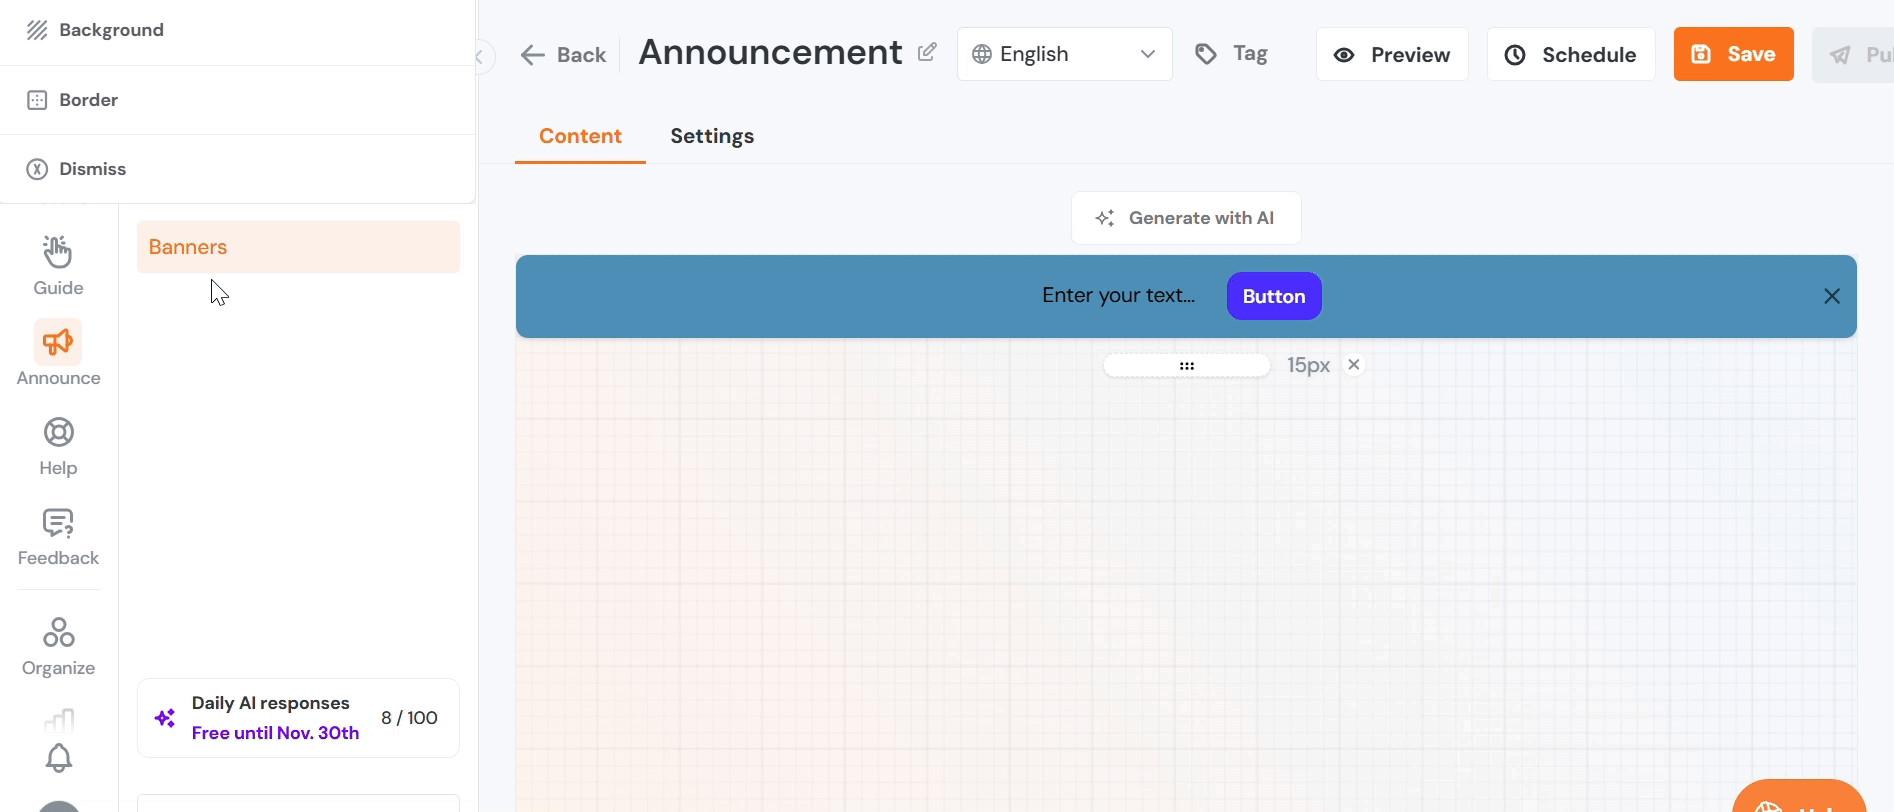
To create a banner, navigate to the Announce section of Product Fruits and select Banners.
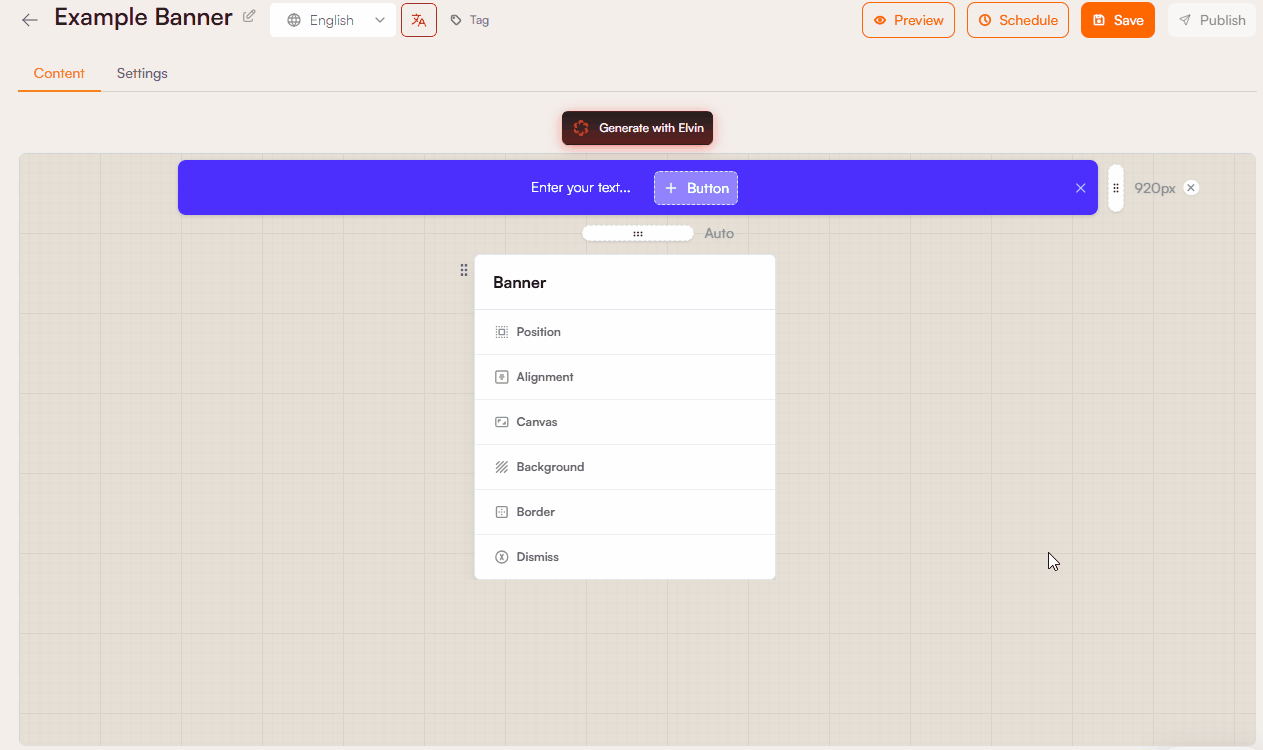
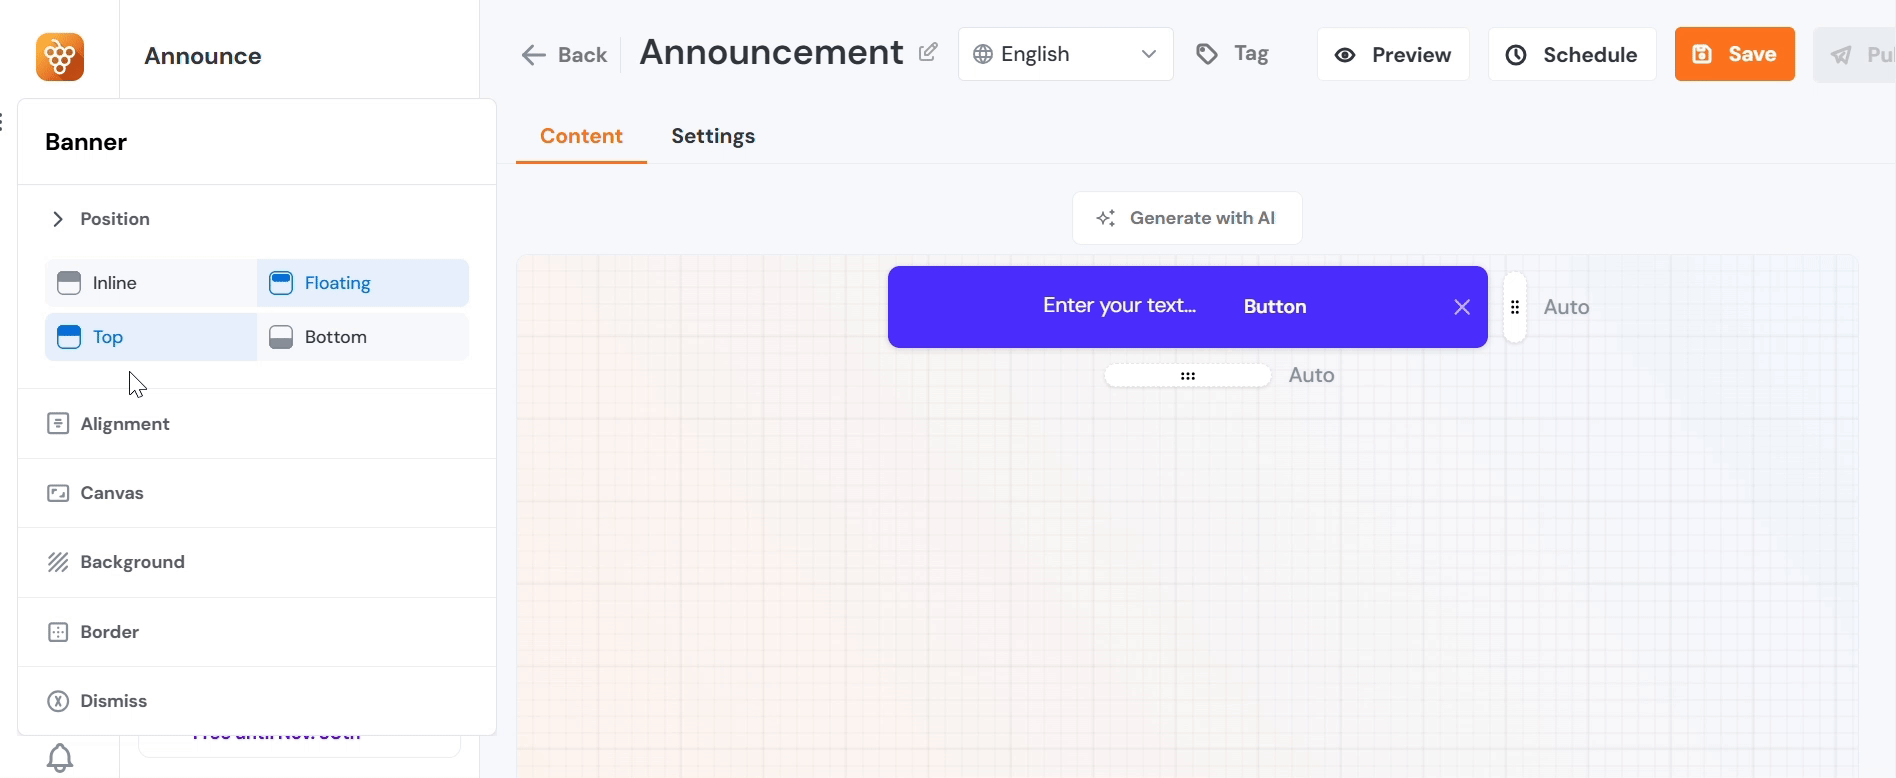
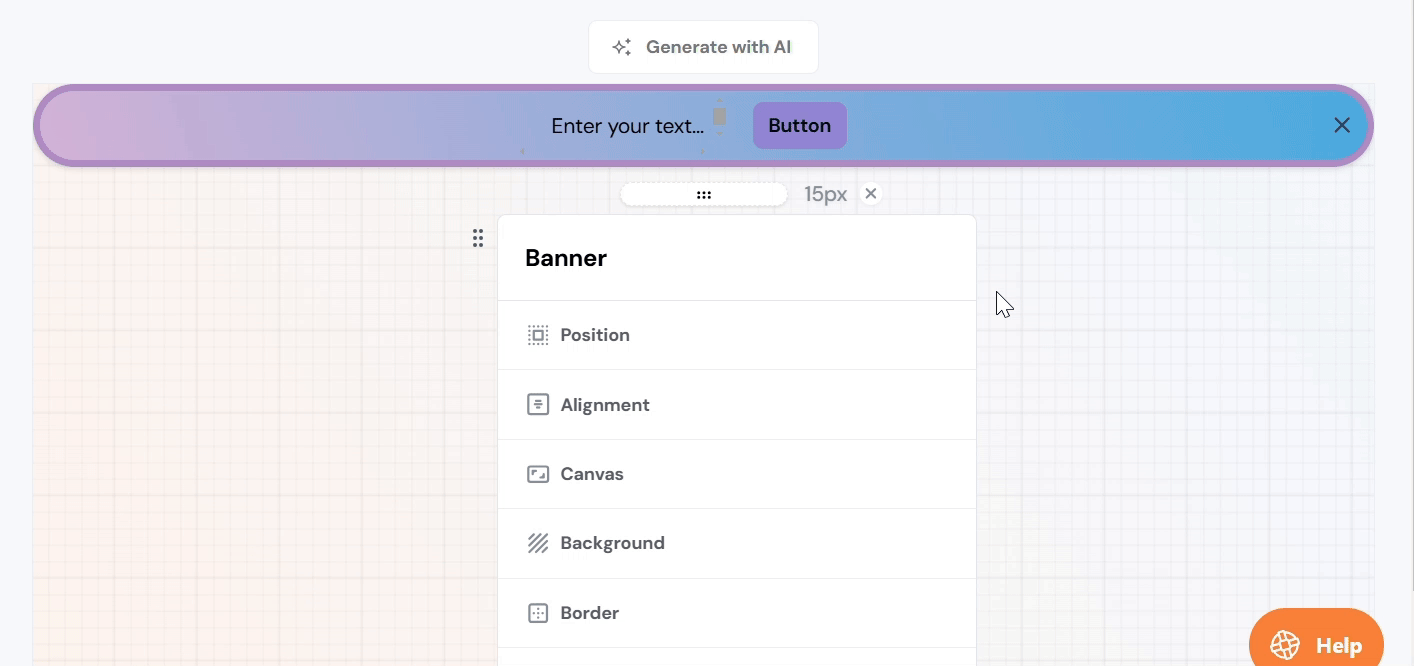
When creating a banner, you’ll find that the editor is divided into two tabs: Content and Settings. The Content tab provides options for customizing the banner’s style, appearance, and content, while the Settings tab enables you to define triggers and configure targeting parameters.
Content
Editor
The settings panel in the banner editor is draggable, allowing you to move it freely to ensure it doesn’t obstruct your workspace. This flexibility ensures a smoother editing experience, especially when working on complex banner designs.
AI
If you’re unsure how to create an impactful banner, the integrated AI can assist. Simply provide a minimum of 11 characters, but for more precise results, try to be as descriptive and detailed as possible. Once your prompt is ready, click Generate, and the AI will create an announcement text for your banner.
The generated text will automatically appear as a preview, allowing you to see exactly how your content will be displayed across both web and mobile devices. You can regenerate the content based on your provided prompt, allowing the AI to attempt a new result. You can choose to accept the outcome or dismiss it, which will delete your prompt.
Translate a Banner with AI
The banner translation feature is included in the Pro plan and above. Keep in mind that translations count toward your plan's total translation limit, and only languages set up for your application are available. See our pricing page for more details on your plan.
Before translating a banner, make sure you have at least a second language configured for your application. Haven't done this yet? Follow this guide.
Here's how to translate a banner:
- Open the banner you want to translate.
- Click Translate next to the current language.
- Choose your target language.
- Click Translate.
- Save the translation once it's ready.

Use the language dropdown to manage your localized versions.
Note that batch translation is not currently possible.
Banner Size, Position, and Style
Adjusting Size by Dragging
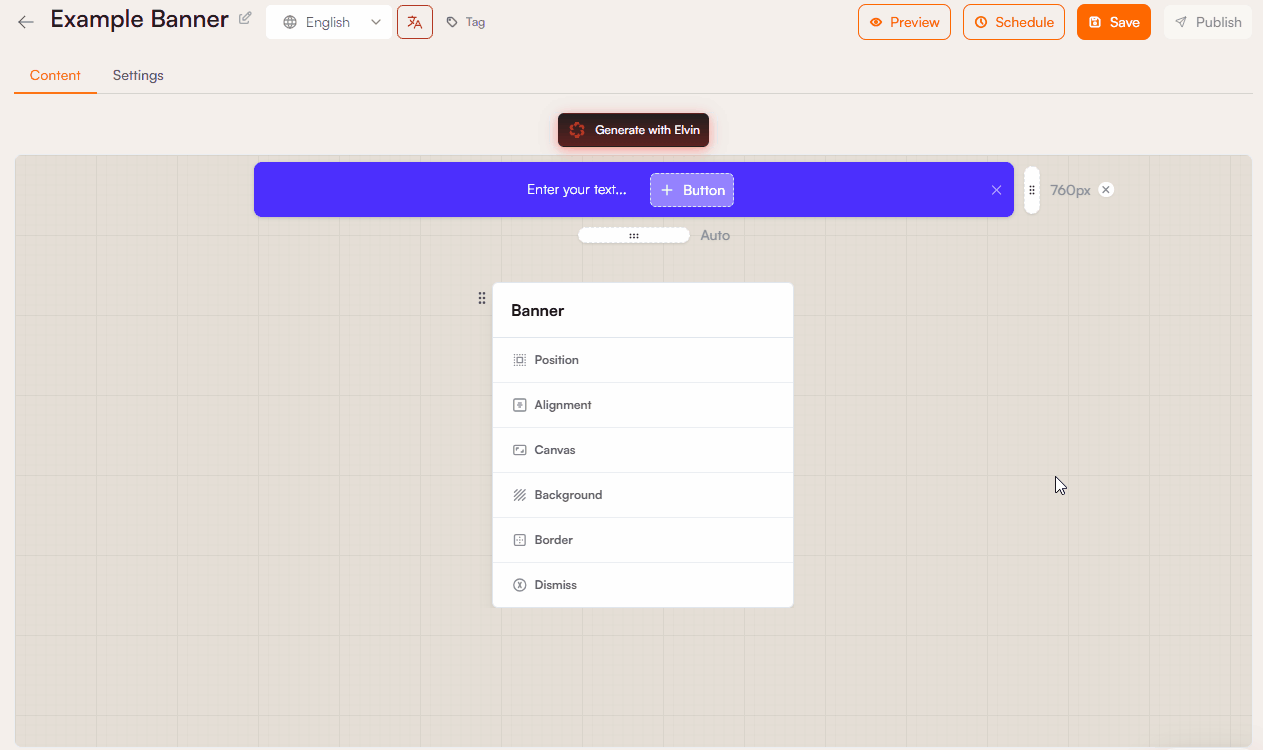
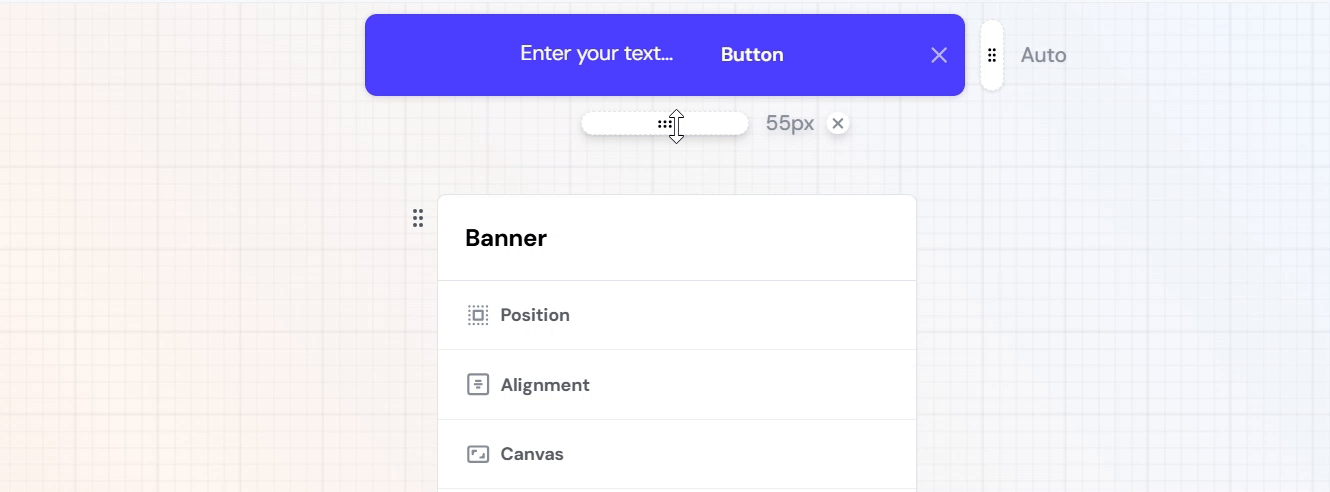
You can easily adjust the size of the banner by clicking and dragging its edges. Initially, the banner's size is automatically determined based on the content. Once you start resizing manually, the automatic size is overwritten. If you want to reset it to its original size, you can do so with a single click on the “X” next to the size controls.
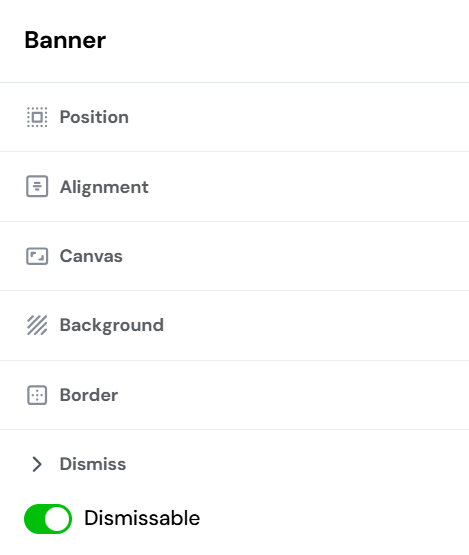
Position
You can configure the banner to appear either inline within the content or as a floating element that hovers above the page. Additionally, you can choose whether the banner will be positioned at the top or the bottom of the screen, giving you flexibility in how it interacts with your webpage layout and content.
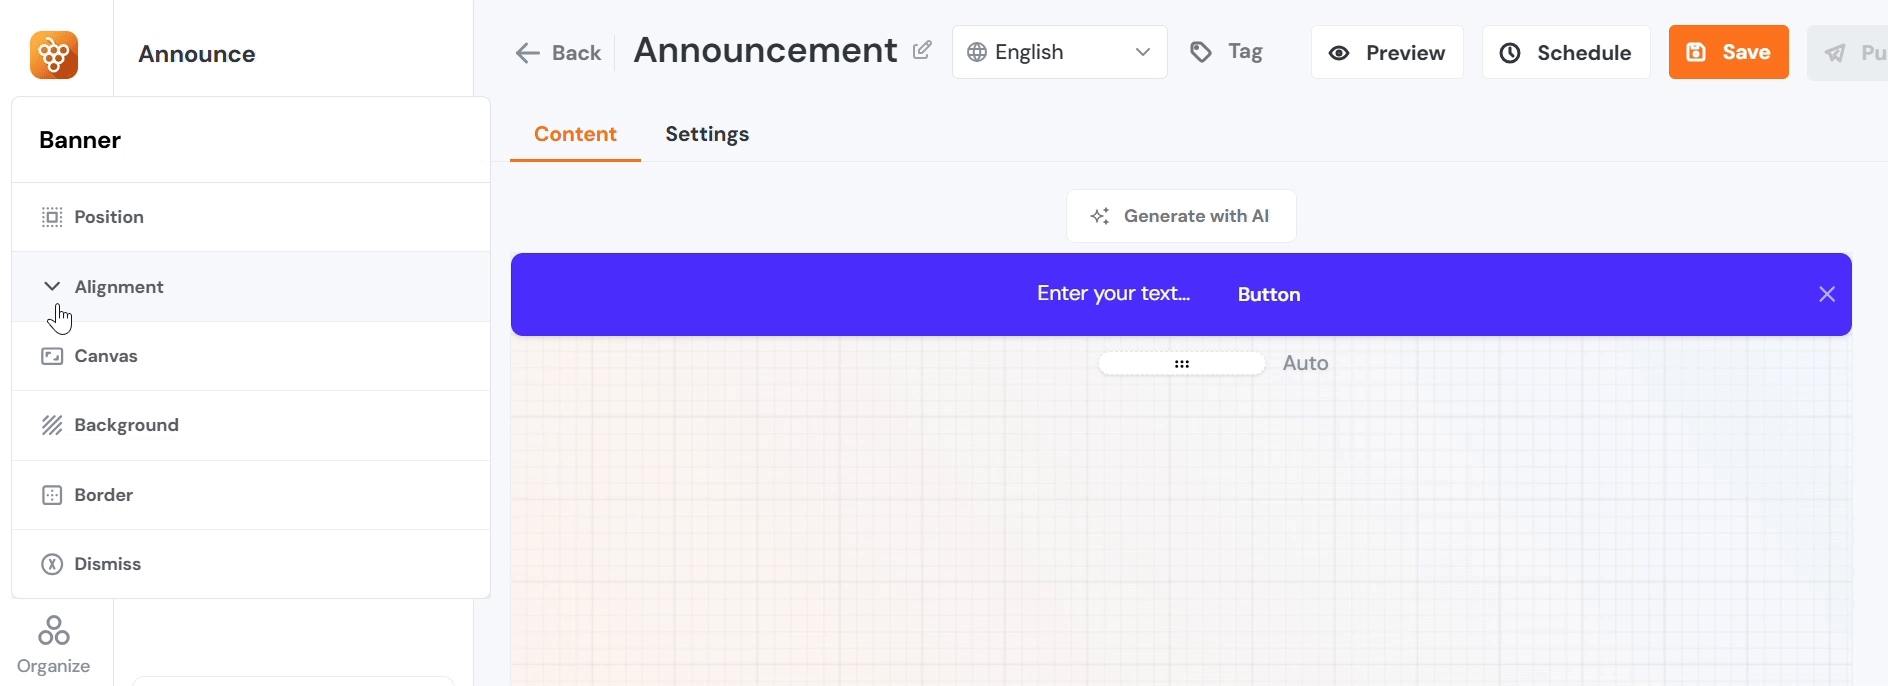
Alignment
The alignment option allows you to either center the banner within the screen for a balanced appearance or stretch it across the full width of the screen, allowing it to adapt to different layouts and ensure maximum visibility.
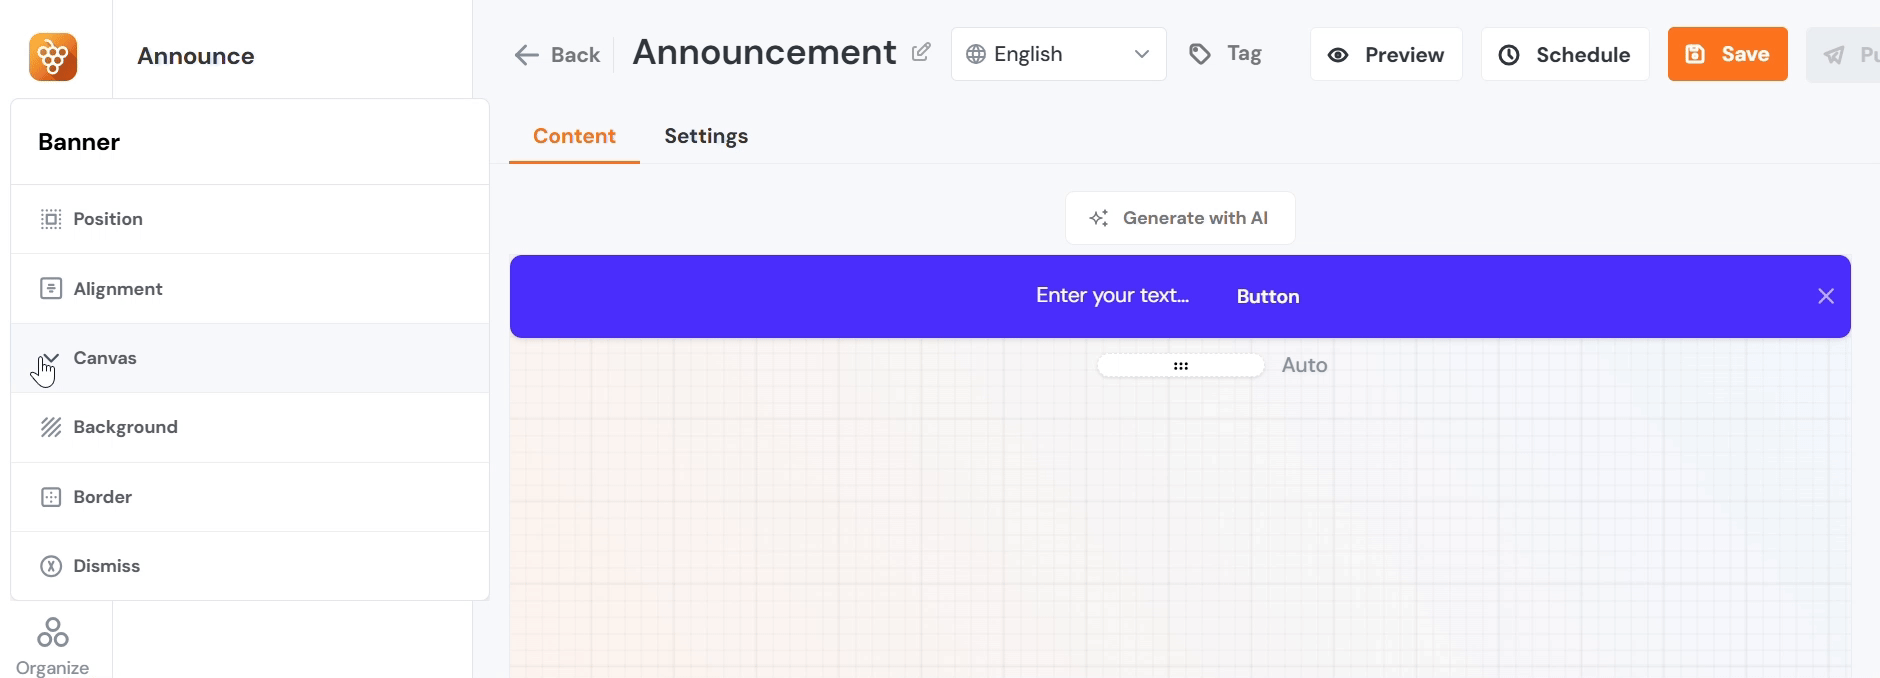
Canvas
In addition to dragging the edges of the banner to resize it manually, you can also set the exact dimensions by entering a specific pixel value for the height, allowing for more accurate sizing to fit your design requirements.
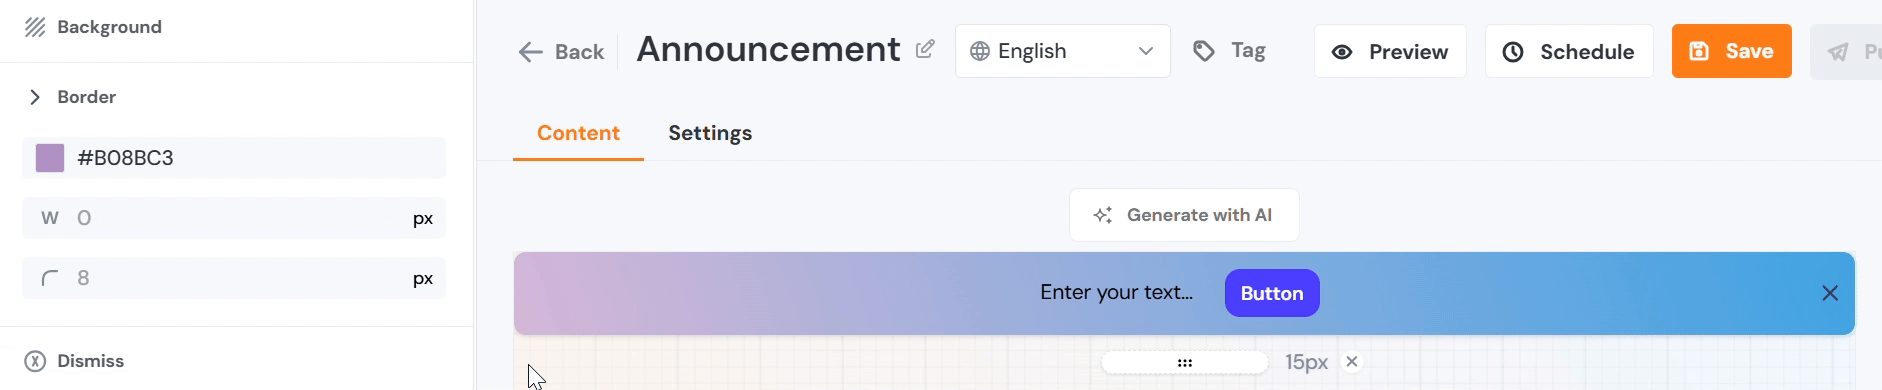
Background
The background option offers two choices: a solid color, which gives the background a monochrome appearance, or a gradient created with two shades. You can either use the color picker to explore how your banner would look with different colors or, if you prefer more control, you can enter the HEX code or RGB values for a precise match. You can set the angle of the gradient to control the direction in which the gradient flows.
Border
Customize the banner’s border by adjusting its color, width, and curvature. The width setting controls how thick or thin the border appears, while the curvature determines how rounded the corners are. This allows you to create a wide range of styles, from sleek, sharp edges with a thin border to bold, thick borders with soft, rounded corners, offering complete control over the banner’s visual appeal.
Dismiss
You can choose whether your banner should be dismissible. If enabled, an "X" will appear in the corner of the banner, allowing users to close it when they no longer need it. If you prefer the banner to remain visible, simply toggle this option off.
Content Placement and Elements
The editor allows you to position text and button almost anywhere within the body of the banner. In addition to text, you can insert a variety of elements into your banner
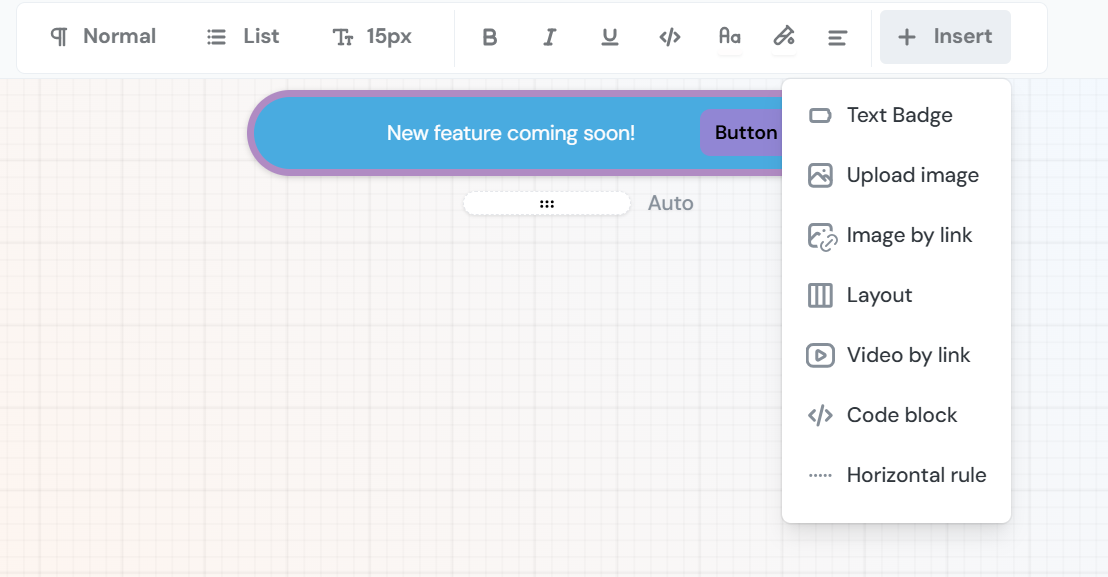
- Text Badges: Use these to highlight key messages or provide additional context.
- Images: Add visual elements to make your banner more engaging.
- Layouts: Divide the banner into structured sections, helping to organize your content. For example, you can create a two-column layout with an image on one side and text on the other.
- Videos: Insert videos via a link to deliver richer content directly in the banner.
- Code Blocks: Useful for displaying snippets of code or technical instructions.
- Horizontal Rules: Add dividing lines to visually separate different sections within the banner.
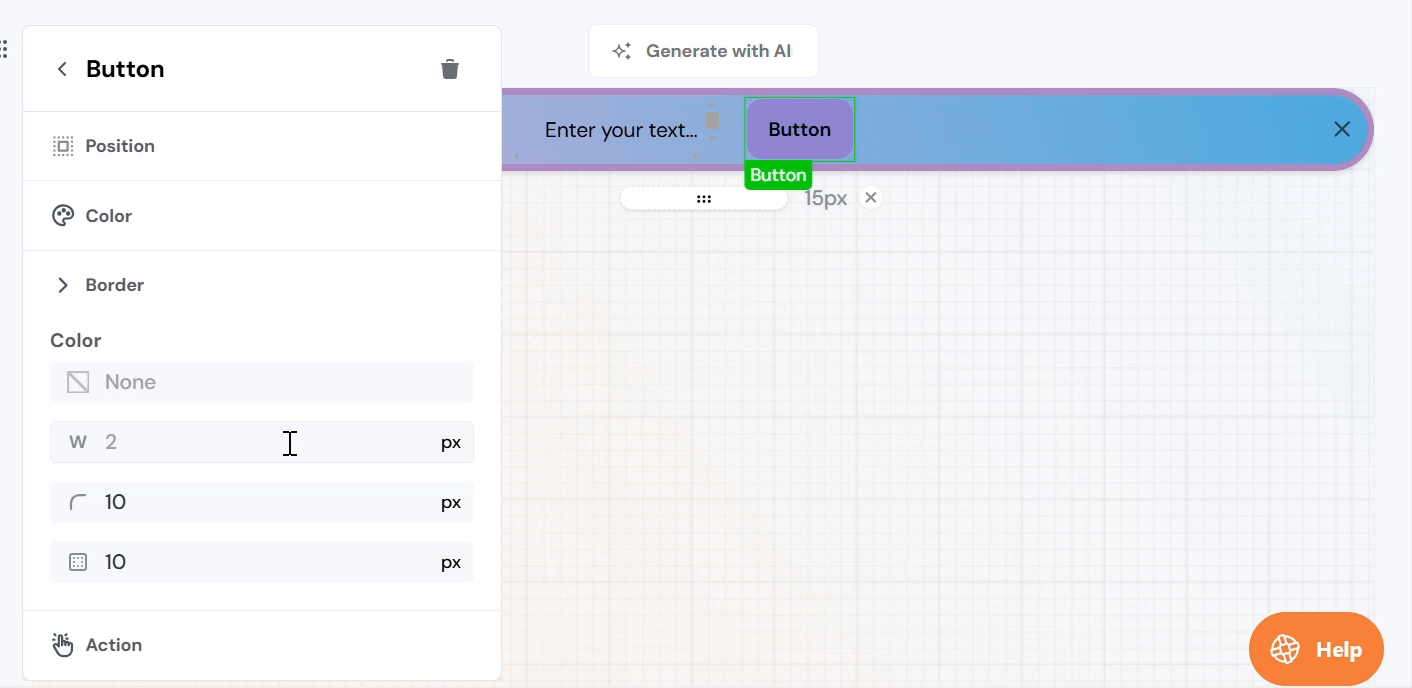
Button Customization
By clicking on the button within the banner, you can access its settings for further customization. Here, you can adjust the button’s appearance, including font, size, color, border style, and position. These options allow you to create a button that aligns perfectly with the banner’s design and functionality.
The border option, in addition to allowing you to set the width and curvature, also lets you adjust the relative position of the border within the banner.
Settings
In the banner settings, you can configure the Triggers, Targeting, and restart the banner for users in Admin tools. This is similar to other Product Fruits content except that announcements have New user behavior and an option to repeat the announcement a set number of times.
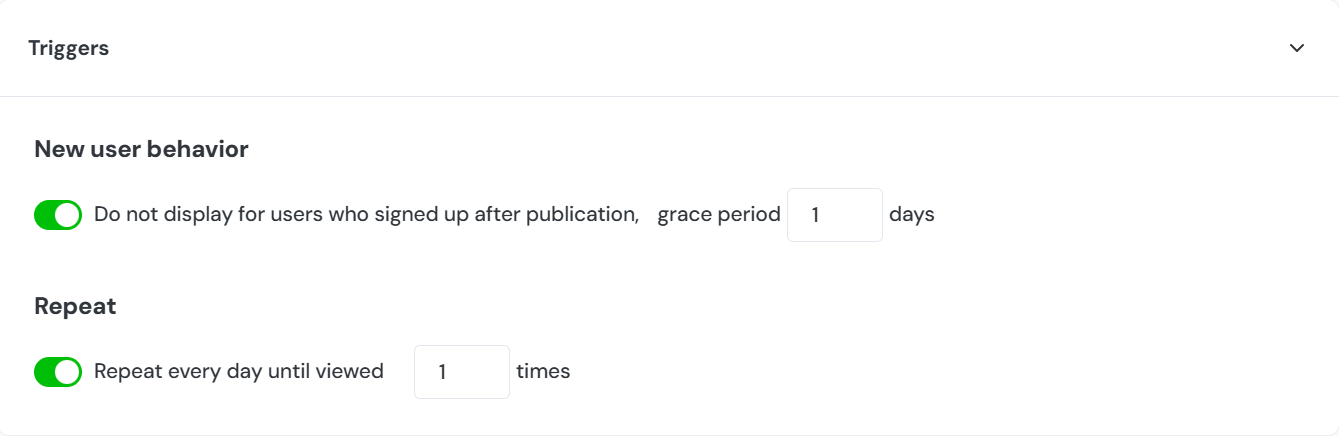
Triggers
The "Do not display for users who signed up after publication" feature can be toggled to prevent showing announcements to users who have recently signed up and are probably still busy with their initial onboarding experience. Prevent overwhelming new sign-ups with information while focusing on the core features of your application before displaying banners to them.
In this section you can also choose to display this banner each day until it is viewed a specific number of times. This can be used for particularly important announcements that you want to ensure your users view and understand.
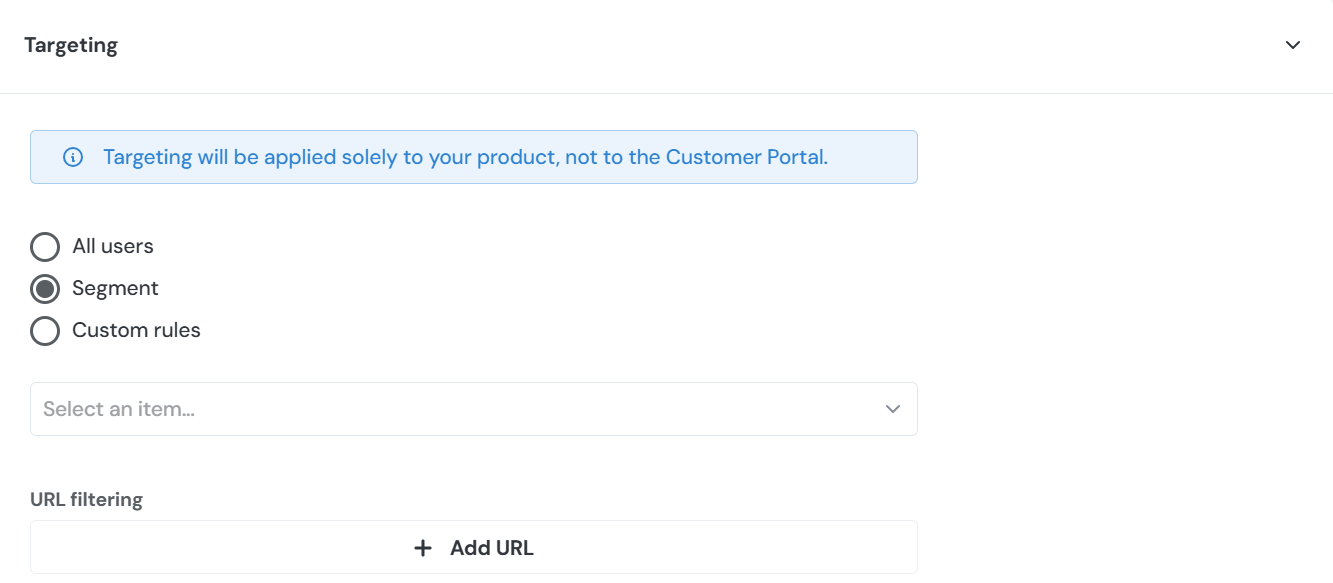
Targeting
In this section, you can define which users will see your banners. You can choose to display them to all users, target a specific segment, or apply a custom rule, or use a URL filter to show the banner only on specific pages.
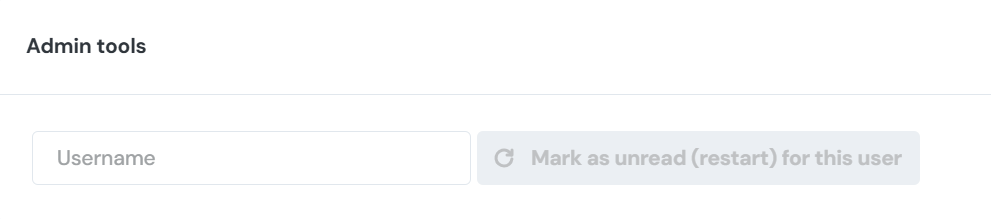
Admin Tools
You can simulate the behavior of a banner being unread and restart it for a user by providing their username.
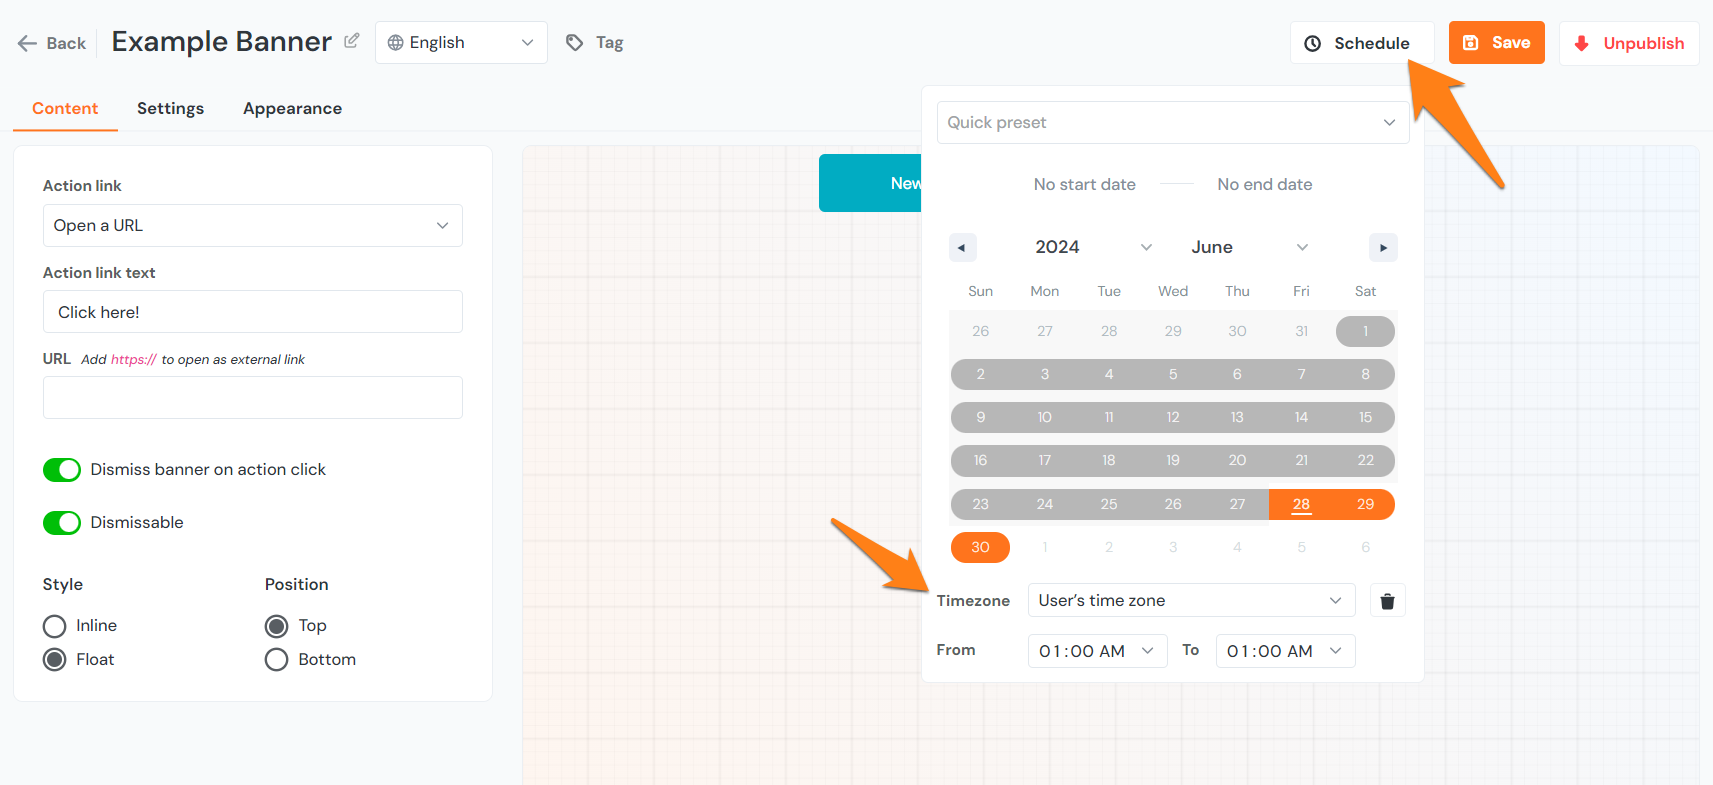
Schedule
Schedule a banner to be displayed in the future, and for a specific date and time range with the scheduling option. It is possible to select the user's timezone or choose from any timezone in the world. If this is not selected, the banner will display immediately and for an infinite amount of time: