
Launching Tours on Element Click
It's possible to set your tour to start when an element on your page is clicked. Perhaps you have a button in your page that you want to use.
 Note: Launching tours on element click is only available for Boost, Pro, and Enterprise subscription tiers. This is an experimental feature that is not enabled by default, please contact support to have it enabled.
All you need to do is to target the page element you want using a CSS selector. As an example, this is what a selector can look like: #quick-actions > li:nth-child(1).
Targeting the trigger element
The easiest way to find the CSS selector of an HTML element is with our editor, which we also go over in this article.
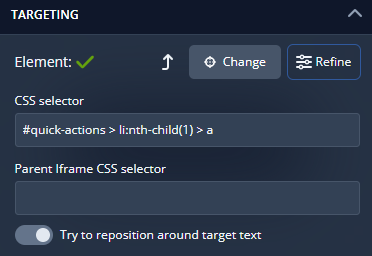
The editor section you'll need for this step is the first one, Targeting.

Clicking the Change button will open up an interface which shows borders around your elements when you hover over them, previewing their CSS selectors. It will look something like this:
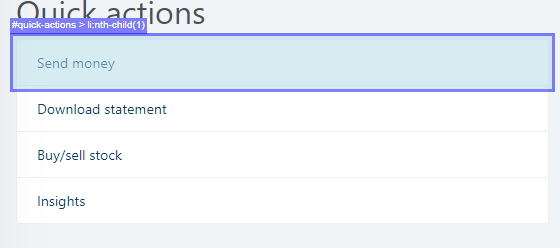
Clicking the highlighted element will select it as the target. You can also click the Refine button to see the full of name of the CSS selector you just targeted. Make sure you save this change, but don't publish it yet.
Setting the tour to start when the element is clicked
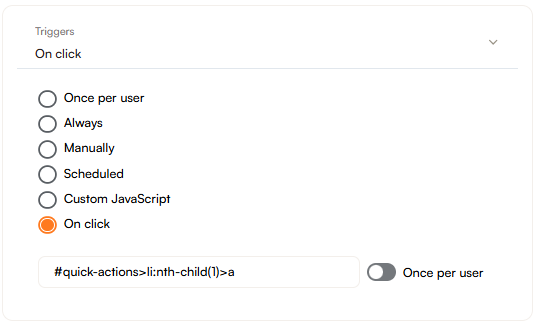
It is specifically this selector that you must enter in the administration of your tour to set the element as the tour's trigger. Simply copy and paste it into the CSS selector text area, under Triggers > On Click.
Save and publish your changes before returning to the editor, and publish your changes there as well. Now your tour trigger should be set up.
The order of completion is important here, because publishing changes made in the editor before the ones in the administration can cause conflicting versions of your tour and overwrite (or even reverse) the administration settings you set. Also note that you don't have to use the same selector or page element to start the tour that the initial step of the tour is attached to. This is just the simplest way to explain the feature.