Custom Buttons and JavaScript Actions
If you want to execute a custom action after the user clicks on a custom button in tour/hint cards, this article will explain how to do that.
Add a custom button
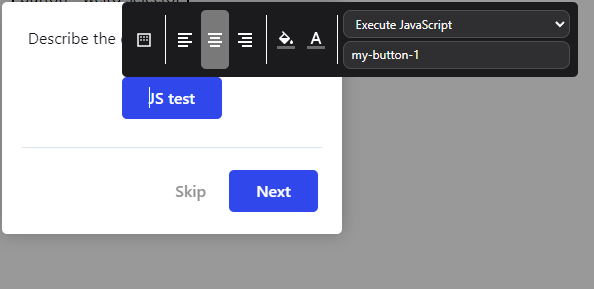
To add a custom button to a card, you'll need to add a new section using the green plus icon 
After adding the button, select the "Execute JavaScript" action. You will need to insert the identification of the action, which can be any string. You will need this identifier later in your JavaScript code.

Handle the action in your code
Then, somewhere in your code, you must listen for the productfruits_card_custom_btn_click event. You will get the identifier (that you set in the previous step) as the event parameter. For example:
window.addEventListener('productfruits_card_custom_btn_click', (e) => {
	if (e.detail.id == 'my-button-1') {
		window.productFruits.api.tours.advanceToNextStep(123456);
	}
});
As you can see, we checked if the identifier of the button is equal to what we set before and then we used Product Fruits JS API to advance the tour to the next step.
