How to embed checklists to custom elements
Product Fruits checklists have two possible display modes. The default option uses a Launcher button. This mode will add a floating button to your application that will open the checklist popup. It works without the need for a developer, you simply build as many checklists as necessary directly in your Product Fruits administration.
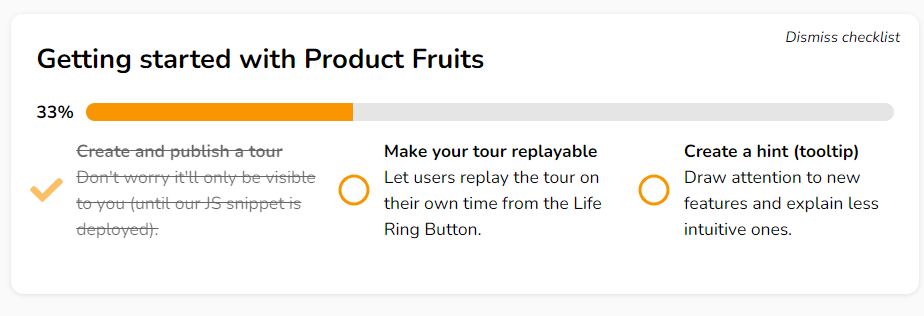
If you want to embed the checklist into a custom element in your application, choose the Embedded mode. This will allow you to display the checklist as if it were a part of your application, e.g. on the dashboard. See the below screenshot for how this can look.

How to embed checklists
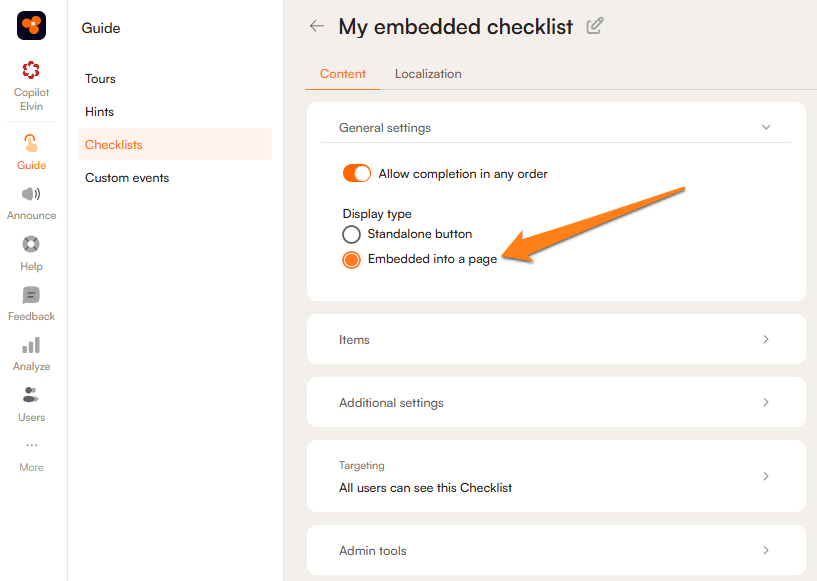
Start by setting your checklist to the Embedded into a page display type on the Content tab of the checklist page.

To insert the checklist into your selected element, call this JS API method:
const checklistId = 123456;
const yourElement = document.getElementById(....);

window.productFruits.api.checklists.injectToElement(checklistId, yourElement);
The checklistId variable can be found in the URL in the Product Fruits administration. When you open the checklist detail page, it is the last number in the URL.

The element must be a JS HTML DOM element instance, not a CSS selector or a jQuery method.
Checking URL filters and segmentation
By default, the injectToElement method doesn't check whether the checklist matches all display rules. No matter what URL filters and/or segmentation is set, the checklist will be injected. If you want to avoid this, you have two options:
A. You can pass an options object like this:
window.productFruits.api.checklists.injectToElement(checklistId, yourElement, { checkEligibility: true });The checkEligibility option will check all display rules and inject the checklist only when the checklist is eligible to be injected.
B. If you want to read the current state, use the isChecklistEligible(id) method. It returns a promise:
// isChecklistEligible returns a promise. You can use await in async functions or then() to get the result
if (await productFruits.api.checklists.isChecklistEligible(checklistId, yourElement) == 'eligible') {
	productFruits.api.checklists.injectToElement(checklistId, yourElement);
}
Important notes
The isChecklistEligible is rate limited per given checklistId. If you call it too often, you will get a cached result that doesn't necessarily reflect the current state of the user. The current rate limit is once per 700ms, but we may change this limit without prior notification. You should optimize your code to call this method only when you're about to inject your checklist.
We don't automatically hide embedded checklists when rules change dynamically.
Listen when the checklist is dismissed or completed
window.productFruits.api.checklists.listen('dismissed', (checklistId) => {
	console.log('The checklist was dismissed by the user.');
});