
Onboarding and engagement setup example with Twigsee
TWO TYPES OF MESSAGING
There are two types of communication and it is very important to distinguish between them.
I. Marketing
Look at it as a part of your marketing communication, it's basically an advertisement.
- You are selling your product (to the new user or an upsell)
- You are actively showing the message, interrupting users' actions
- Timing is important - think about when to show the message and to whom
Examples of Marketing communication:
- Welcome new user
- Excite users about part of the app or a feature
- Present upsell offers to the right users at the right time
II. Helping (guiding, teaching)
You teach users something, offer them help or provide more information.
- You are informative, you are teaching, not selling
- You prefer to offer the help passively (a lot of people do it wrong, they are actively pushing information)
- You prefer to give users options how to access the information when then want to
Examples of Helping:
- Explaining a part of your application
- Providing contextual help for a feature
- Documentation
TWIGSEE APP
Twigsee is an app which connects kindergarten teachers and parents. In Twigsee principals and teachers organize whole schooling process - administration of children, class attendance, GDPR and much more. Parents use the app to communicate with school.
Twigsee problems and challenges
The app is great, but teachers and parents are not technically savvy, they struggle to understand how the app works. When they learn the app, they love it! But a lot of them have quite negative approach during the boarding, they are not patient enough to learn the app. That leads to lot of 1:1 demo sessions, lot of tickets on support and low engagement with the app. Many schools gave up onboarding as it was too complicated for them.
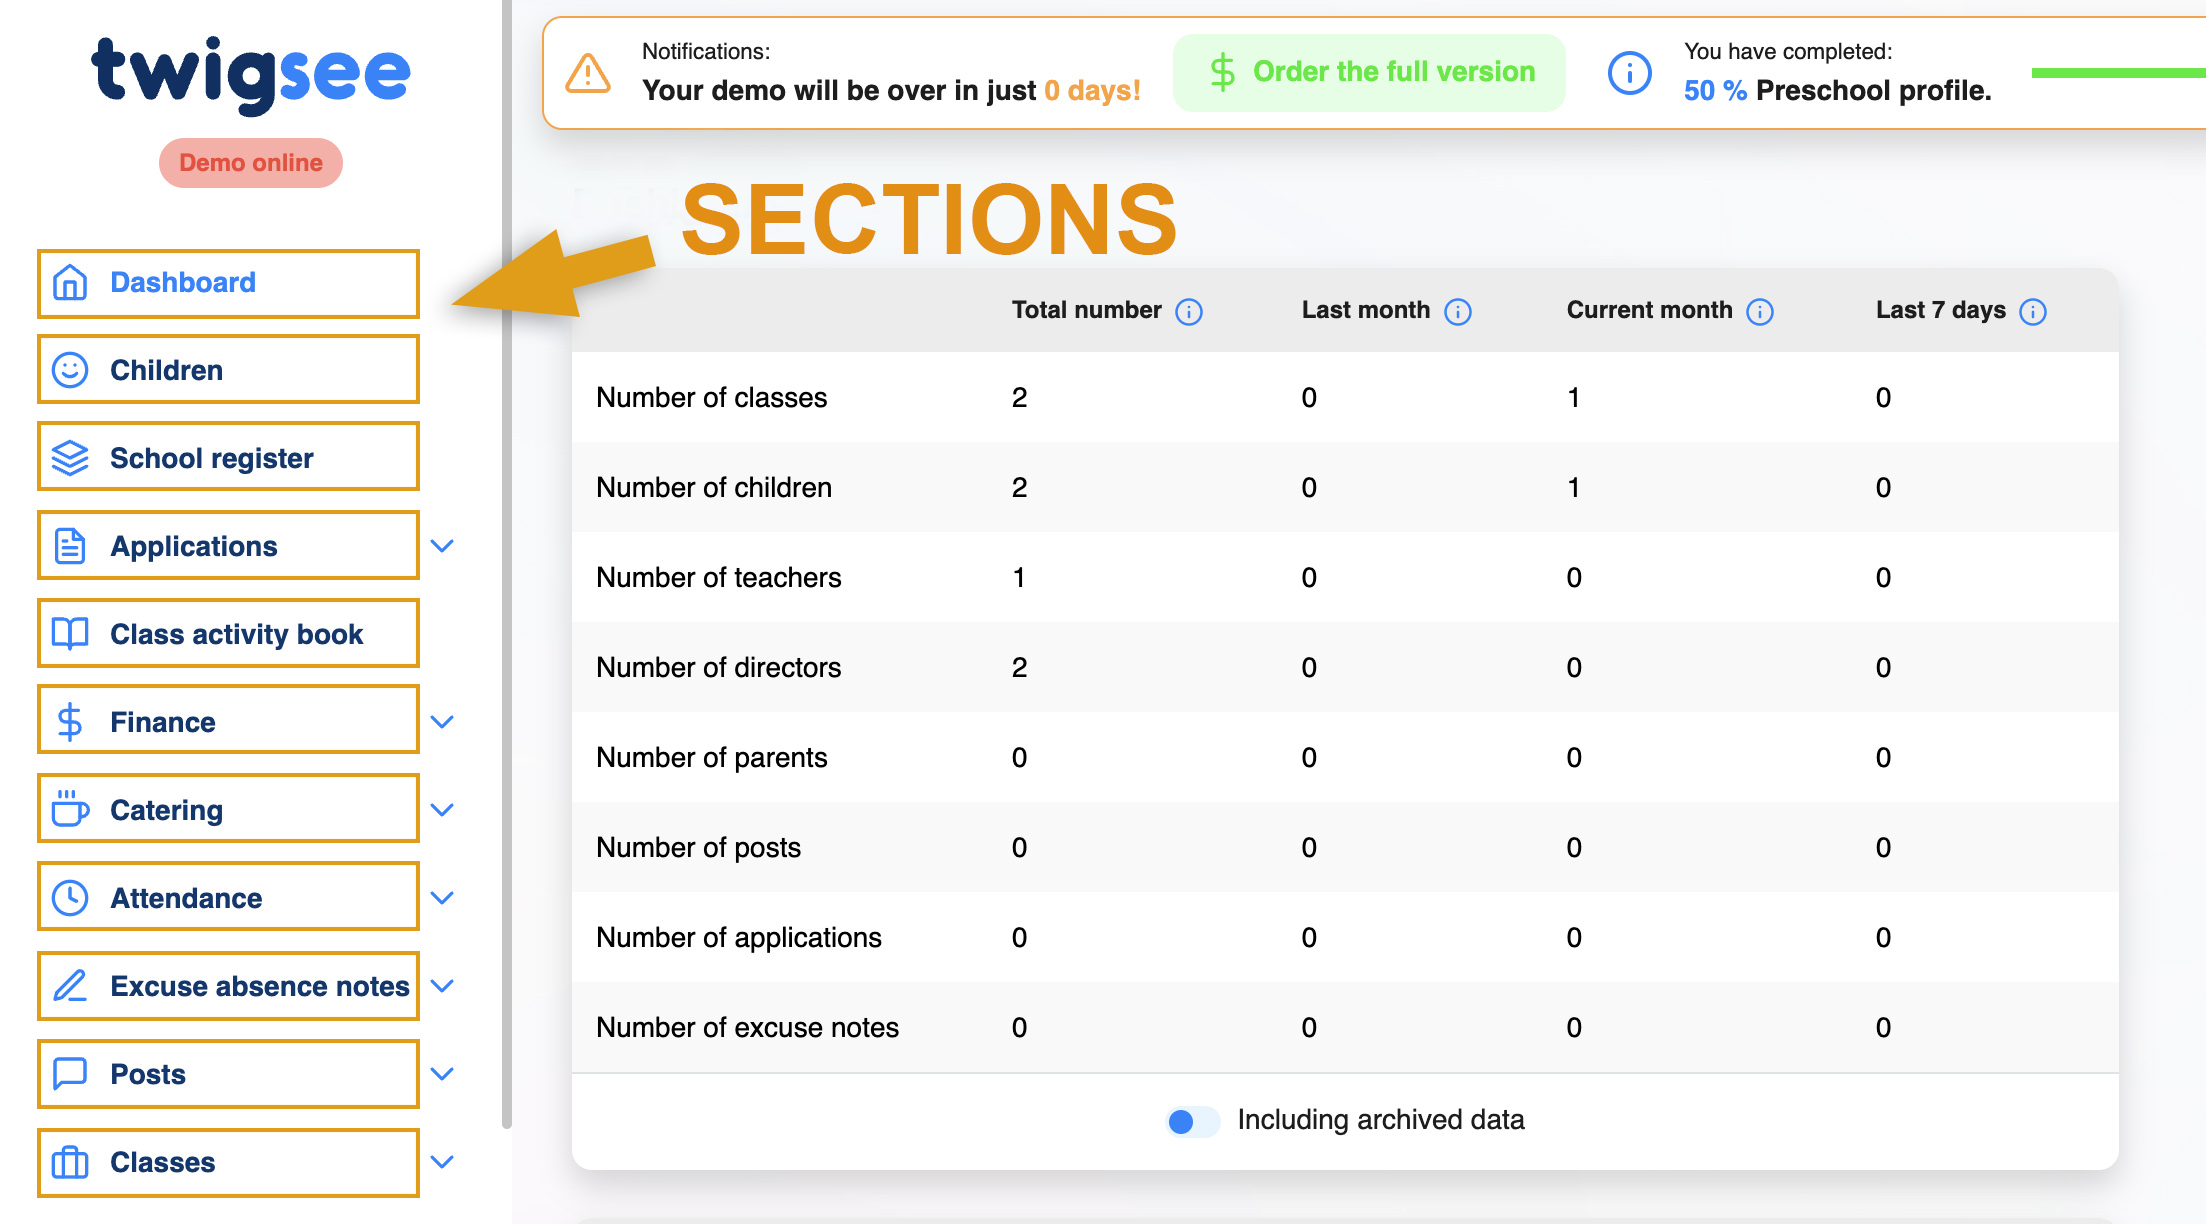
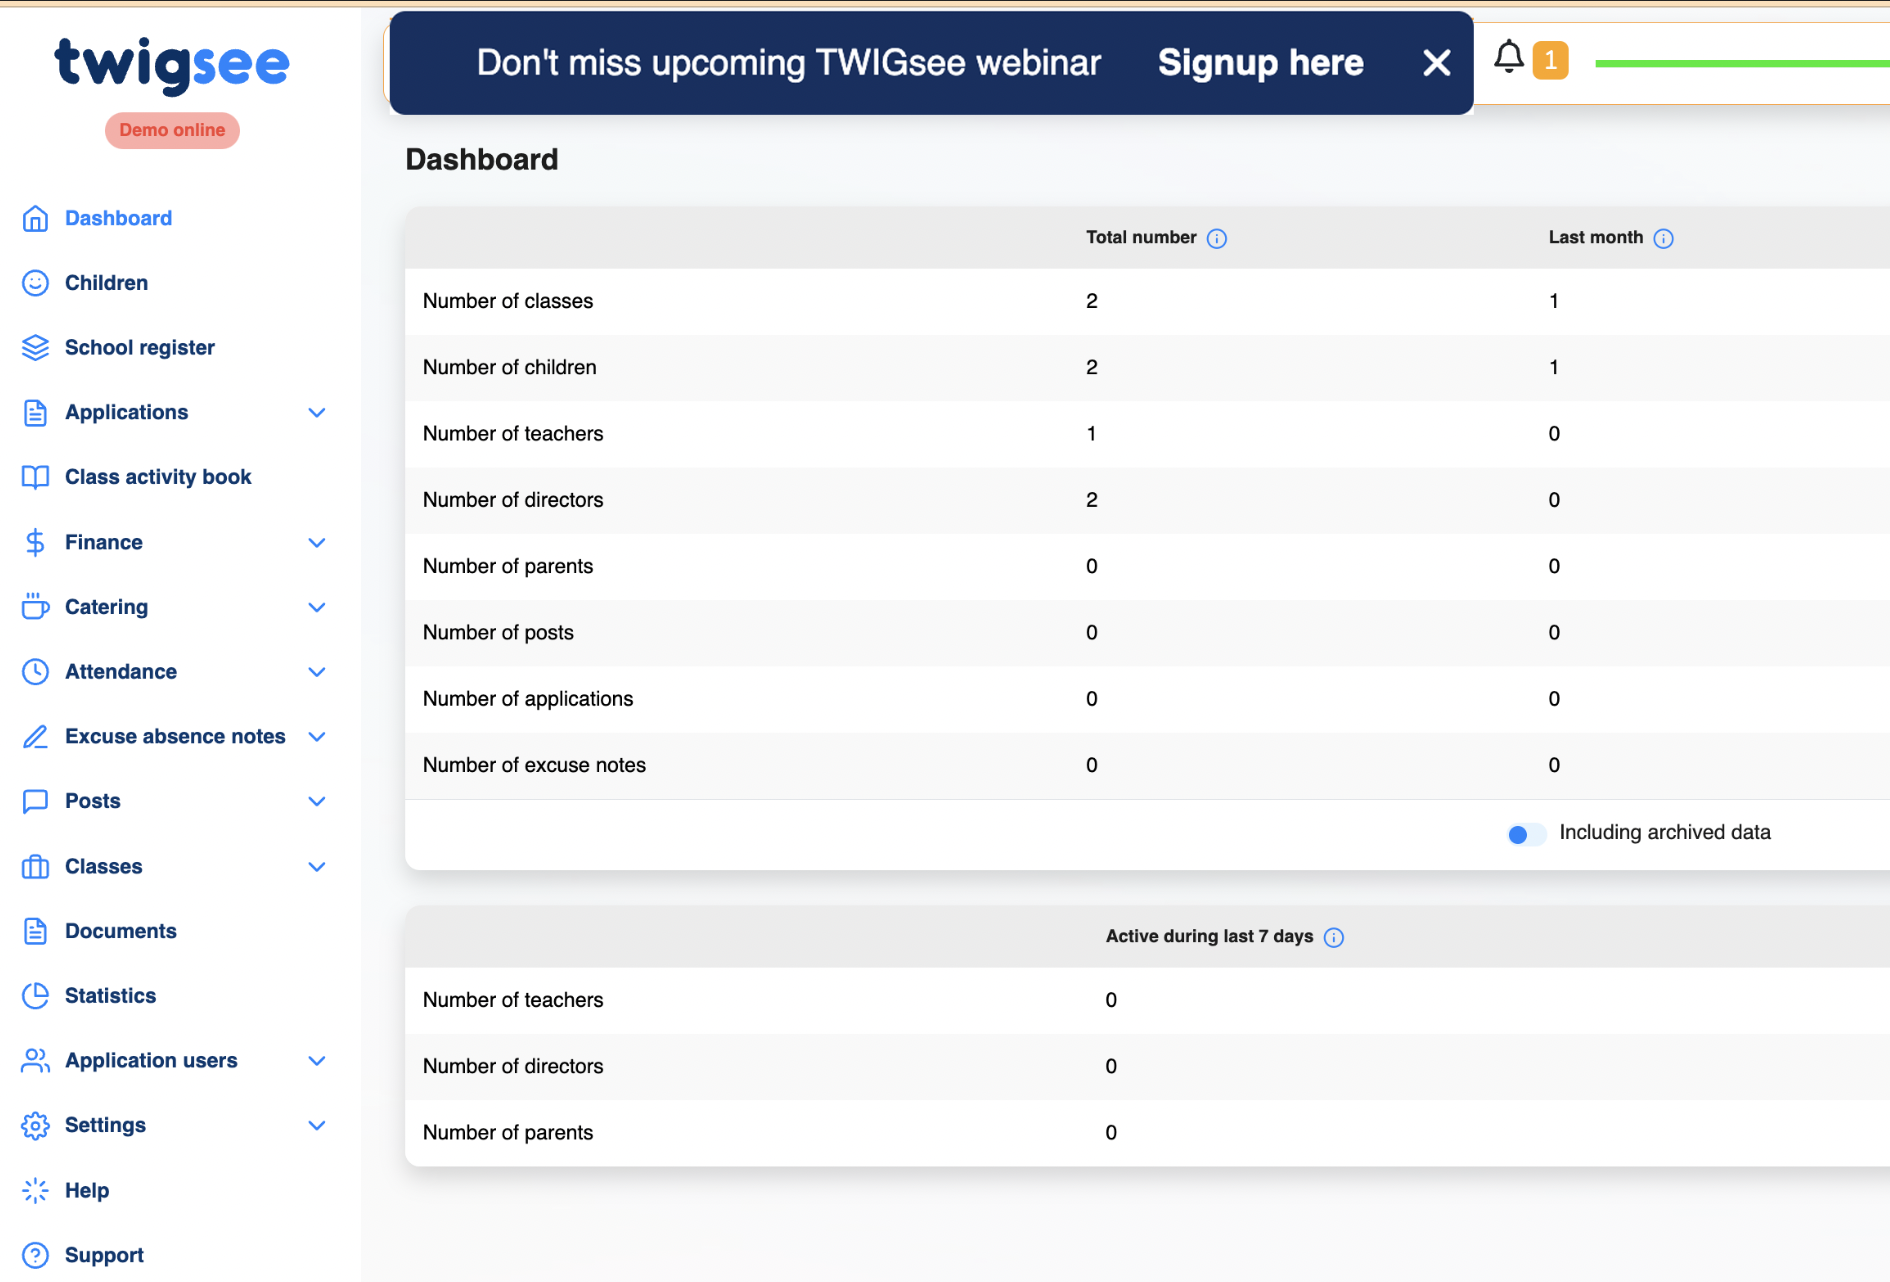
Twigsee app structure
Different apps have different structures, but in general there are a few pretty standard layouts. Twigsee, for example, is structured into several sections and it makes a lot of sense to take this as guidance through the onboarding.
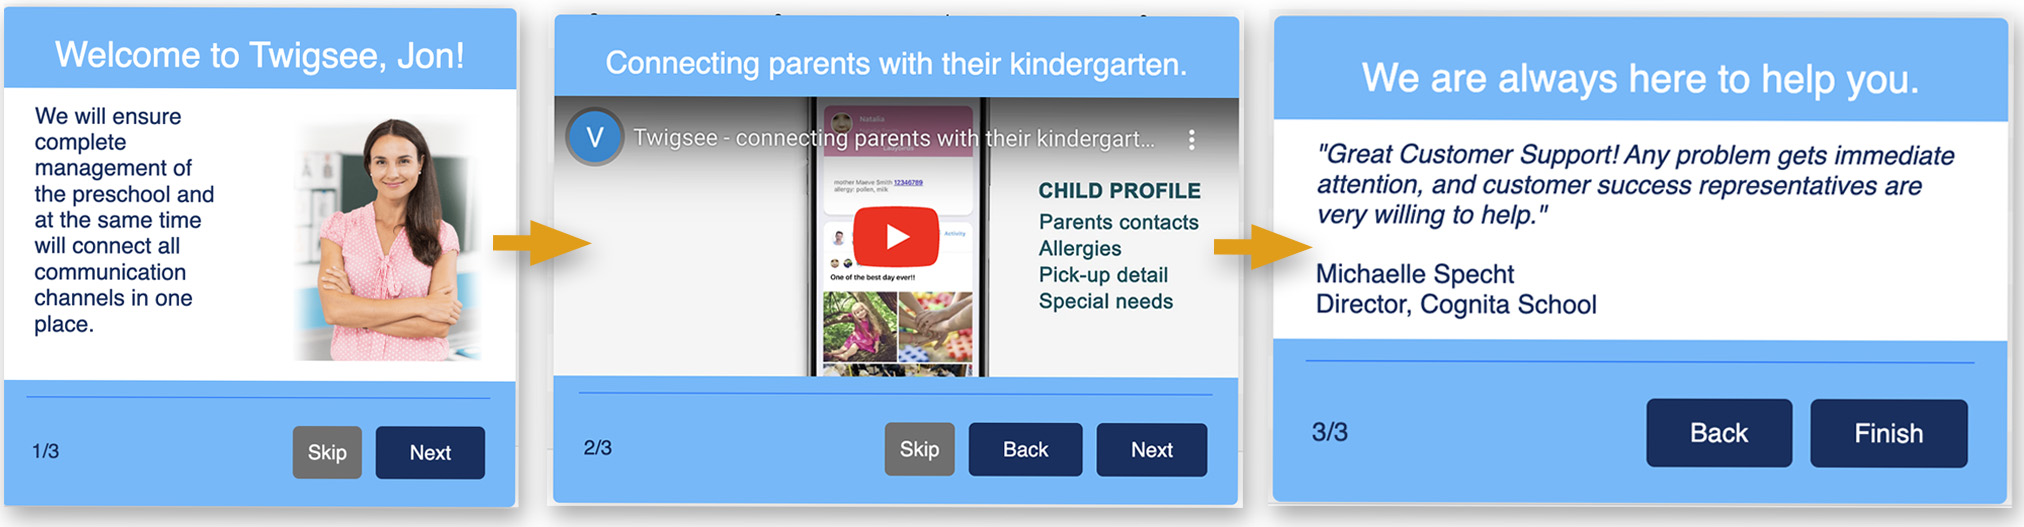
Welcome Tour (Marketing)
When new users arrive at your app, welcome them on the main page. Create a 2-3 card, simple tour where you thank them for their time and assure users that here they will find the solution for their pain. You can also share your marketing video or share testimonials.
- It’s marketing, you show this tour once to the new users only.
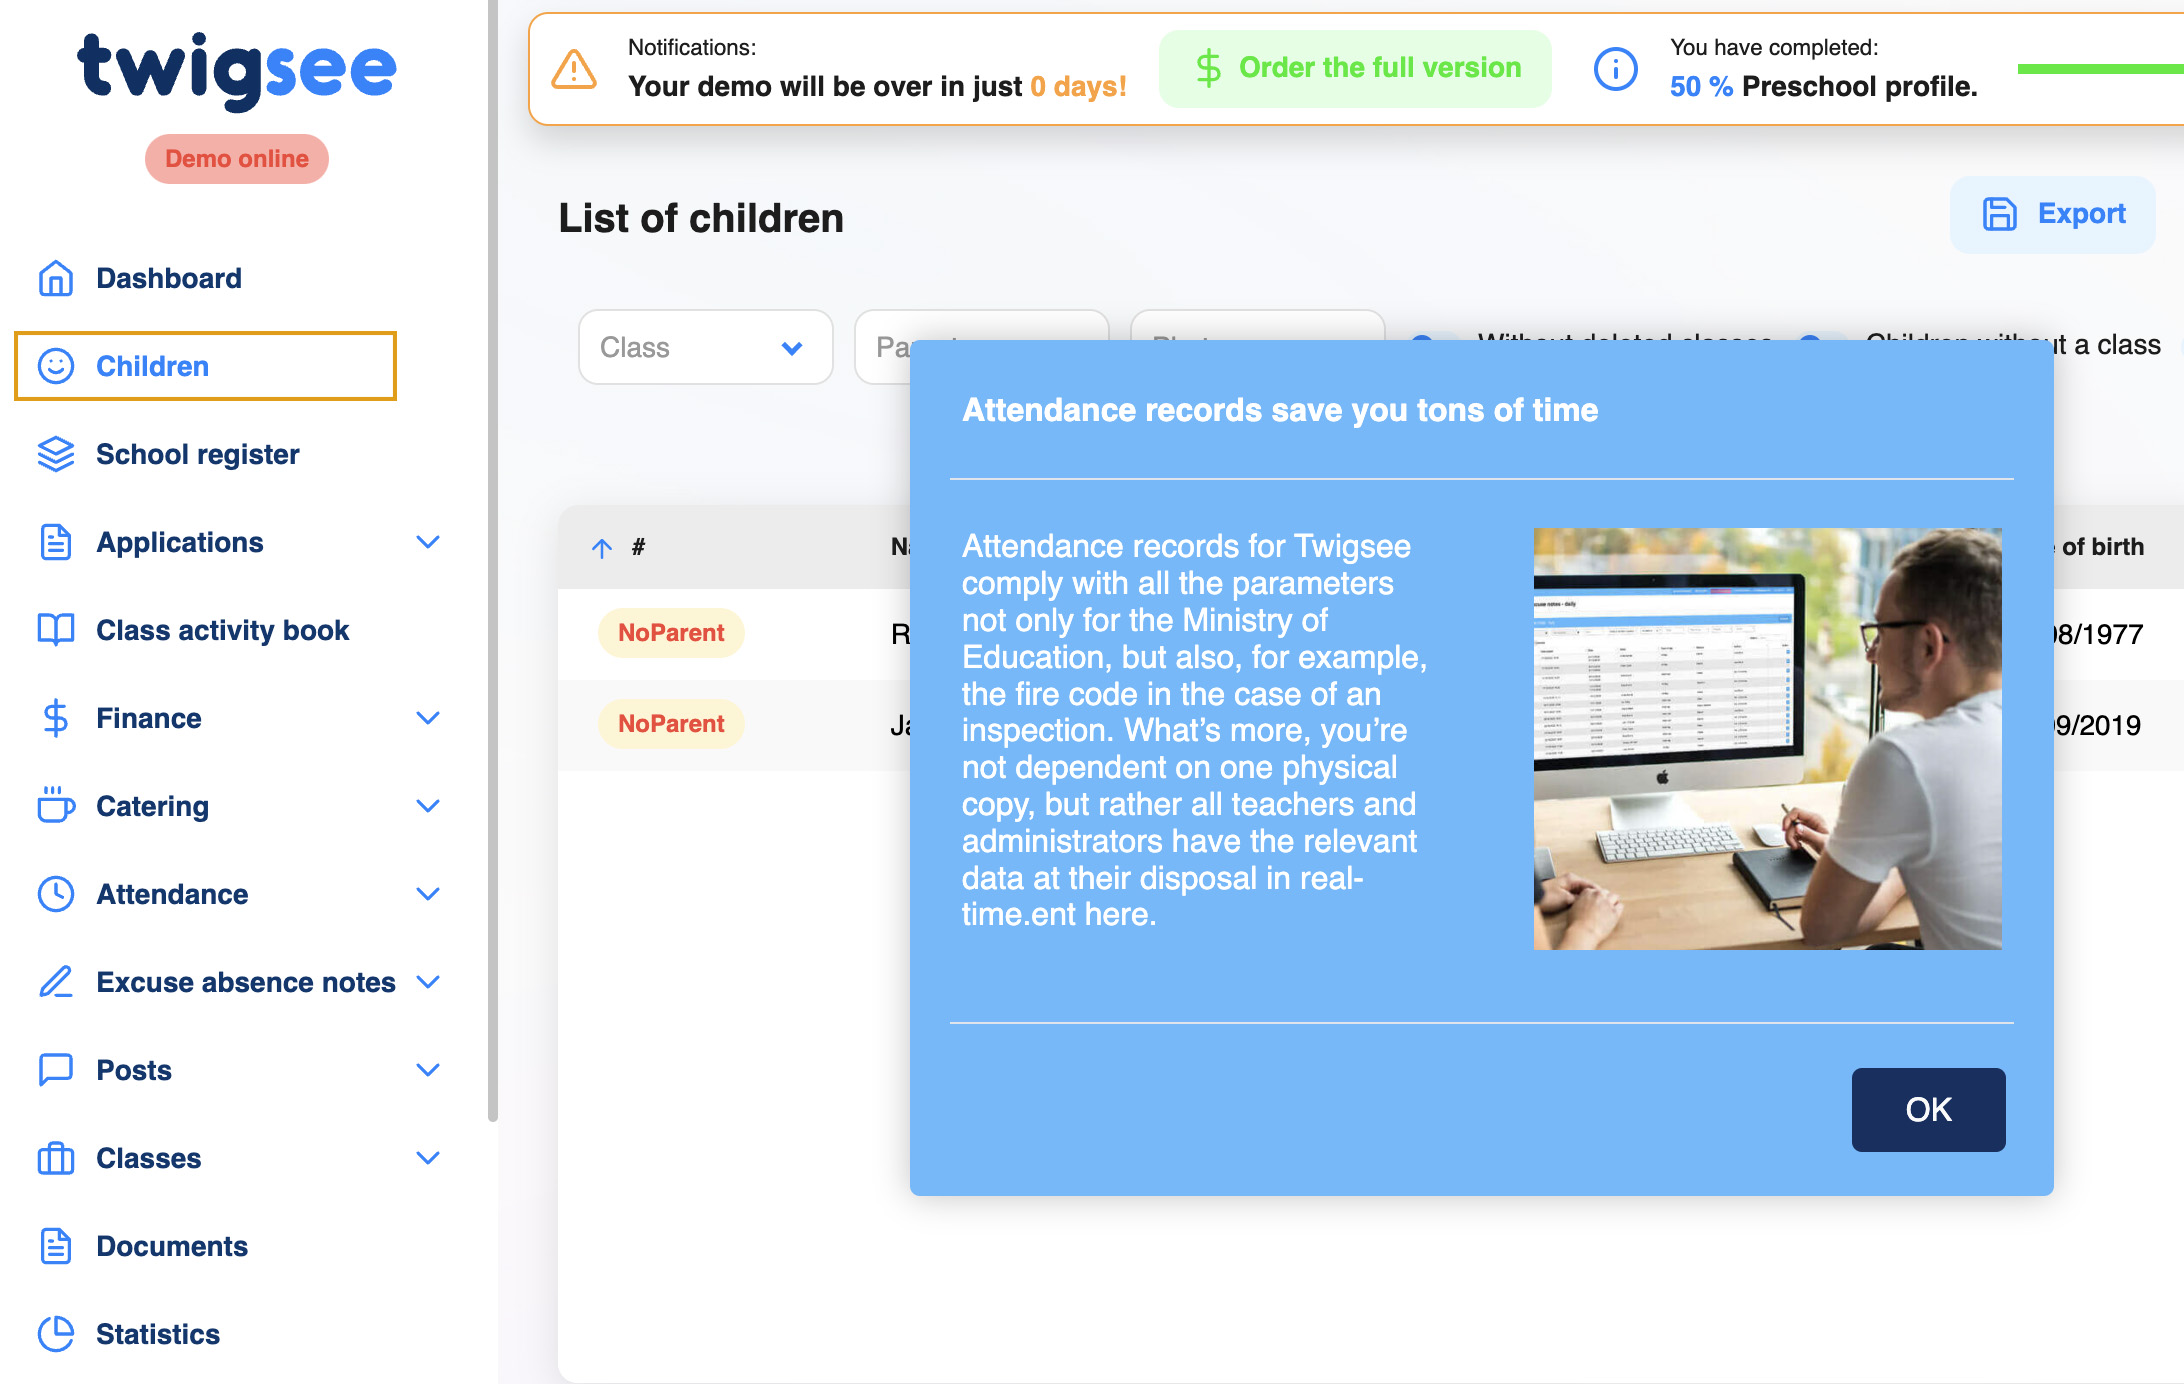
Welcome Tour for each section (Marketing)
Each section contains a single card tour where you communicate how great and useful this section is and how it helps users. You don’t teach them – you excite them!
- It’s marketing, you show this tour once to the new users only.
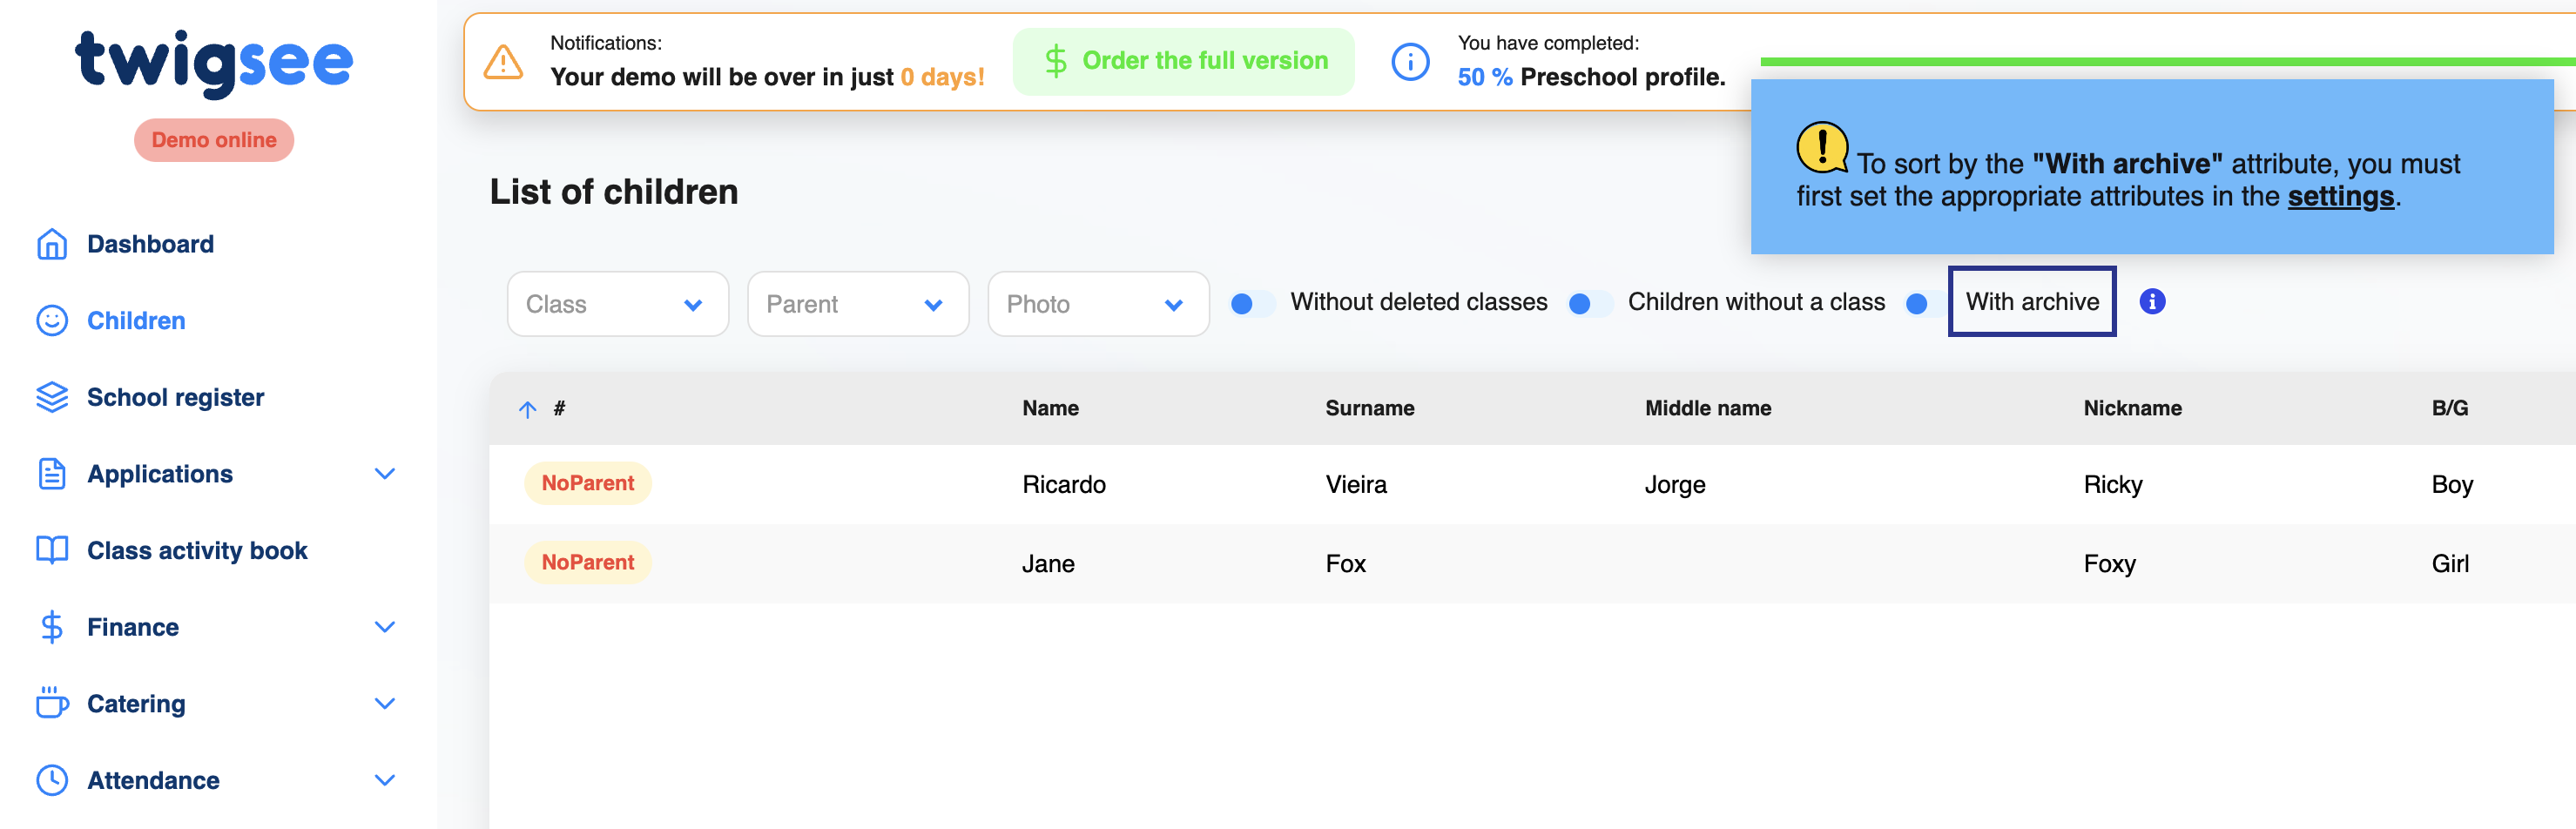
Hint for a section (Helping)
It’s helpful to have a hint that describes the section in more detail. This is not marketing, don’t write fluff like “this is excellent you're gonna love it”. Provide useful information, something that typically has long-term value.
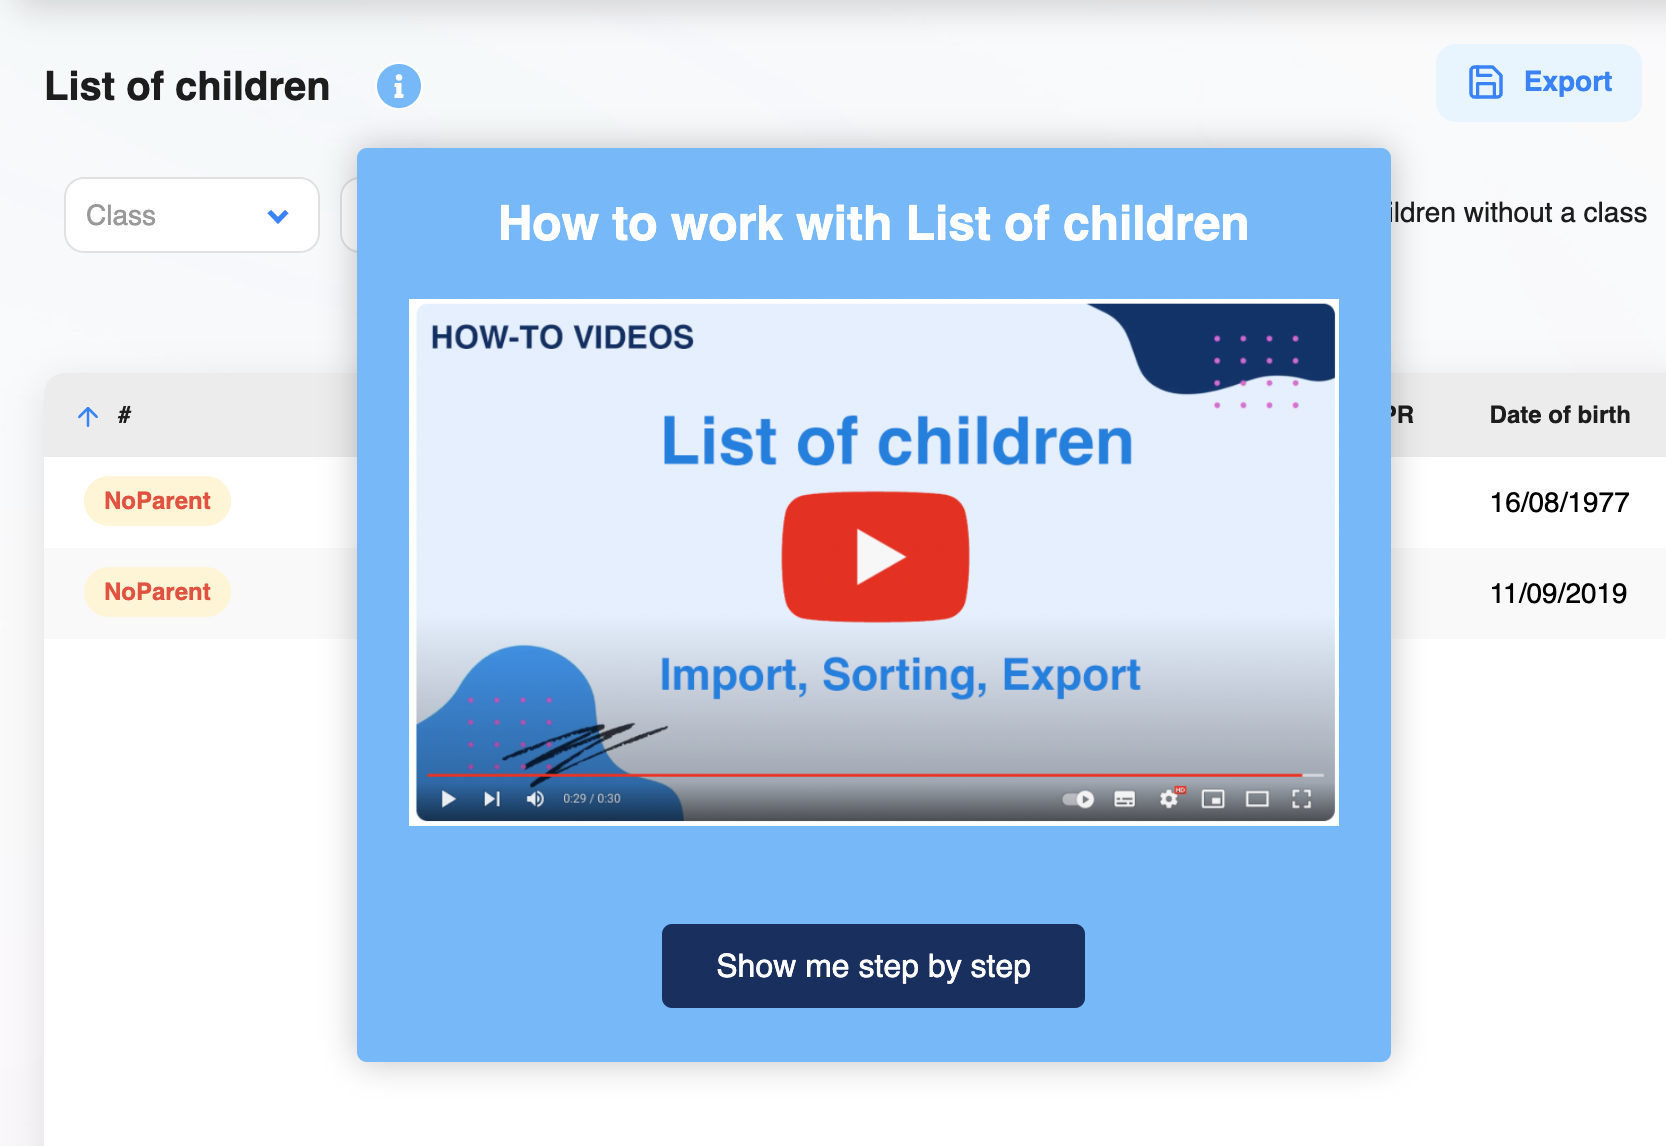
A few tips:
- Video describing how this part of the app works
- Link to the Knowledge Base article(s)
- Add a button which starts the tour. This is a powerful combo – share the basic text information in the hint and provide users an option to start the tour that describe the topic to the more detail.
Note: The Welcome Tour single card tour is shown once only, it’s marketing. A hint for the section is always available and contains useful help. See the difference?
Hint for a feature (Helping)
If a feature needs a bit more context, use a hint.
A few tips:
- Use “show only once” or “dismiss forever” if you think users need to see it only once.
- Add animated Gif demonstrating the feature
- Use flashing beacon when you need to drag user’s attention to some place.
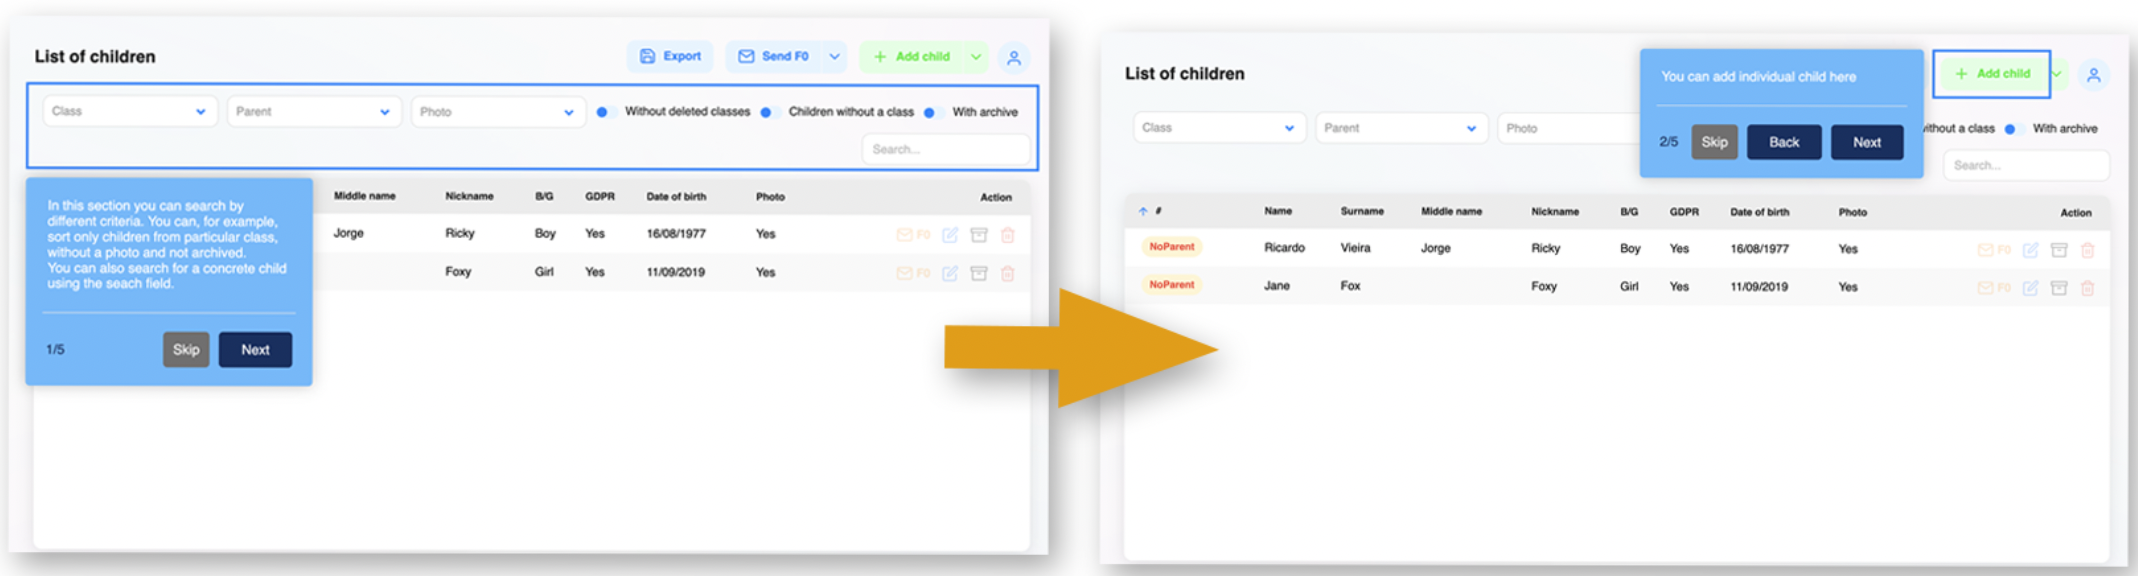
Step by step tours (helping)
For some parts of the application, consider step by step tour which teaches users how to use this part of the app.
Not all of our users use this feature correctly. Sad, but you don’t have to be one of them, just avoid these common mistakes:
- Don’t overuse step-by-step tours. You are taking the steering wheel from the users, and they don’t like it (you don’t like it either, do you?)
- Offer users the option to start the step-by-step tour only when they choose to. You can start the tour from a hint or from help centre (the Life Ring).
- Don’t create long tours. If you really think you need a long tour, split it into chunks of 2-3 card shorter tours, so when the user cancels the tour in a card #2, the next short tour starts in card #4 and you have a chance to keep her on the tour.
- Offer users replayability of the tour in case they cancel it.
- Don’t be disappointed if users don’t finish the tour – the tour is meant only for the users who need the help.
- I know you are obsessed with tours, but they are really just a small part of good onboarding mix and honestly – not the best one. Don’t overuse them.
- There is a temptation to create one cool-looking tour to present all your features. It usually fails. Users cancel it; they are not patient enough to follow that type of tour.
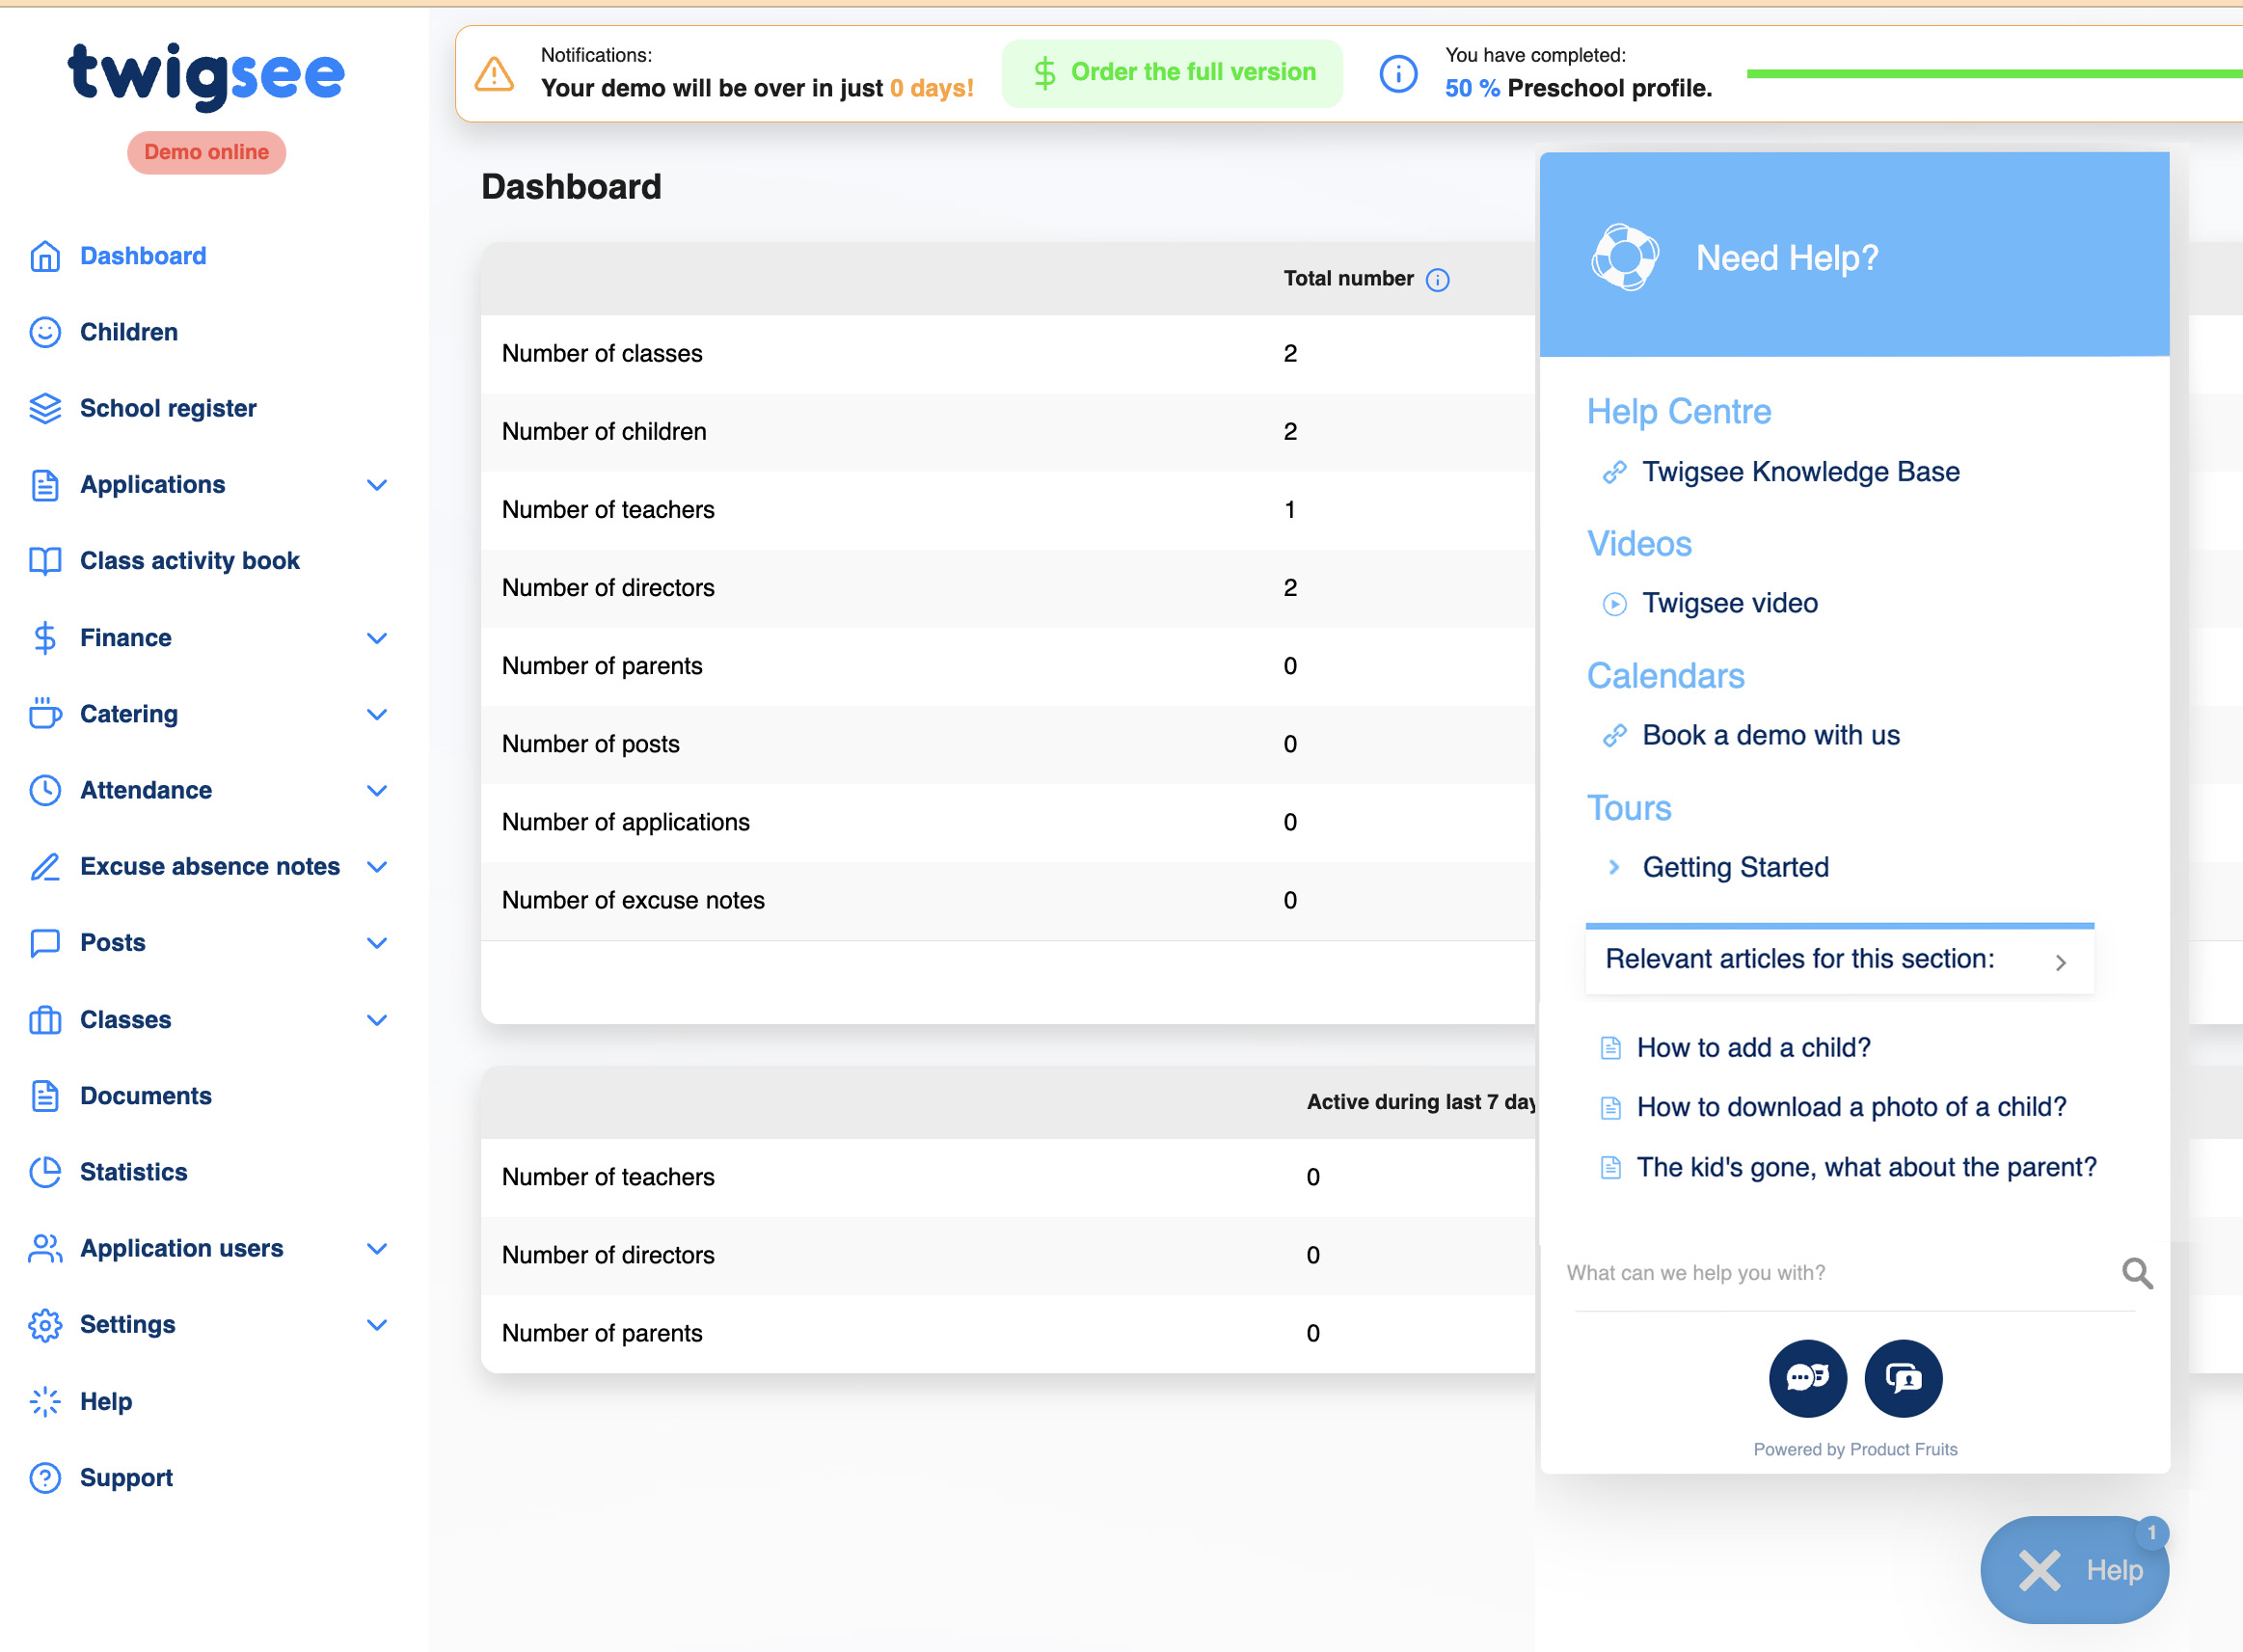
Help centre
This is the single place of contact for all your users' needs. You don’t have to teach them where to find Q&A, or how to schedule a demo session with you – just tell them: Whatever you need, just check the Ring.
A few tips:
- Add a link to schedule your demo
- Add a video
- Add articles, group them to folders and make these folders visible for certain section only. So, users see the articles relevant for each section.
- If you copy your knowledge base to Product Fruits knowledge base, the users can read the articles in the ring, not losing the focus from the app (super useful).
- Add our feedback icon and your chat icon to the ring to avoid having more icons on the screen
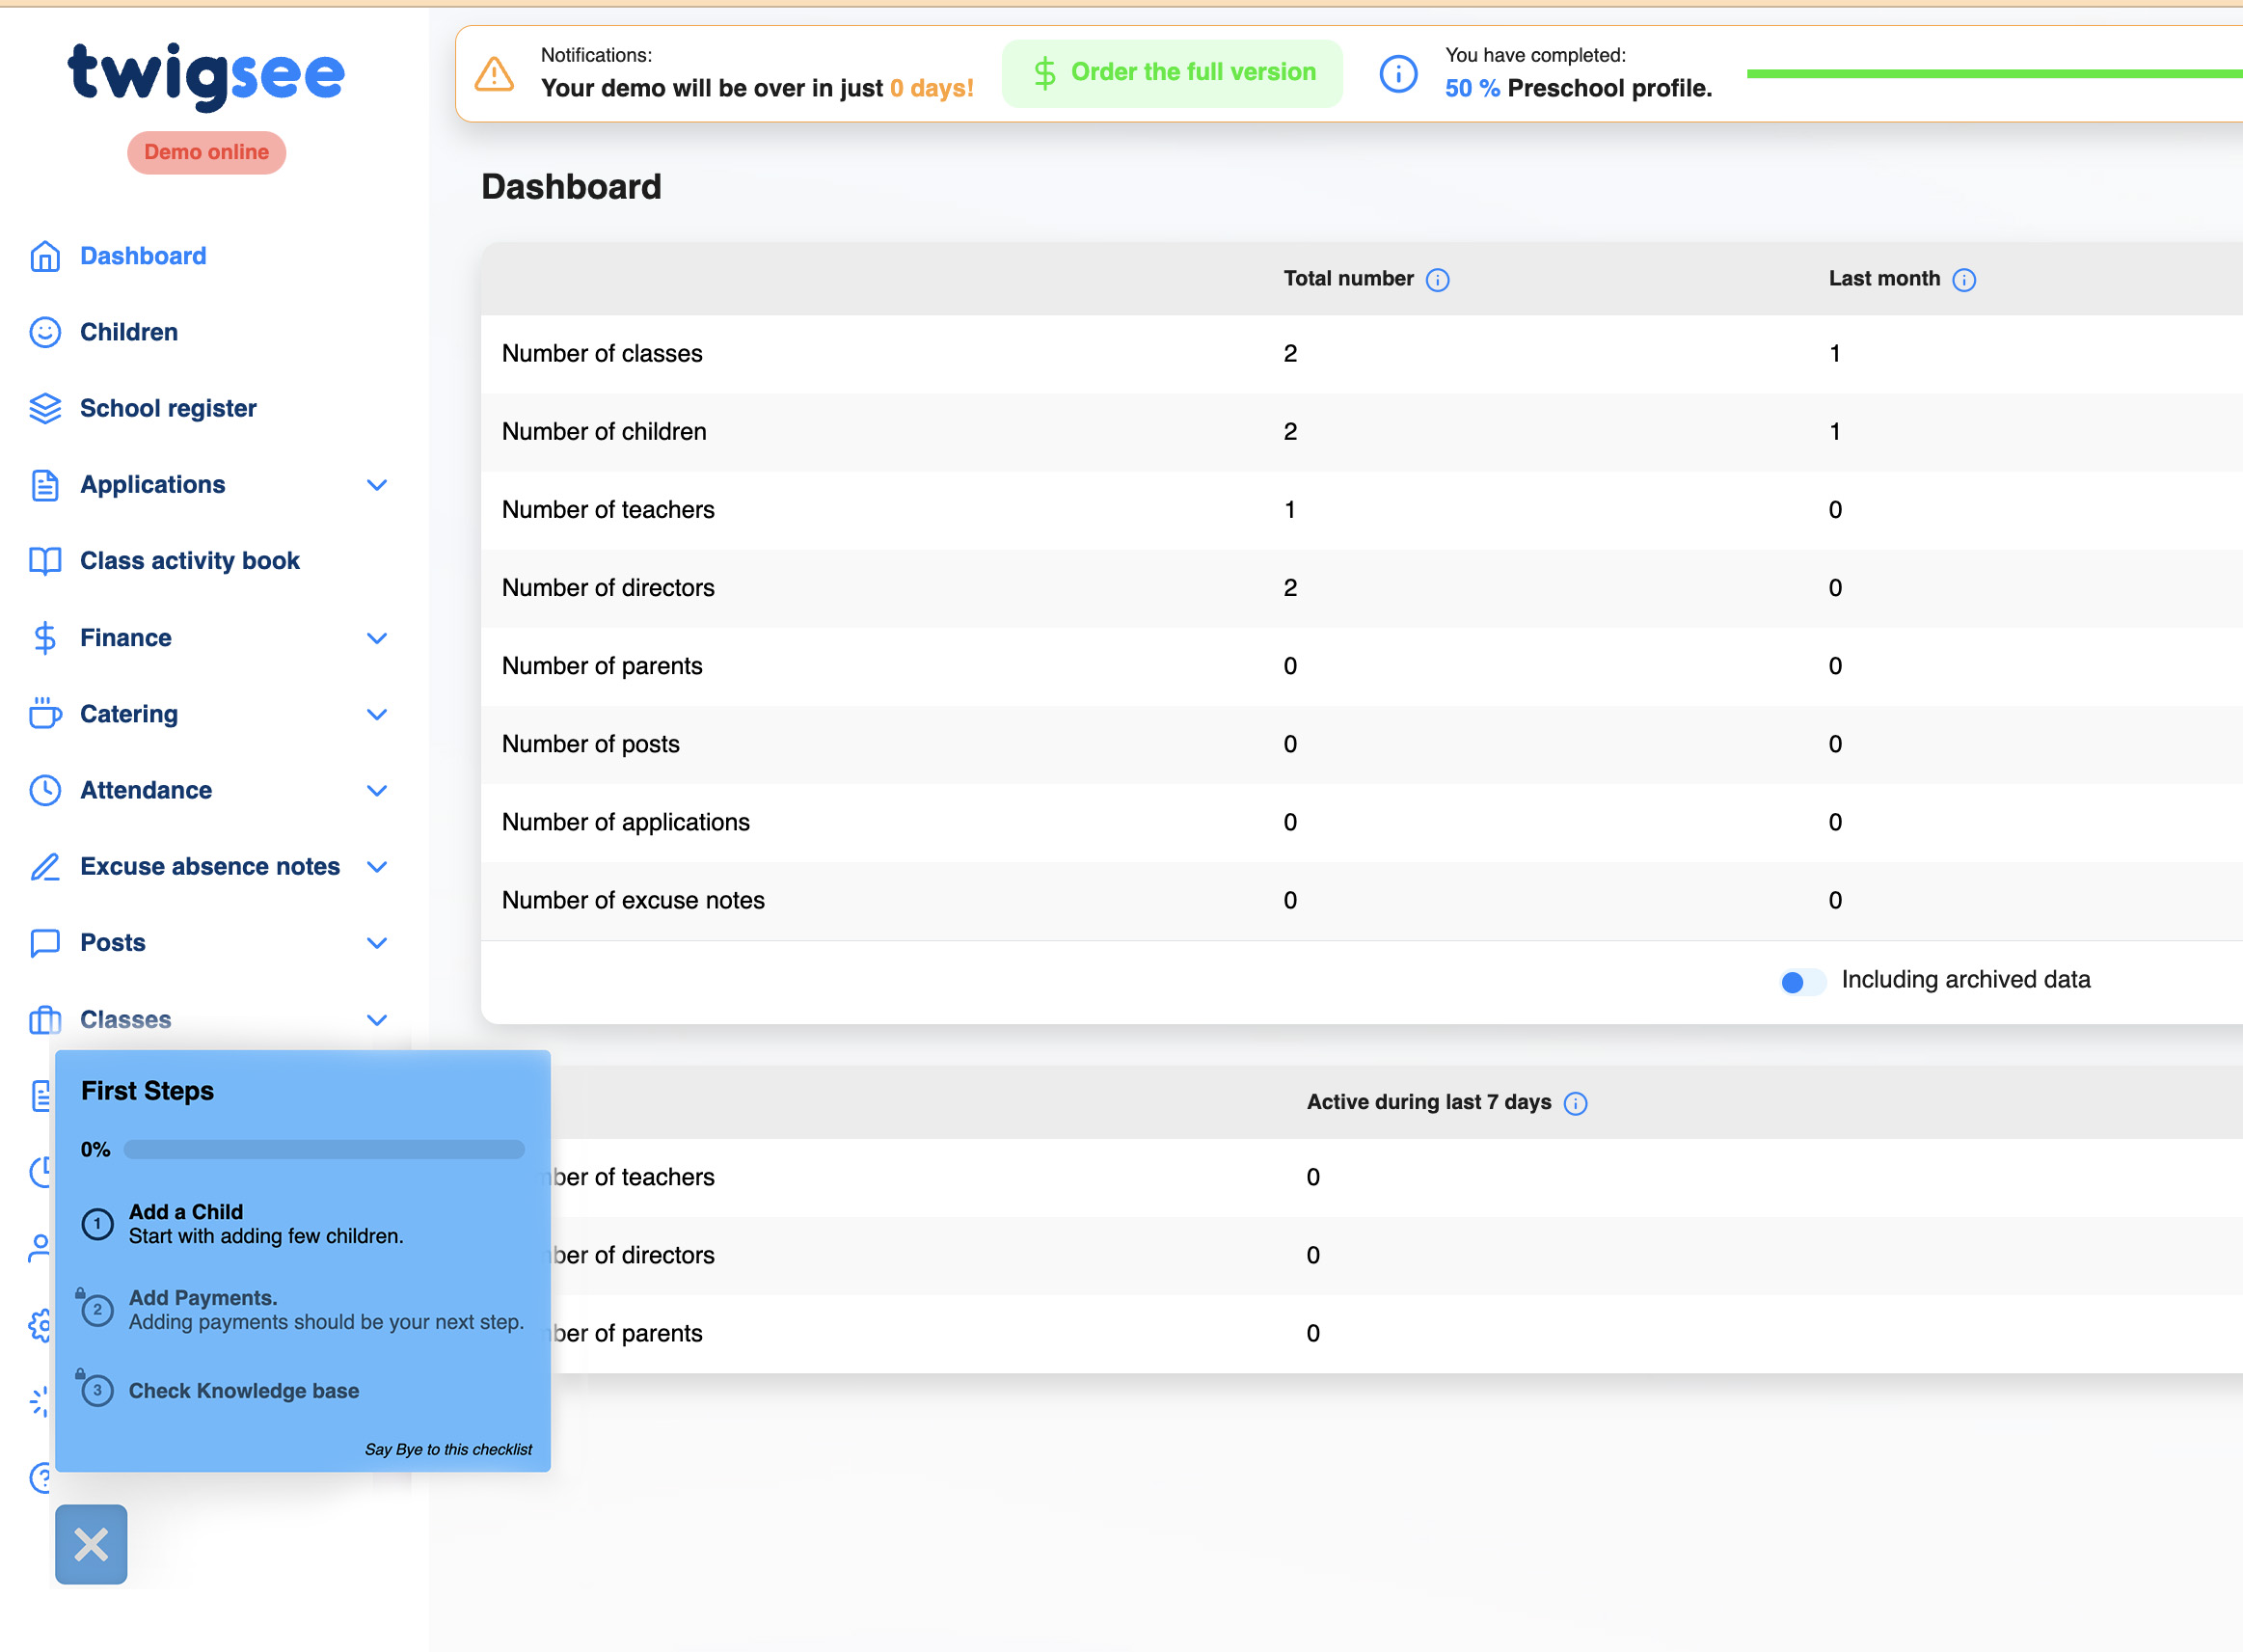
Check list
In the checklist you specify what steps users shall take to be onboarded. Basically, you tell them – if you do this and this you will know how to use our app.
A few tips:
- Add Knowledge base articles (typically How to install our app)
- Add video
- Add Tours (yes, you can give your users an option to replay the tour!)
- You can create one Checklist for all users or different checklist for different users (new users / advanced users / experts) or for different parts of your app.
News centre
This needs a little bit of help from your developers, but then you can share your news with your users directly in your app!
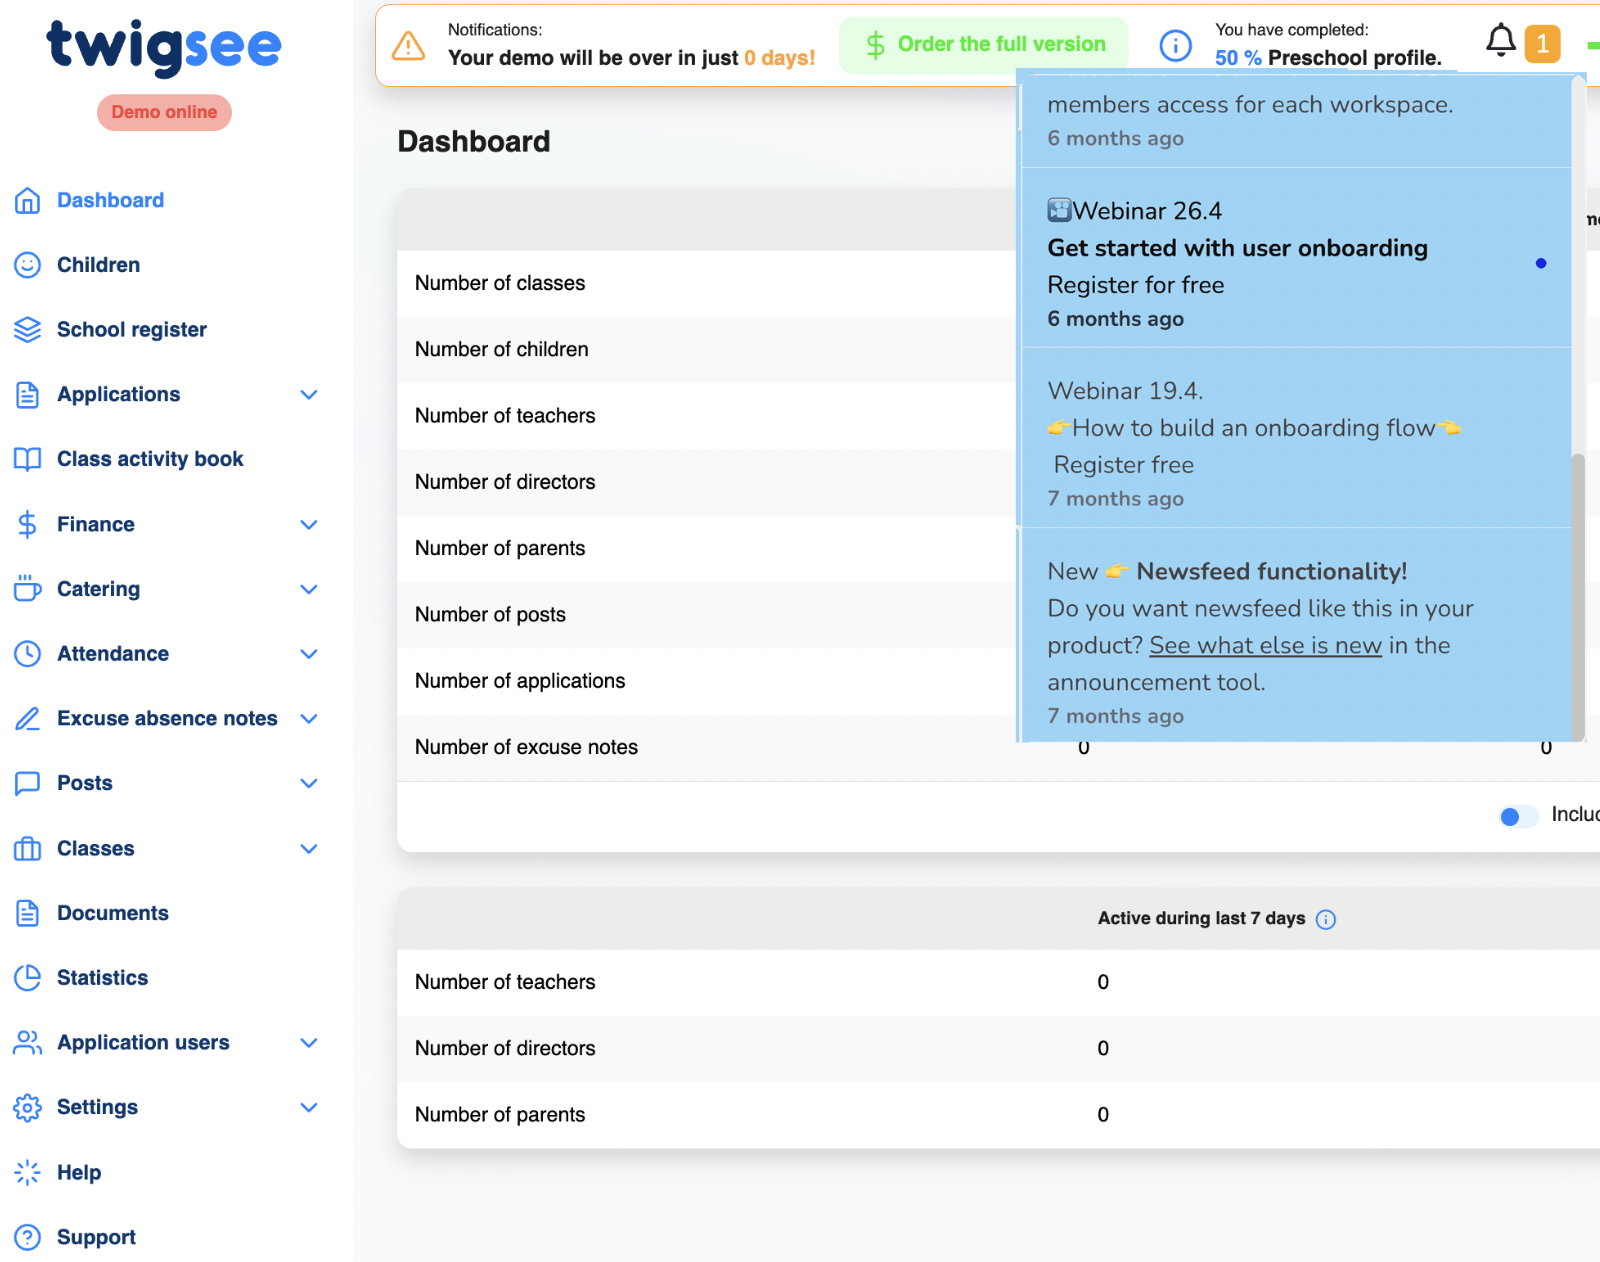
Announcements
It's super easy to share different types of announcements with your users. For example, you can share release notes with them or invite them to a webinar.
Not sure where to start?
- Create Welcome Tour
- Add Single Feature Tours for each section
- Add Hints describing each section (add it in the section, not in the main menu)
- Add Feature tours, guiding users step by step through the most complicated parts (see? It's #4 in the list)