
Trigger Flows Using the JavaScript API
Before You Start
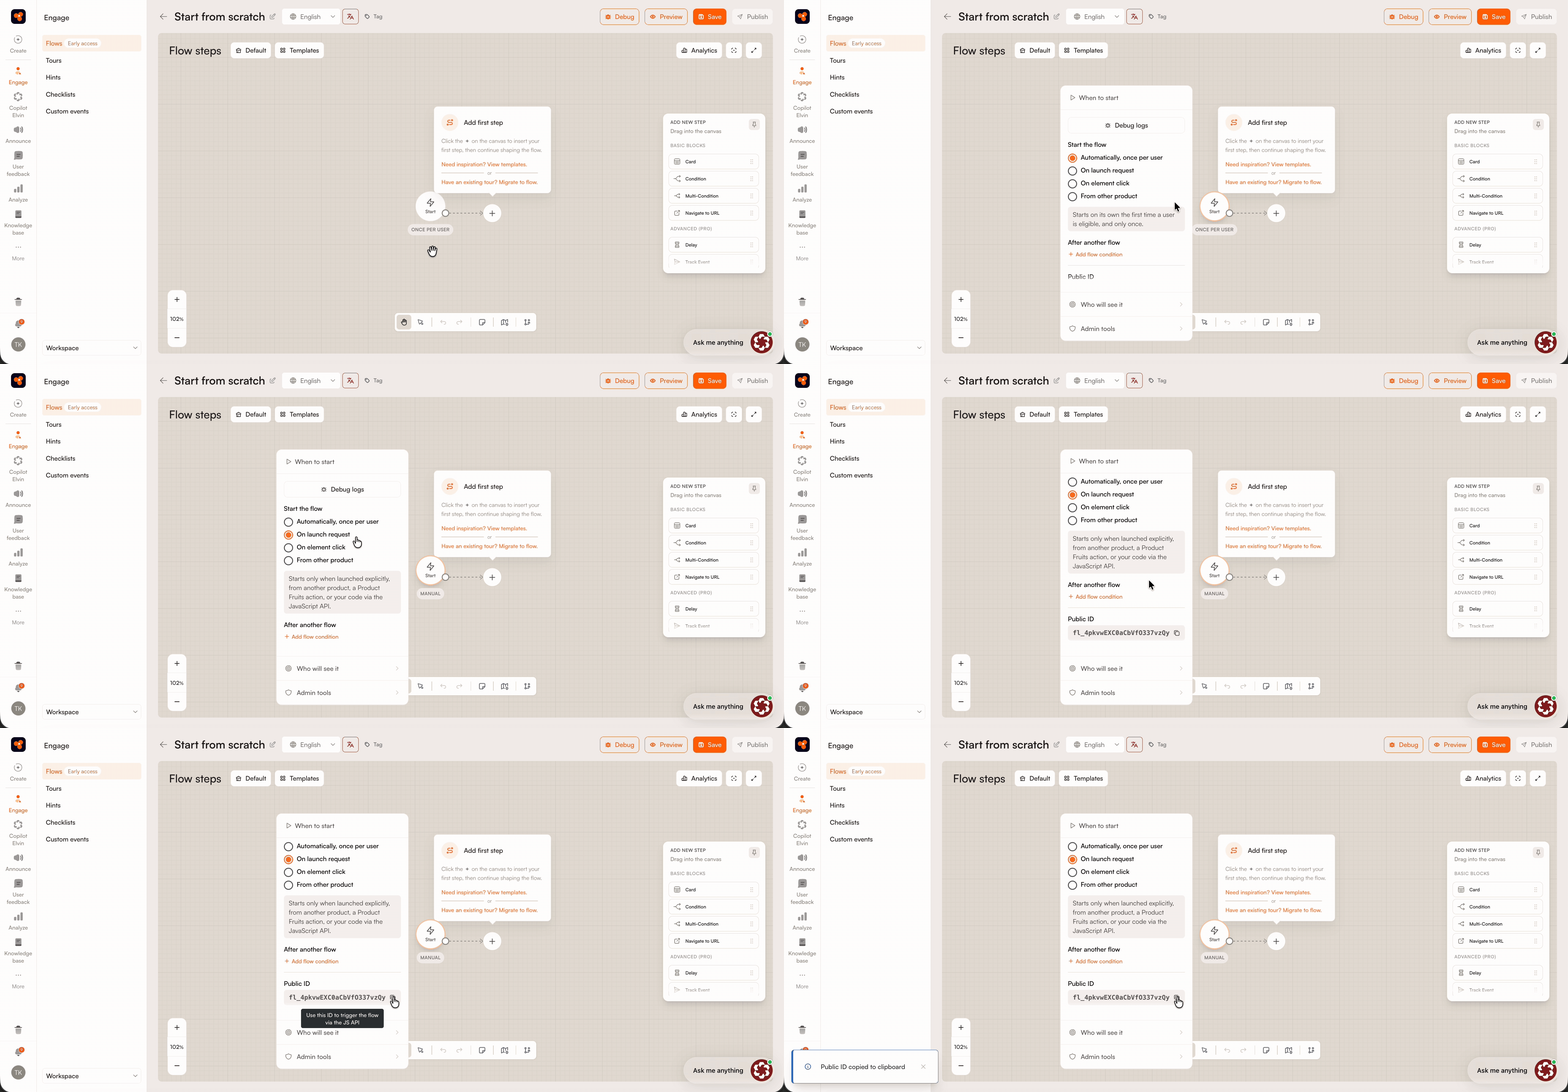
Navigate to Engage > Flows, and select the Flow. A Flow must use the On launch request trigger before you can start it through the JavaScript API or a URL parameter.
In the Flow editor:
- Open the Flow.
- Select the Start step.
- Set Start the flow to On launch request.
- Copy the Flow’s Public ID from the Enter-step settings.
Start a Flow with JavaScript
Product Fruits provides the global $pfai command queue. You can use it before or after the Product Fruits script finishes loading.
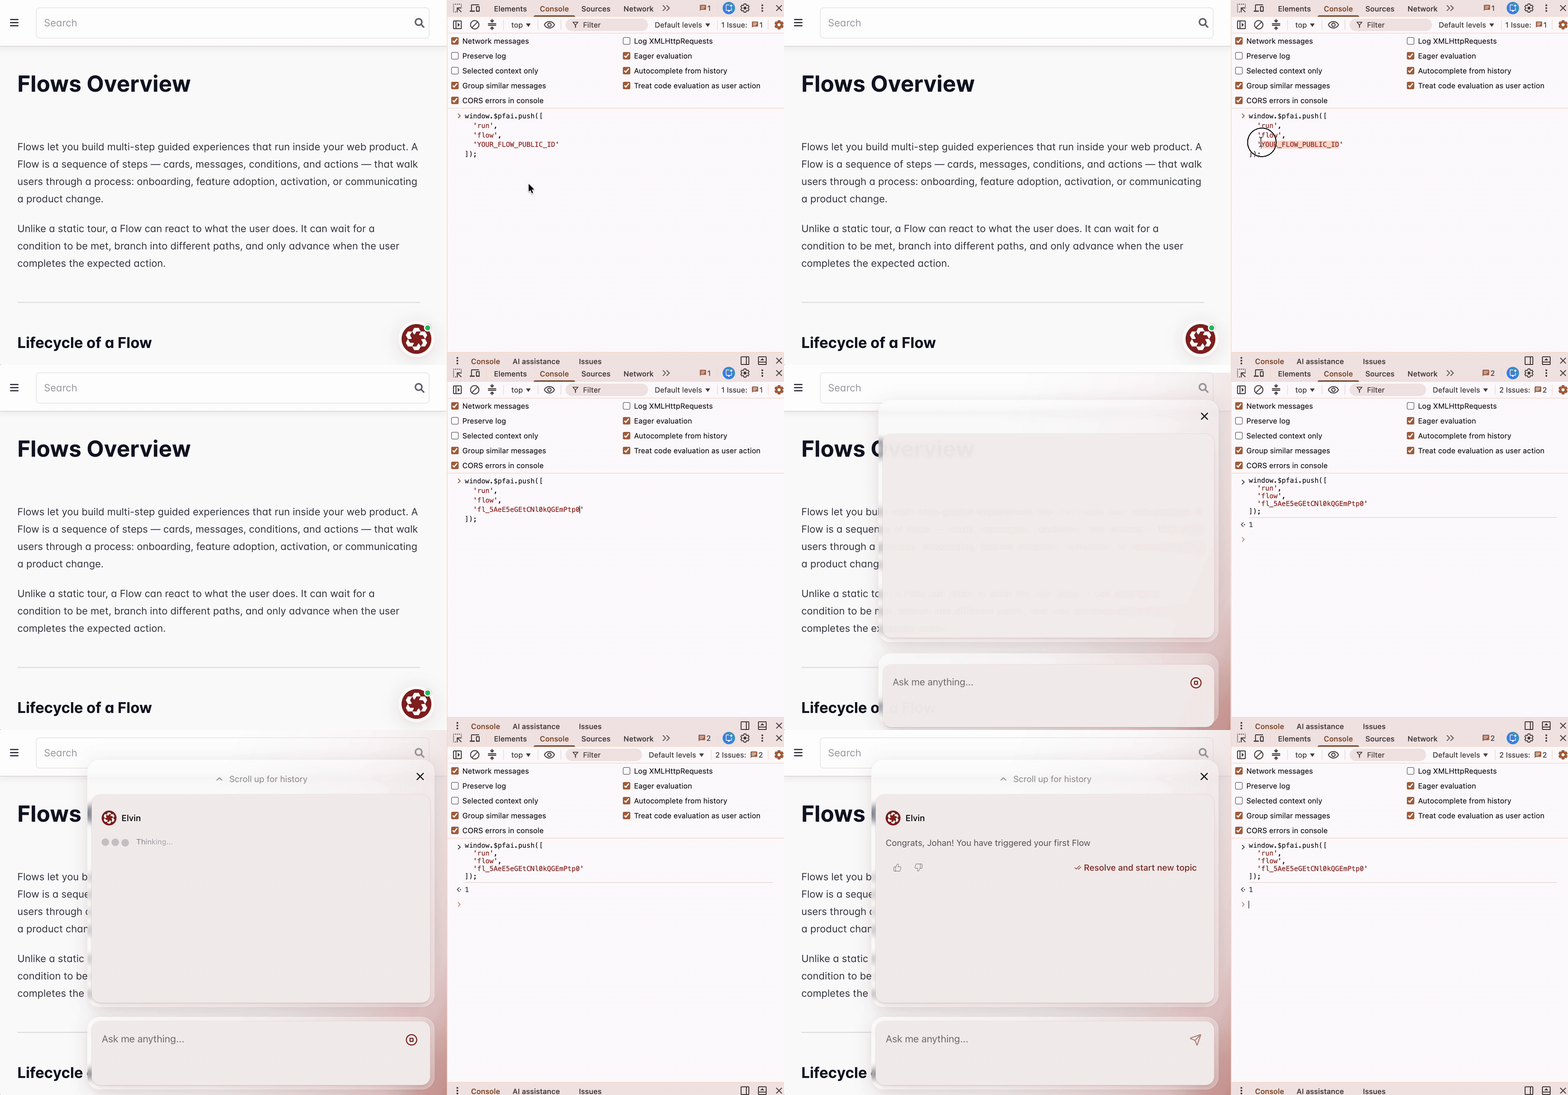
Replace YOUR_FLOW_PUBLIC_ID with the Public ID from the Flow’s Enter step:
window.$pfai.push([
  'run',
  'flow',
  'YOUR_FLOW_PUBLIC_ID'
]);
The user must meet the Flow’s normal eligibility and targeting conditions.
The examples below use the browser console for demonstration. The Flow’s first step triggers an Elvin chat with the instruction: “Congrat, {{user.firstname}}! You have triggered your first Flow.”
Start a Flow Regardless of Eligibility
Add the force option when the Flow should start even if the user would not normally be eligible:
window.$pfai.push([
  'run',
  'flow',
  'YOUR_FLOW_PUBLIC_ID',
  { force: true }
]);
Option | Type | Default | Description |
|---|---|---|---|
| Boolean |
| Immediately enrolls the user and bypasses normal eligibility and targeting checks. |
Use force: true carefully. It can restart the Flow for users who have already completed or seen it, depending on how your integration invokes the command.
For example, this can be useful when a Flow acts as an on-demand form that should open every time a user performs a specific action.
Start Multiple Flows
To request multiple Flows at once, pass their Public IDs to flow-batch:
window.$pfai.push([
  'run',
  'flow-batch',
  ['FLOW_PUBLIC_ID_1', 'FLOW_PUBLIC_ID_2']
]);
Product Fruits still controls when each Flow can appear and coordinates them with other content waiting to be displayed.
Start a Flow from a URL
You can also start a manually triggered Flow by adding pf_start_flow to a page URL:
https://yourapp.com/dashboard?pf_start_flow=YOUR_FLOW_PUBLIC_IDWhen the Product Fruits widget loads:
- The Flow is started with forced enrollment.
- Normal eligibility and targeting checks are bypassed.
- Product Fruits removes
pf_start_flowfrom the address bar. - The parameter also works with URL changes in single-page applications.
If the Public ID does not match a Flow available in the current configuration, Product Fruits writes a warning to the browser console.
Anyone with a URL containing this parameter can attempt to start the Flow. Avoid publishing such links unless forced enrollment is intentional.
Monitor Flow State Changes
getFlowState gives you back a number (or null if we don't have any state for that user/flow yet):
window.addEventListener('pf_flow_state_changed', () => {
  const state = window.productFruits.flows.getFlowState('YOUR_FLOW_PUBLIC_ID');
  console.log('current flow state:', state);
});
Flow State Values
0= not started1= in progress2= completed3= terminated / skipped / dismissed4= snoozed
Respond to a Specific Flow State
If you care about only one state:
window.addEventListener('pf_flow_state_changed', () => {
  const state = window.productFruits.flows.getFlowState(
    'YOUR_FLOW_PUBLIC_ID'
  );

  if (state === 2) {
    // The Flow was completed. Run your action here.
  }
});
Detect When a Flow Finishes
Listen for the pfFlowFinished browser event:
window.addEventListener('pfFlowFinished', (event) => {
  console.log('Flow:', event.detail.flowId);
  console.log('Enrollment:', event.detail.enrollmentId);
});
The event details include:
Property | Description |
|---|---|
| Identifies the completed Flow. |
| Identifies the user’s Flow enrollment. |
You can use this event to refresh your application, record an analytics event, or run another action after completion.
Troubleshoot Flows with the Debug Overlay
Product Fruits includes an on-page debugging overlay for developers and administrators.
Open it through the command queue:
window.$pfai.push([
  'config',
  'toggle-debugger',
  { force: true }
]);
You can also enable it directly:
window.productFruits.flows.debug(true);The overlay contains three sections:
- Overview — the current runtime and state snapshot.
- Flows — loaded Flows and their current states.
- Queue — content waiting to be displayed.
The panel can be dragged around the page. If it is collapsed, double-click its pill to expand it.
To disable the direct debug mode:
window.productFruits.flows.debug(false);The debug overlay is intended for troubleshooting. Do not enable it permanently for end users.